Configuring an Automatic Deployment Rule (ADR)
- The purpose of this lecture is to demonstrate how to automate the collection of new updates and deliver them to clients.** **
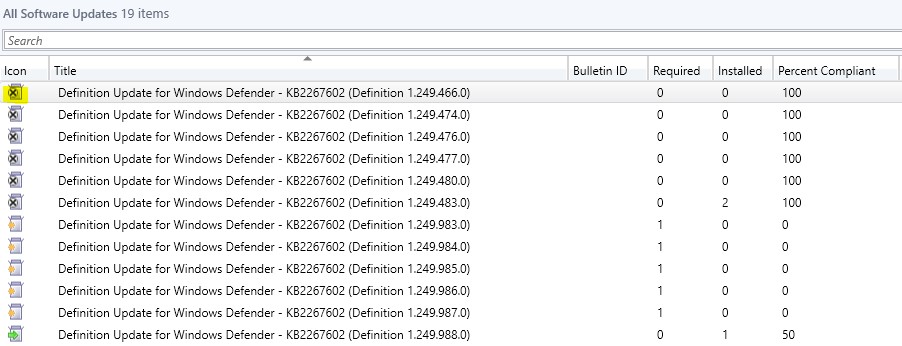
- From the workspace, if we click software library then in the navigation pane we click all software Updates. What we see here is a synchronization of windows defender updates from Microsoft online.** **
- Notice that some file definitions have an icon with an x.
What this means is that these x’s represent outdated definitions. So, what we will want to do is filter out the irrelevant definitions and create a current list of updates for windows defender that we will send out to our Endpoint Protection clients.
**To accomplish this, we need to configure a Search **
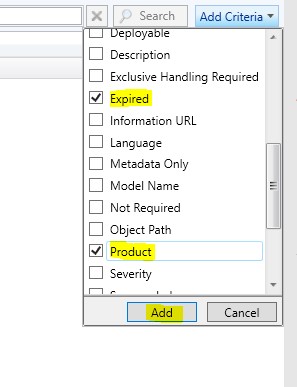
- From the search bar, click the Add criteria button, Scroll down and click expired, scroll down then check product , click add.
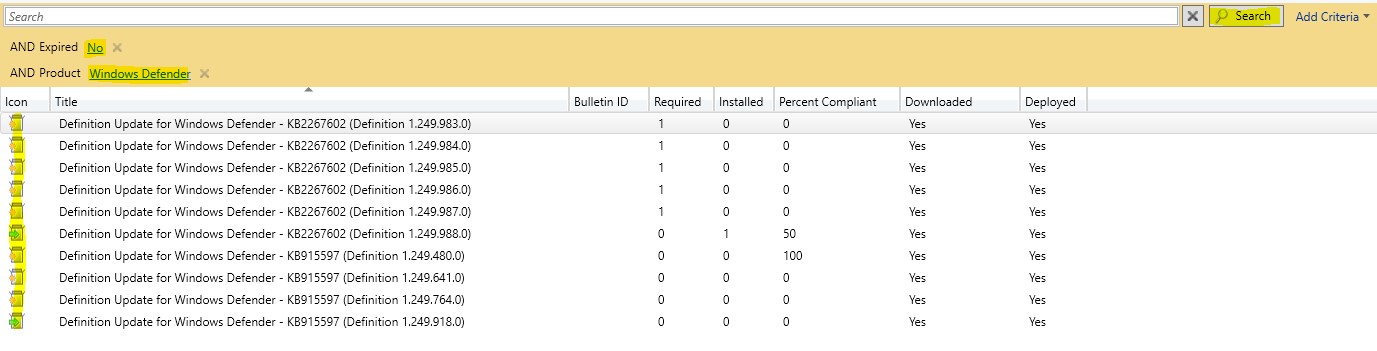
- On the left side, right under the search bar, by AND expired click Yes , then change this setting to NO
- To the right of And Product , click the underlined selection , Scroll down and click Widows Defender.
- From the search bar, click the search button, now you have a filtered list of unexpired windows 10 defender updates.
- So you might ask, **How does this work with the Automatic Deployment Rule? **
**Create a Software Update Group **
- What we are going to do is select all the updates, by pressing (Ctrl – a)
- Right-click and select create software update group.
This group represents like the name implies a group of updates. We will use this group with our automatic defender rule.
- **Name,*…
No comments yet. Add the first comment to start the discussion.