
The Anti-malware Policy Settings Overview

Full-Access Members Only
Sorry, this lesson is only available to Server Academy Full-Access members. Become a Full-Access member now and get instant access to this and many more premium courses. Click the button below and get instant access now.
Instructions
Q&A (0)
Notes (0)
Resources (0)
Saving Progress...
Resources
There are no resources for this lesson.
Notes can be saved and accessed anywhere in the course. They also double as bookmarks so you can quickly review important lesson material.
We need to understand the settings before we can build custom policies. With that in mind in we will present an overview of the various policy settings available to us in Endpoint Protection.
Open the SCCM console
- From the Workspace click Assets and Compliance, from the navigation pane click Endpoint Protection, then click Antimalware Policies. Displayed are two policies, the SCEP Standard Desktop custom policy and the Default Antimalware Policy.

From the List View, right-click on Default Client Antimalware Policy, then select properties.
We see the categories on the left and the options or settings for each category on the right.
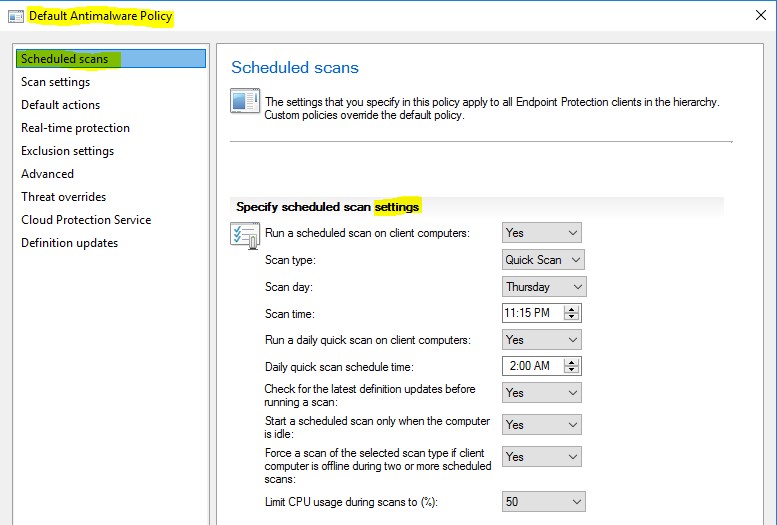
Scheduled Scans – These settings customize the schedule that you will utilize in your organization
- Run a scheduled scan – the choices are Yes or no
- Scan type – The choices are Quick Scan or Full Scan
- Scan day – Select Daily or select one of the days Sunday through Saturday • Set the Scan Time
- Check for the latest definition updates before running a scan
- You can Limit the amount of CPU utilization that should be used during the scan so that the system is still usable.
Scan Settings - These settings determine what will be scanned
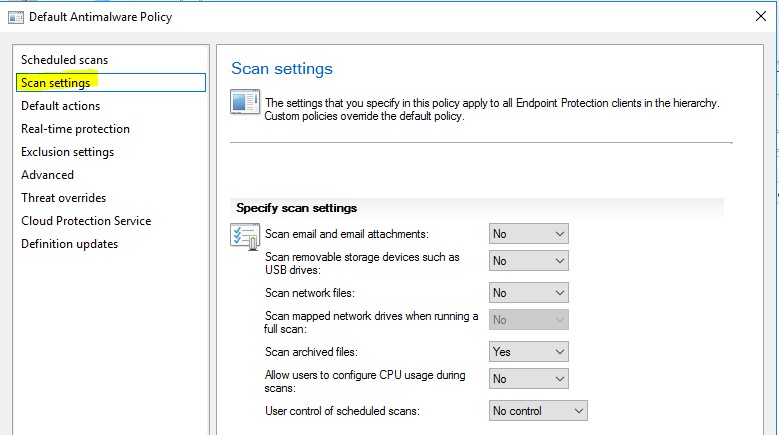
- Scan email and attachments
- Scan USB thumb drives
- Scan network files
- Scan mapped network drives
- Allow users to configure CPU usage during scans
- Allow users control of scheduled scans – Normally set to no control
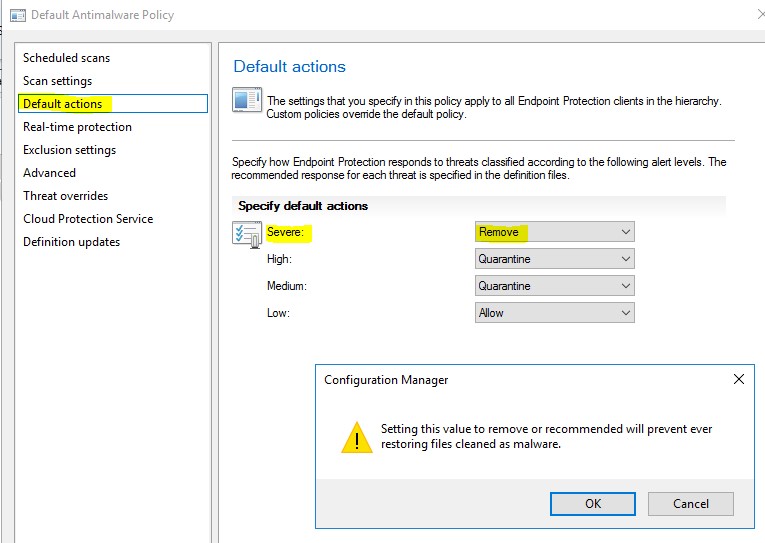
Default Actions - Specifies how Endpoint Protection responds based upon the rated severity Levels
- Severe – We can choose remove, which will remove the malware.
- High - We can choose remove, which will remove the malware.
- Medium and Low – We can choose Quarantine
Real Time Protection – These settings enable you to configure the continuous monitoring capabilities on an Endpoint Protected client.
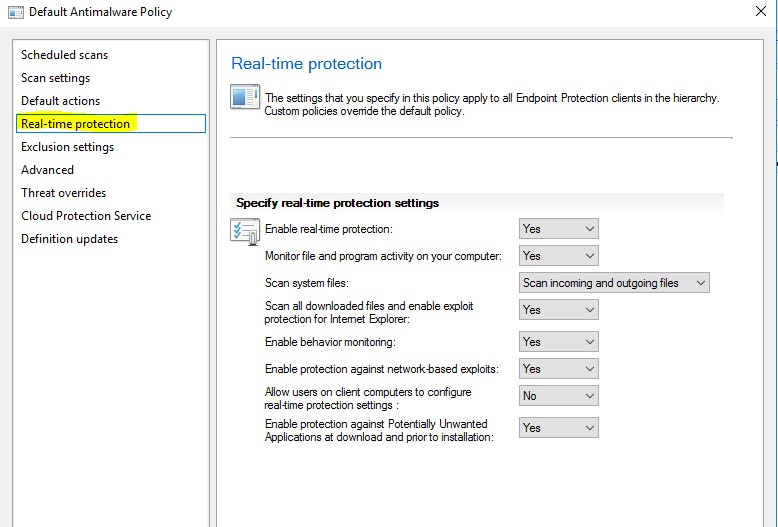
- Enable real-time protection – Set to Yes
- Scanning system files - Options are the scanning of incoming and outgoing files or incoming or outgoing files only
- Enable behavior monitoring – Not just relying on known malware, but we are looking for suspicious activity to set alarms.
- Enable protection against network-based exploits – Helps protect you against zero-day vulnerabilities.
Exclusion Settings - You can exclude files and folders because those files continually set off false alarms
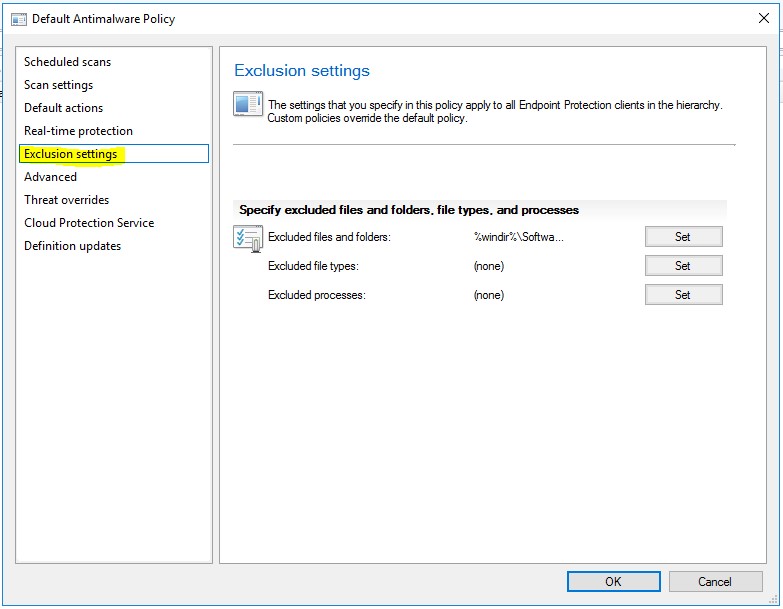
- Files, folders – Set the path to the files and folders
- Files types – You can set file types like.jpeg or .bat
- Excluded Processes – Here you can exclude processes like spoolsv.exe, which manages printing in the background without tying up your computer. You may not need to scan that process.
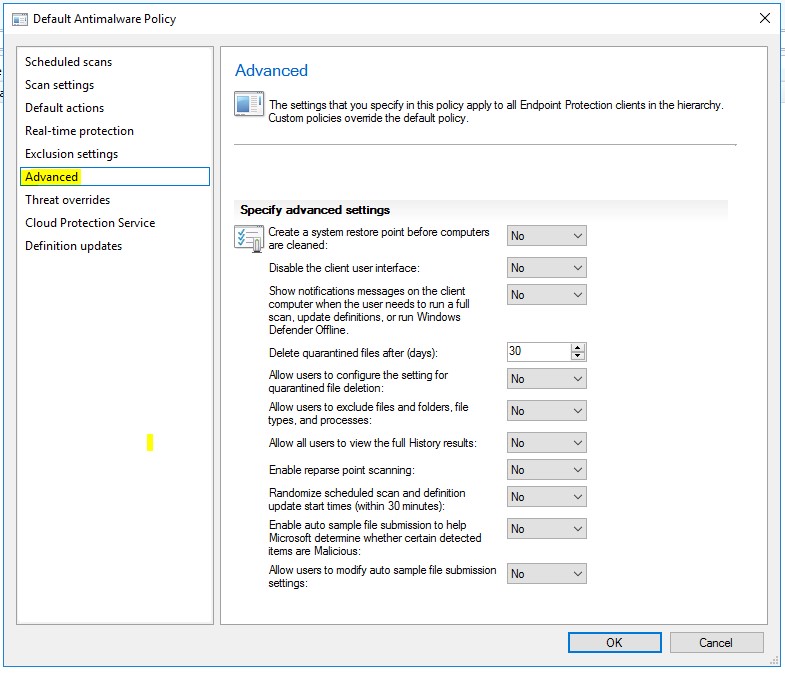
Advanced Settings – This contains things that you can allow the users to do.
- Most of these settings I normally set to no
- Delete quarantined files after (days) you can set this to whatever is appropriate.
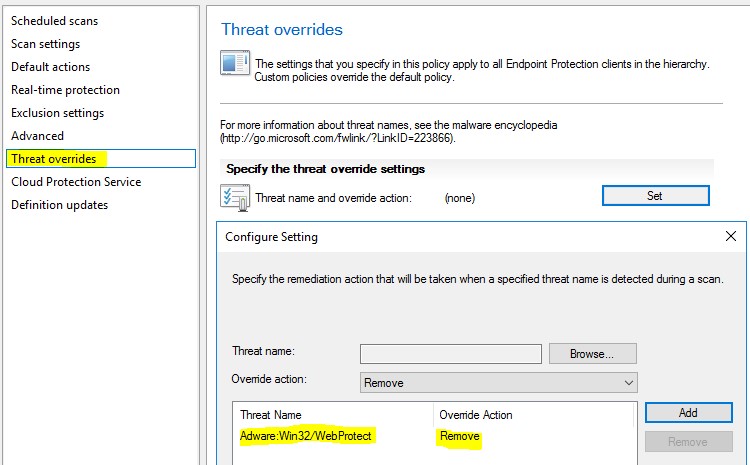
Threat Overrides - Here you can set a specific threat name like Adware:Win32/WebProtect, then select an Override action like allow, remove, quarantine
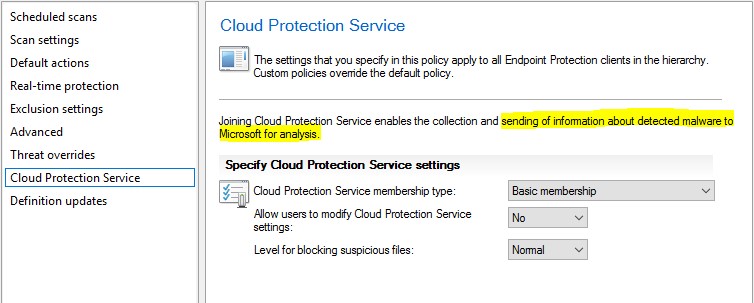
Cloud Protection Service – This setting enables the client to send information about detected malware to Microsoft for analysis.
Definition Updates – Determines how often EP clients should check updates for the endpoint protection engine, as well virus definitions
- You can setup an hourly time interval that the client will check for Endpoint Protection definitions.
- Check for EP definitions at a specified time

Set Source – You can set one or more settings in order, that will pull down updates depending upon what is checked. This is saying that the client will receive it’s updates from one or more of these locations in the order that you select.
- Updates distributed from Configuration Manager
- Updates distributed from WSUS
- Updates distributed from Microsoft Update
- Updates distributed from Microsoft Malware Protection Center
- Updates distributed from UNC shares
Server Academy Members Only
Sorry, this lesson is only available to Server Academy Full Access members. Become a Full-Access Member now and you’ll get instant access to all of our courses.


