
Install SQL Server 2017

Full-Access Members Only
Sorry, this lesson is only available to Server Academy Full-Access members. Become a Full-Access member now and get instant access to this and many more premium courses. Click the button below and get instant access now.
Instructions
Q&A (0)
Notes (0)
Resources (0)
Saving Progress...
Resources
There are no resources for this lesson.
Notes can be saved and accessed anywhere in the course. They also double as bookmarks so you can quickly review important lesson material.
In our lab we are going to install SQL Server 2017 Cumulative Update 2. Feel free to use an update newer than CU2, but that is the minimum you must install in order for it to be compatible with SCCM. Below is a table that you may reference for a list of supported versions of SCCM 1902 and SQL:
| SQL Server | Edition | Min Cumulative Update |
| SQL Server 2017 | Standard, Enterprise | CU2 |
| SQL Server 2016 SP1, SP2 | Standard, Enterprise | Not CU Required |
| SQL Server 2016 | Standard, Enterprise | Not CU Required |
| SQL Server 2014 SP1,SP2,SP3 | Standard, Enterprise | No CU Required |
You should have already downloaded the SQL Server 2017 executable, so at this point launch the installation file.
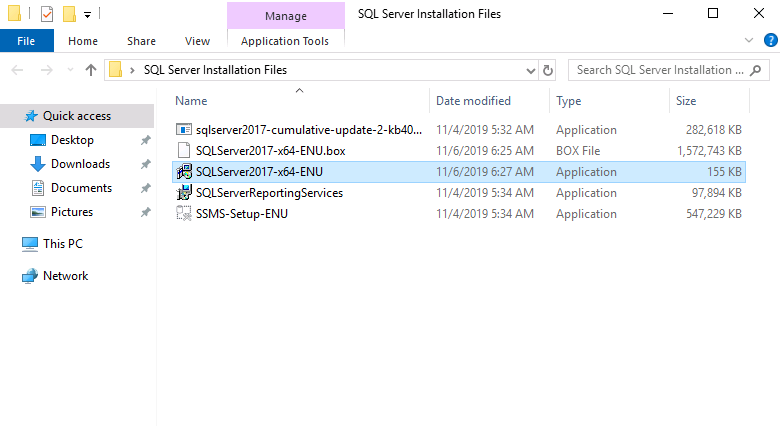
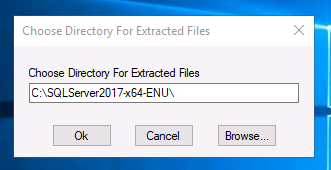
This will prompt us to extract the installation files. I am going to place them on the C:\ drive.
Also, keep in mind that we will need to immediately update to cumulative update 2, so you may begin that download now while you wait from https://catalog.update.microsoft.com (search SQL 2017 Cumulative Update 2) if you have not downloaded it already. Please keep in mind for lab users this is pre-downloaded to the lab VM.
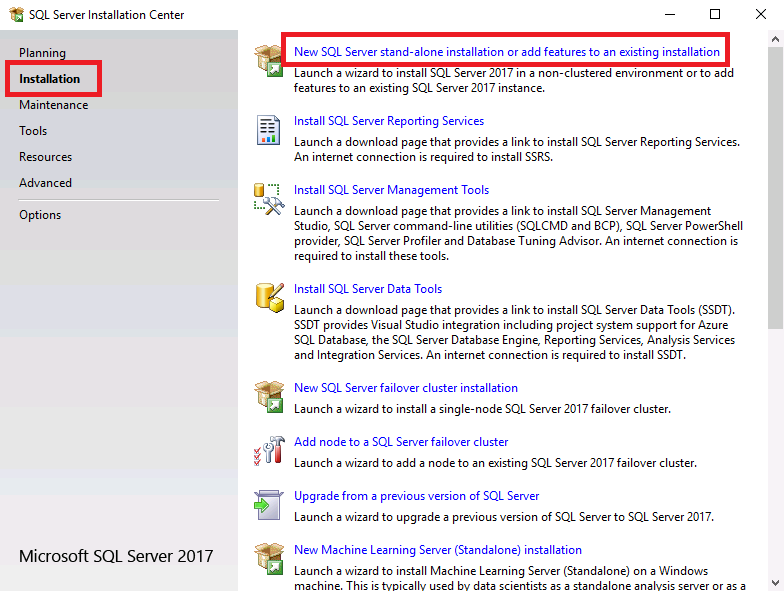
Once the SQL Server Installation Center opens, click New SQL Server stand-alone installation text:
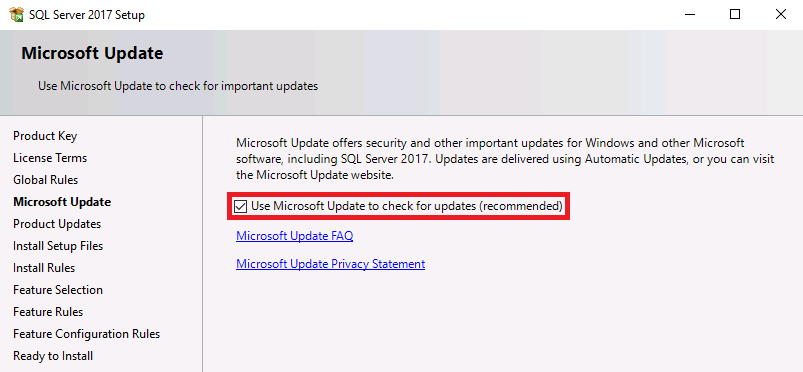
If you have a product key, you may enter it now or choose to use the free evaluation edition and click Next. Agree to the license terms and click Next again. On the Microsoft Update page, click the checkbox next to Use Microsoft Update to check for updates, and click Next:
There will be a prerequisite check completed and you may see a warning about the Windows Firewall, this is ok and is generated when you have the Windows Firewall enabled (as it should be).

Click Next. Check the Database Engine Services checkbox and If you are installing a version older than SQL Server 2017, select the Reporting Services - Native checkbox as shown below:

In version 2017+, SQL Server Reporting Services can only be installed through a separate installer file which we will install later on. For now, check the Database Engine Services checkbox and click the Download it from the web link to being the Reporting Services installer download.
Important: If you’re using the ServerAcademy.com lab, we have already downloaded the installer file and placed it on the SCCM server under C:\SCCM Install Files\SQL Server 2017\SQLServerReportingServices.exe
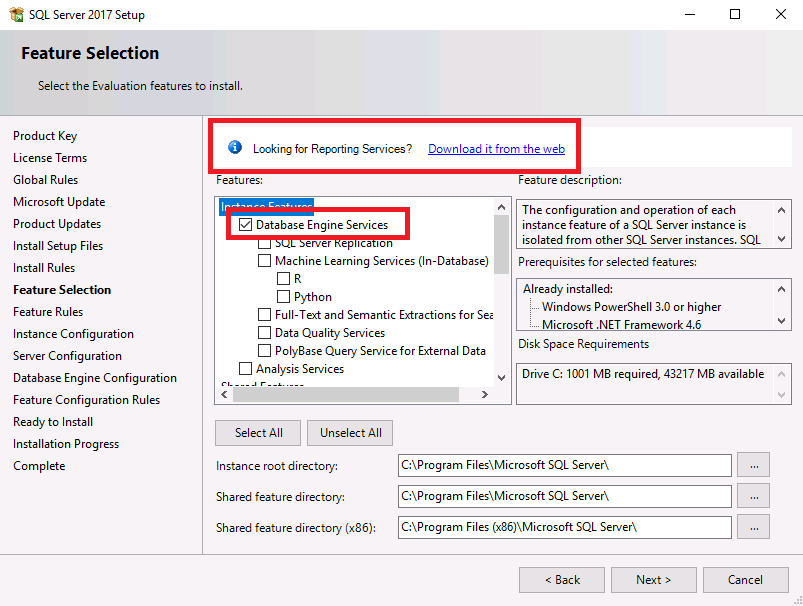
Alternatively you can download it from this URL: https://www.microsoft.com/en-us/download/details.aspx?id=55252
If you download it now you can skip downloading it after the SQL installation is complete. We will install the Reporting Services immediately following the SQL Server 2017 installation.
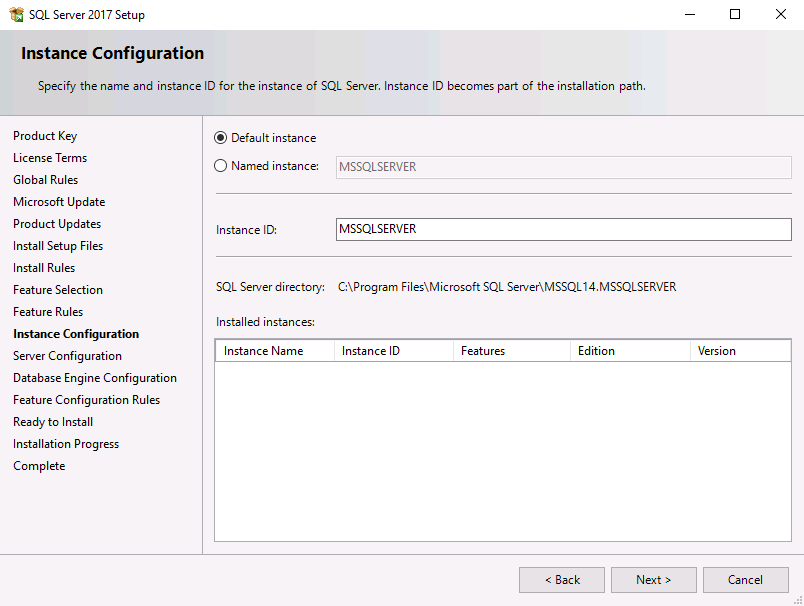
Click Next. You may change the instance name or ID if you’d like - but we will use the defaults and click Next:
Click the drop-box next to the account names and click Browse. Note that you MUST change the account for the SQL Server Agent away from the default NT Service account.
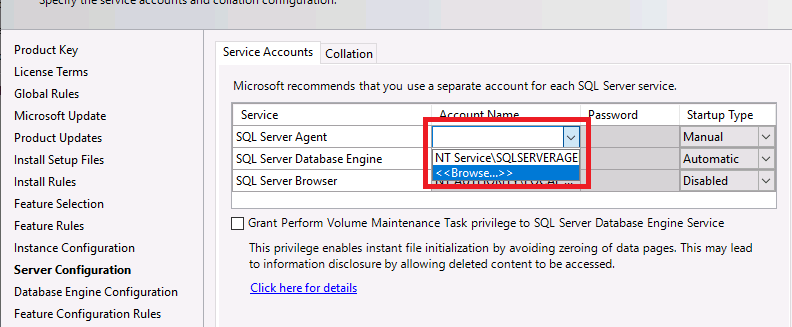
We are going to use the SQLService account we created earlier. Make sure you enter the passwords for the accounts.
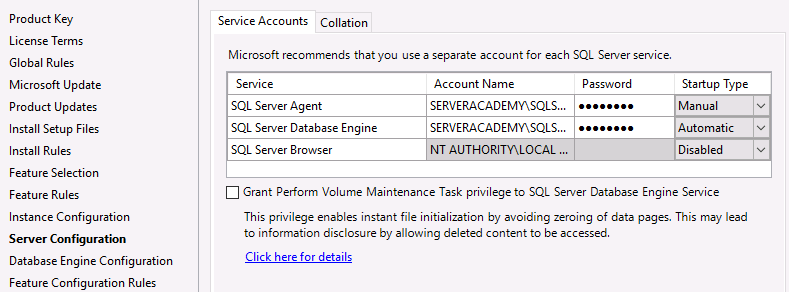
Next click the Collation tab and verify that your database engine is using the SQL_Latin1_General_CP1_CI_AS collation setting.
Note: The default server collation setting SQL_Latin1_General_CP1_CI_AS is based upon your Windows Server Locale Settings. Simply stated if you are from the United States and you have your Windows Server Locale set correctly (United States -English), when you install SQL server your Server Collation settings by default will reflect SQL_Latin1_General_CP1_CI_AS. If you are from a Non-US English or even UK-English speaking country please verify this setting.
Server Academy Members Only
Sorry, this lesson is only available to Server Academy Full Access members. Become a Full-Access Member now and you’ll get instant access to all of our courses.


Is the reporting service automatically configured when SCCM is installed, or does it require configuration? I don’t remember if I installed the reporting service on my sccm lab so after not being able to access the reports went back and reinstalled it and then configured it using the info on this site https://www.anoopcnair.com/sccm-migration-sql-server-sql-2017/ under section for configuring reporting service.
Hi Ambrose Garza
If you installed Reporting Services during the installation of the SQL Server instance, SSRS will be configured automatically for you. If you install SSRS later, then you will have to go back and configure it.
Ricardo
I wonder if Ambrose did the basic install. The files aren’t extracted for a custom install like this lecture explains. Should this be something explained in the lecture, or the files already extracted for the SQL install?
I did also have to add 10+ trusted sites to get to the point where it would download the Reporting Services