
Endpoint Protection Policy Overview
Instructions
Q&A (0)
Notes (0)
Resources (0)
Saving Progress...
Resources
There are no resources for this lesson.
Notes can be saved and accessed anywhere in the course. They also double as bookmarks so you can quickly review important lesson material.
- What is a policy?
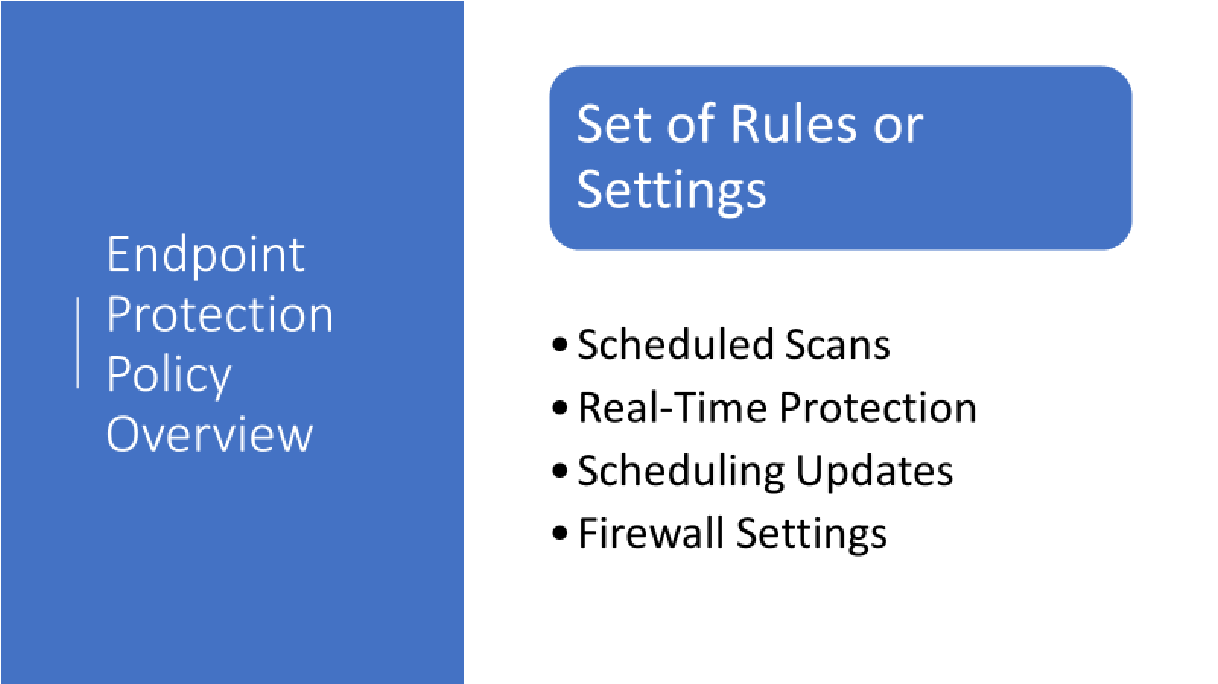
A policy is a set of rules or settings that are applied to potentially thousands of clients all at once.
- What settings are we talking about? For example, setting up scheduled scans, turning on and off real-time protection, scheduling updates, firewall settings among others.
- If you have thousands of computers to manage there is no way you would want to manage settings on all those computers individually, right? That is what policies are used for.
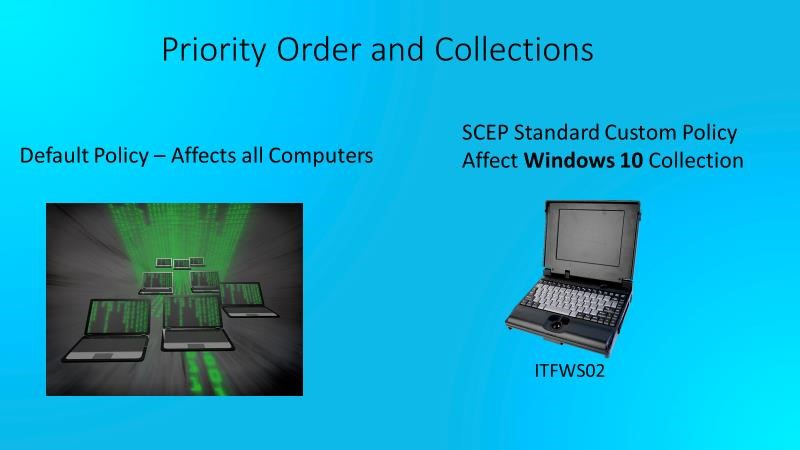
- In configuration manager Endpoint Protection, you can use the default antimalware policy to deploy these settings to every device in your organization or you can create a custom policy and deploy settings to individual device collections in your organization.
From the SCCM Console, Workspace, click Assets and Compliance, From the Navigation Pane click Endpoint Protection, then click Antimalware Policies. There are two policies, one is the Default Client Antimalware Policy and the other is a Custom policy called SCEP Standard Desktop Policy. In this overview, we will briefly describe both policies.
The Default Client Antimalware Policy (Open Console)

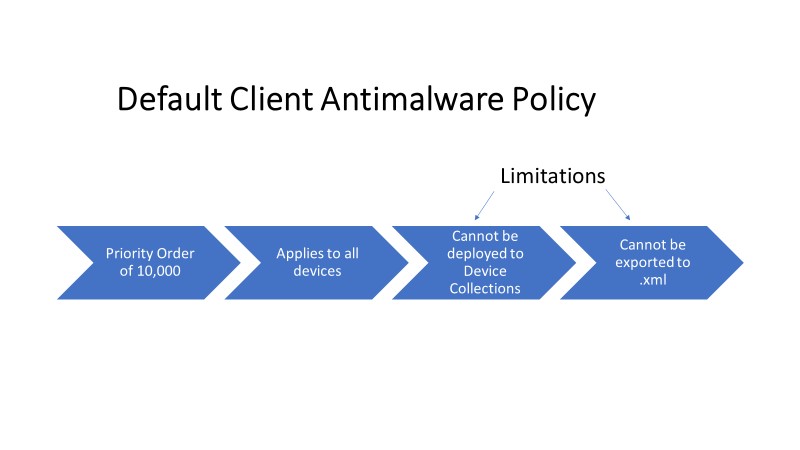
- Notice that the Default Client Antimalware Policy has a priority order value of 10,000 We will talk more about priority orders in a moment.
- Default policy settings apply to all devices in the hierarchy.
- The default policy can be modified and those modified policies are called custom policies.
Default Policy Limitations
- Cannot be deployed to a device collection, a device collection is groups of computers.
- The default policy cannot be exported to an .xml file.
Custom Policies
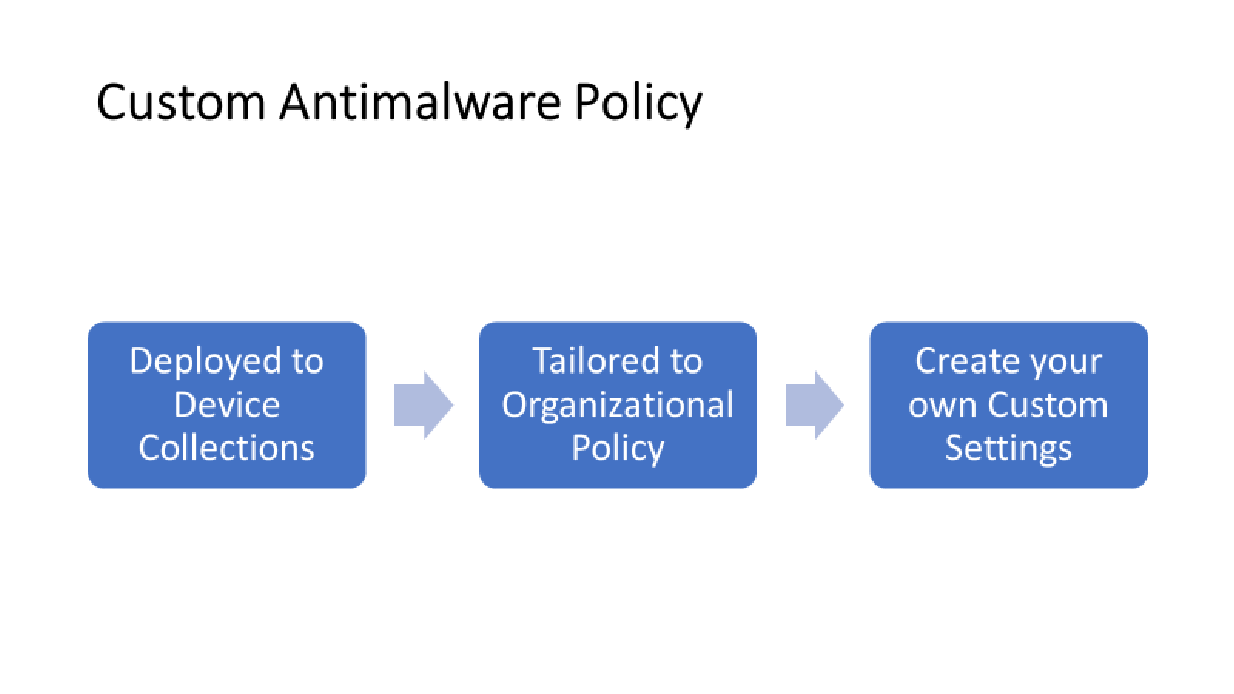
- Can be deployed to individual device collections, not user collections.
- Settings could be tailored to organizational policy (Government or Industrial)
You could have a government agency that requires a specific malware scan frequency or specific firewall settings. And you can create your own custom policy, which we will be covering in another lecture.
Let’s take a look at a custom policy.

- From the Console, we have a custom policy called SCEP Standard Desktop. At the bottom of the screen, we can click on
- Summary – Under Properties, this shows the Priority, which is 1, and it shows one deployment. This means that this policy has been deployed to a collection. From File Properties - this shows the date created and who created it.
- If we click Deployments, at the top it shows the two policies, and at the bottom Under SCEP Standard Desktop, the name of the collection Windows 10 is displayed.
If you recall a collection is a group of computers. What this means is that the SCEP Standard Desktop Custom Policy and all its settings will be deployed to the device collection called Windows 10.
- To verify what computers are part of the Windows 10 Collection. From the Navigation Pane click Device Collections, then double click the Windows 10 Collection. Here we see our Windows 10 computer ITFWS02.
How does this priority order work?
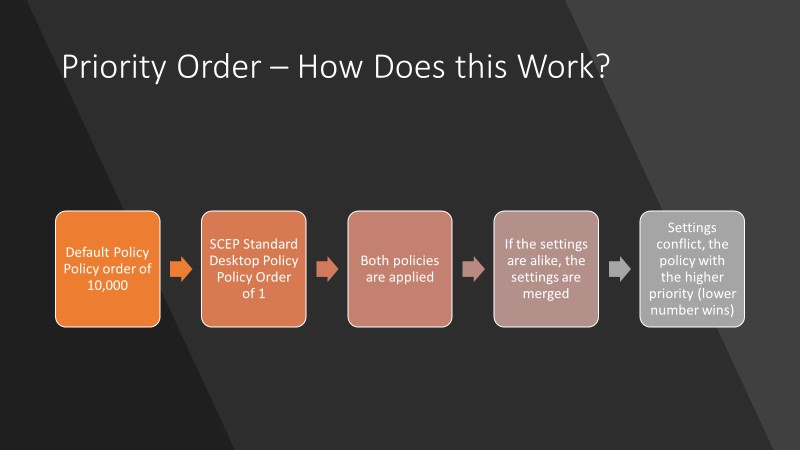
- The default Policy has a policy order of 10,000, the SCEP standard desktop custom policy has a policy order of 1. Both policies will be applied.
- if the settings are alike the settings will be merged.
- If the settings conflict, the policy called SCEP Standard Desktop will win, the lower the number the higher the priority.
But only for machines in the windows 10 collection that get the custom policy.

- Now go back to Antimalware policies, from the list view, click the SCEP policy, and from the Ribbon click Deploy.
- From Device Collections, click Windows 10, then ok.
So now ITFWS02 will receive the settings from the default policy and the settings from SCEP Standard Desktop policy. If the settings are alike they will be merged and if the settings conflict, the custom policy will take precedence over the default policy. Normally this policy would deploy, but as you can see I have already assigned this policy to the collection called windows 10.
Server Policy Templates
- There are several server policy templates that come preconfigured for Endpoint Protection.
- They are located in this case C:\Program Files (x86)\Microsoft Configuration Manager\AdminConsole\XmlStorage\EPTemplates
- To import these policies into Endpoint Protection, from the Ribbon click Import, then click one of the templates. We have already selected the SCEP_Standard_Desktop Policy.
Exporting a Policy
Why would you want to export a policy?
- You may want to backup your policy settings.
- You may want to use the policy in another environment, so it saves time.
Windows Firewall Policies
- What is a firewall? A firewall is a software program or a piece of hardware that helps screen out hackers, viruses, and worms that try to reach your computer over the internet.
- From the Navigation Pane click Windows Firewall Policies.
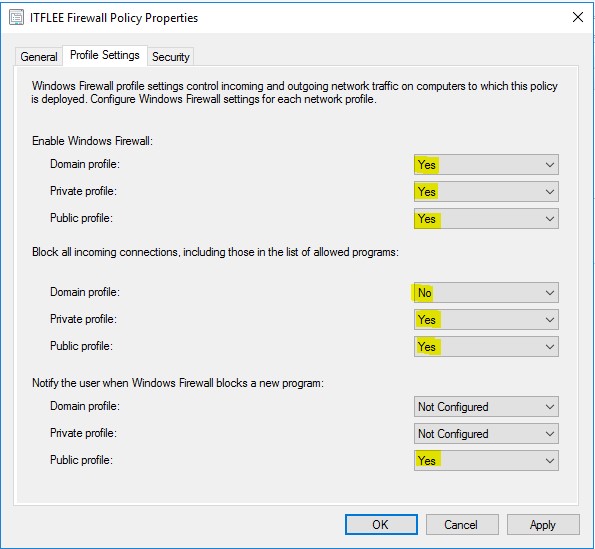
Here we see the ITFLEE Firewall Policy, if we right click on the policy, then click properties, we have three tabs, General, Profile Settings, and Security.
- On the General Tab, you have the name, date, and who created the policy.
- Click the Profile Settings tab – There are three network profiles Domain, Private and Public
Windows uses Network profiles to determine how the host based firewall behaves.
From the profile settings tab, we can enable the firewall for the Domain profile, the private profile and the public profile. There are three settings that we can choose, Yes, No, or Not Configured. But what does Domain, Private and Public mean?
- Domain – The Domain Policy is in effect when the computer is connected to an Active Directory Domain controller. Like being at work on your domain joined computer.
- Private - On private networks, like your network at home, you can enable network discovery features allowing for easy file sharing and printing. Windows will also use the Homegroup feature to share files and media between your PCs.
- Public Networks like those in a coffee shop, you don’t want your computer to be seen by others or share files with them.
To configure these policies the choices are yes, no or not configured, Yes and no are easy to understand, but what does not configured mean?
- Not Configured – There are other ways that the Windows firewall can be configured, for example, a Group Policy object. So that is why we have the setting “Not Configured” We are saying that this network profile will be configured by another mechanism like Group Policy.
Incoming Connections – This can be configured for each of our three different network profiles. Again, we can choose yes, no, or not configured.
- Domain – We may want To allow our network Admin access to our machine
- Private - Do we want to block all incoming connections when we are at home on a private network?
- Public – Do we want to block all incoming connections when we are sitting in a coffee house on a public network? Most of the time we would set this to yes.
Common Use
- Domain – Allow inbound RDP (Remote Desktop Protocol) from our Administrators IP. If this is your remote control solution.
- Private – Block all inbound traffic
- Public - Block all inbound traffic
We might want to Block all inbound traffic on a Private as well as a Public network. This means that we can still send traffic out and get the responses back but any inbound traffic originating from outside of our machine would be blocked.
Notifications – Again we have the option of using notifications on our three profiles if we want to be notified when Windows Firewall blocks an application, or if the firewall blocks incoming traffic.
The Firewall policy priority order works just like our Antimalware policies.
- Deployed to device collections
- Multiple policies
- The priority value determines to order of precedence.
What you may have noticed is missing here, is that we don’t configure all the inbound and outbound rules, for that we would use:
- Group Policy Windows Firewall settings to centrally manage Active Directory joined machines.
- You can still centrally manage some of the settings from within Endpoint Protection It all depends upon the needs of your organization.
Windows Advanced Threat Protection (ATP)
- Windows ATP is designed to work with Windows 10. The idea behind ATP is that Windows 10 devices collect data and send it up to the cloud in Microsoft Azure and this data is then analyzed by Microsoft.
- The purpose of ATP is to detect Zero-Day Attacks. Which exploits vulnerabilities that are not known by the Vendor of the software that is being attacked.
- ATP can look for certain actions across a multitude of machines, not just one. Those certain actions could be network activity that is trying to penetrate the network or software attempting to locate valuable company proprietary data.
- Requires a subscription to the Windows Defender Advanced Threat Protection online service. There is an evaluation subscription available.
- If you would like additional information on exactly how you can sign up for a trial account to test ATP out yourself, please see the documentation that came with this lecture called Windows Defender Advanced Threat Protection.pdf
Role Based Administration
There is one more thing that I want to show you before we complete this lecture.
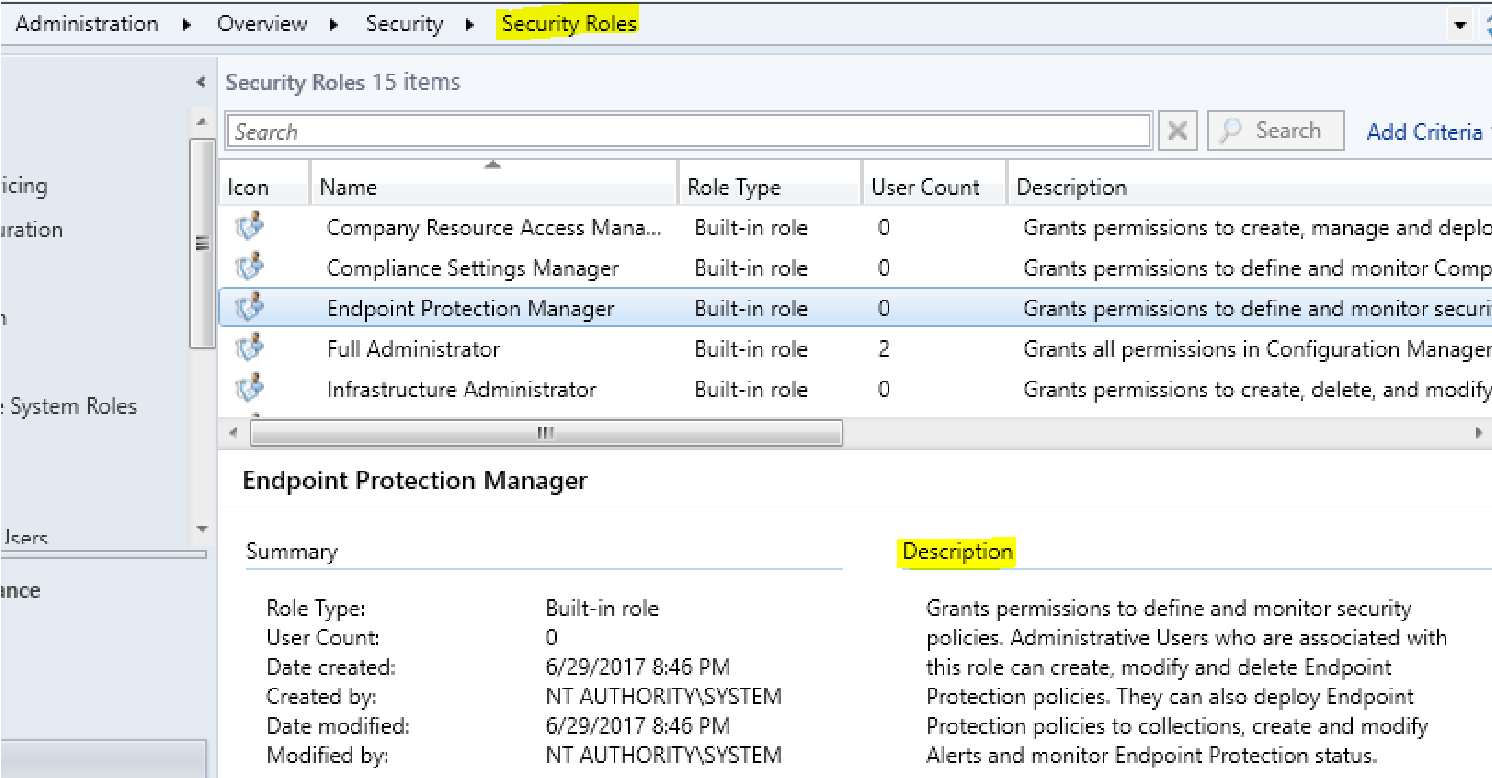
Configuration manager allow us to designate administrators to various roles from within the Configuration Manager. This is called Role Based Administration.
- Let’s say that you would like to assign one of your administrators an additional task of creating, editing, and deploying the roles and security policies within Endpoint Protection.
- This can be accomplished, from the Workspace, click Administration, from the Navigation Pane click Security Roles, in the ListView Endpoint Protection Manager is displayed, check out the description.
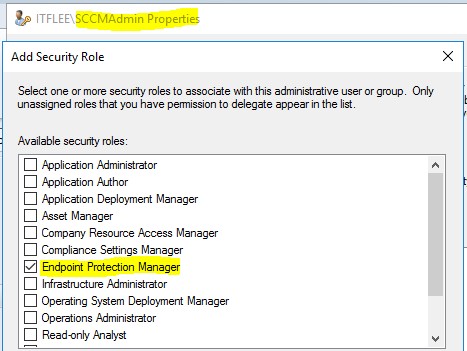
- Now from Administrative users, right-click on one of your administrators, click properties, then click security roles, click add, then check Endpoint Protection Manager, click ok, then ok again.
Congratulation you have completed this lecture, thanks for watching and we will see you in the next lecture.


If someone is already a Full Administrator, is it necessary to add them to the Endpoint Protection Management Admin security role?
Hi Matthew Stricker
If they are already a Full Administrator there is no need to add them to the Endpoint Protection Management Admin security role since they will have the necessary permissions.
Ricardo