Installing System Center Configuration Manager

Full-Access Members Only
Sorry, this lesson is only available to Server Academy Full-Access members. Become a Full-Access member now and get instant access to this and many more premium courses. Click the button below and get instant access now.
Instructions
Q&A (0)
Notes (0)
Resources (0)

Saving Progress...
Resources
There are no resources for this lesson.
Notes can be saved and accessed anywhere in the course. They also double as bookmarks so you can quickly review important lesson material.
To install SCCM, we want to be sure we are logged in to the SCCM server as a domain administrator user account.
Do NOT attempt this installation by using the local admin account (SASCCM01\Administrator).
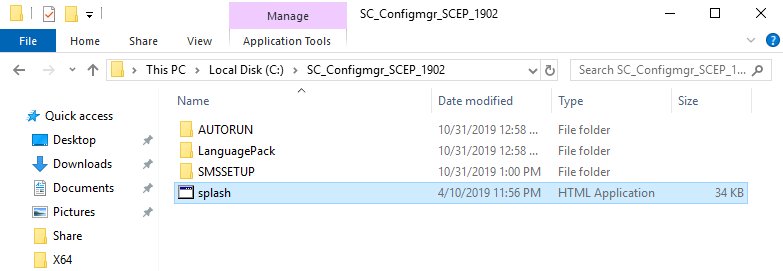
We previously ran SC_Configmgr_SCEP_1902.exe and extracted the installation files to the C drive. Open that folder and run splash.hta to begin the install:
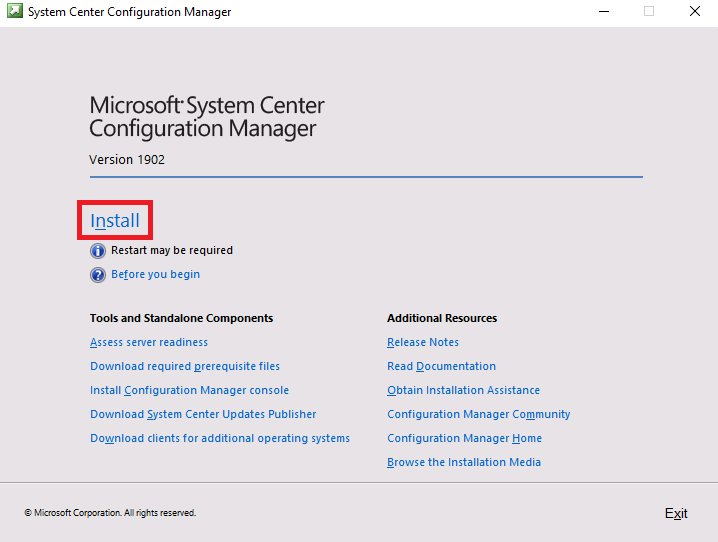
Click the Install button to get started with the installation”
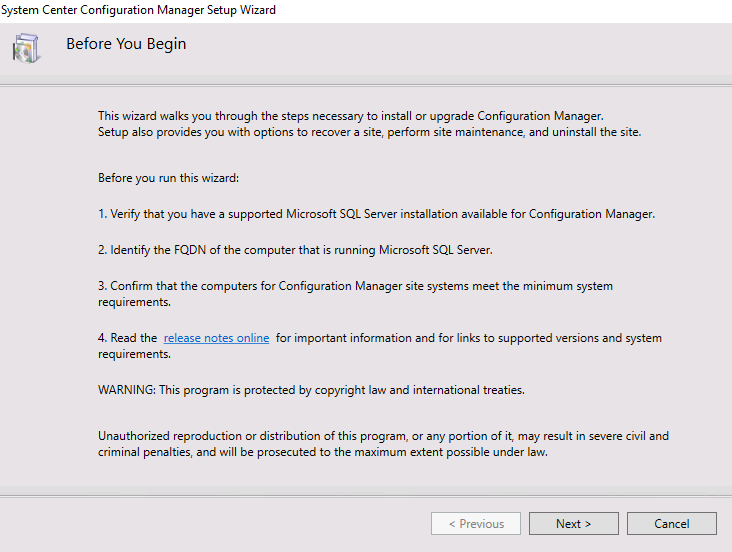
Here we are going to have a few notes about tasks we should have completed before we attempt to install SCCM. Click Next:
On the next screen, we need to select one of the available setup options. Check the checkbox next to Use typical installation options for the stand-alone primary site. Click Yes at the popup.
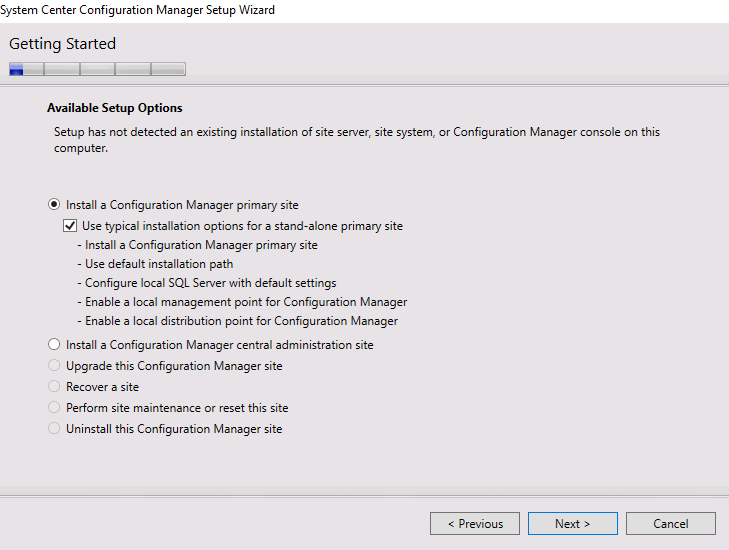
A Configuration Manager central administration site (CAS) and all the other options are only appropriate when we have other SCCM servers created - which we currently do not. Click Next to proceed to the next page.
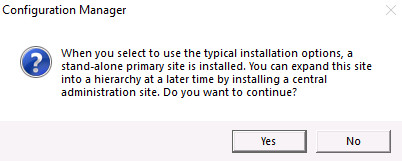
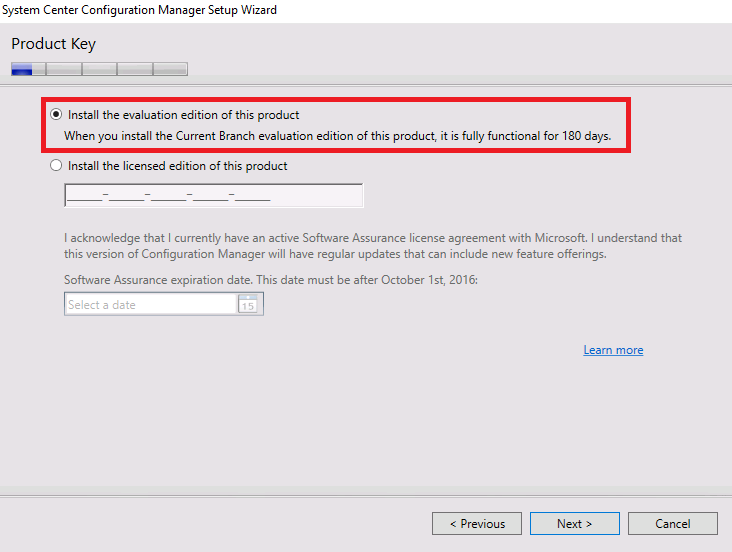
You will see a popup like this when you click Next, simply click Yes to confirm your choice. Now you may enter your license key or chose to install the evaluation edition and click Next.
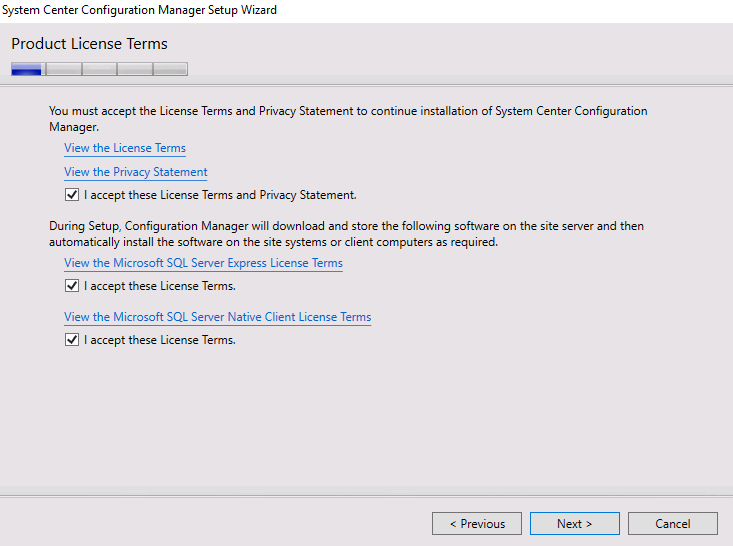
Accept the license terms and click next:
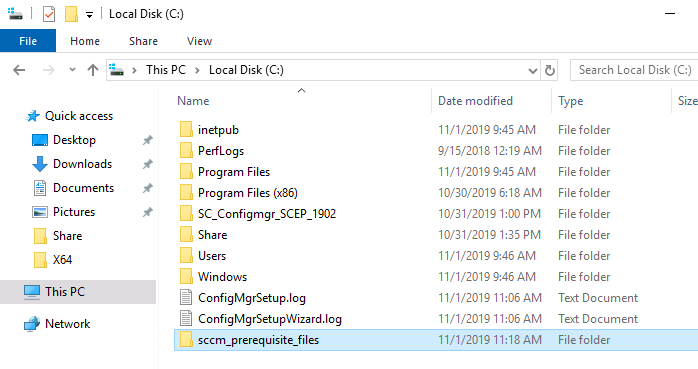
Now specify a download path for the SCCM prerequisite files. I am using “C:\sccm_prerequisite_files”.
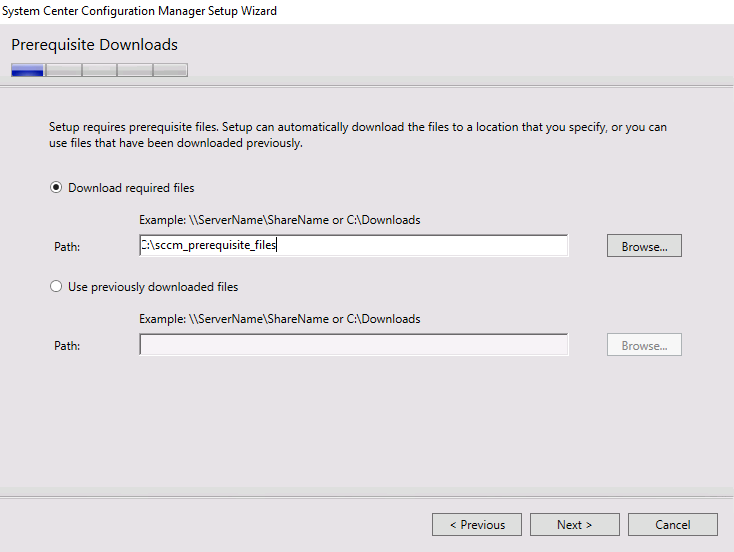
Note: if you’re using the ServerAcademy IT labs, we have pre-downloaded the files to the c:\SCCM Install Files folder:
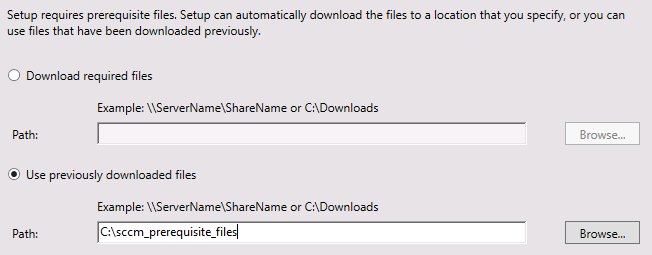
Keep in mind that you need to create the folder if it does not exist just yet so go ahead and do that now. Click Next.
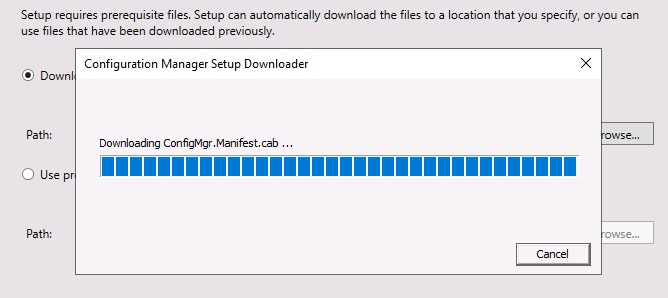
The download will now begin and we need to wait for it to complete:
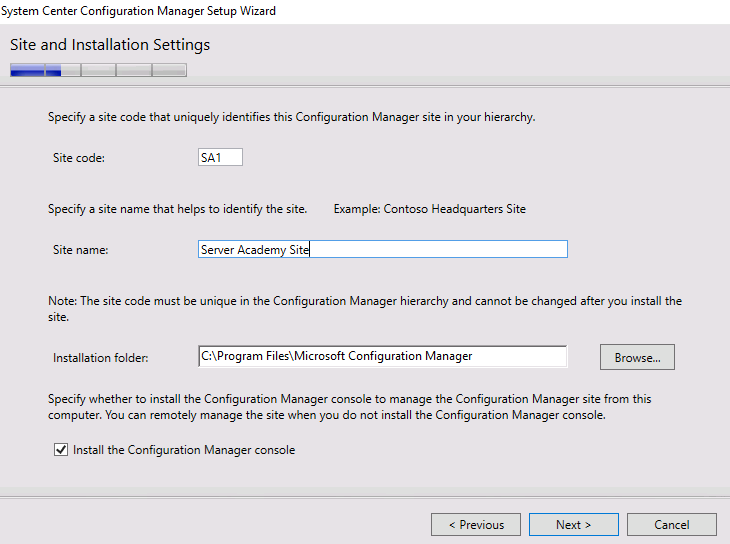
Once the download is complete you need to define some site information. I am going to use “SA1” as the site code and site name of “Server Academy Site” and click Next.
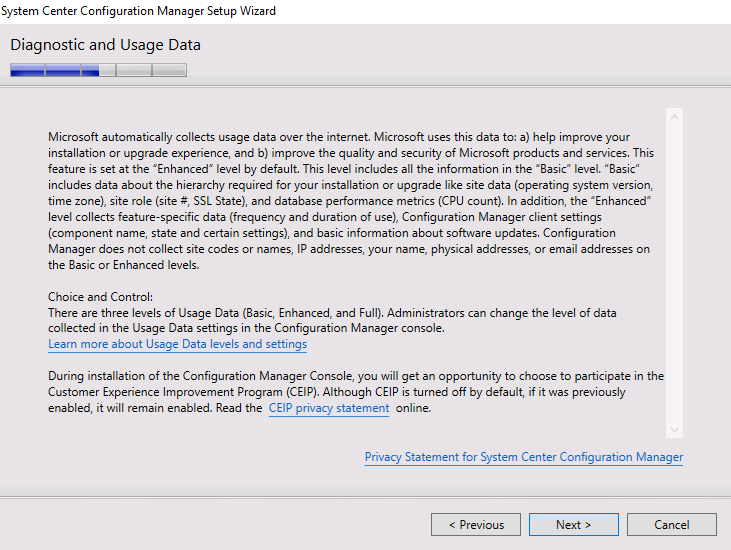
Click next again through the Diagnostic and Usage Data window:
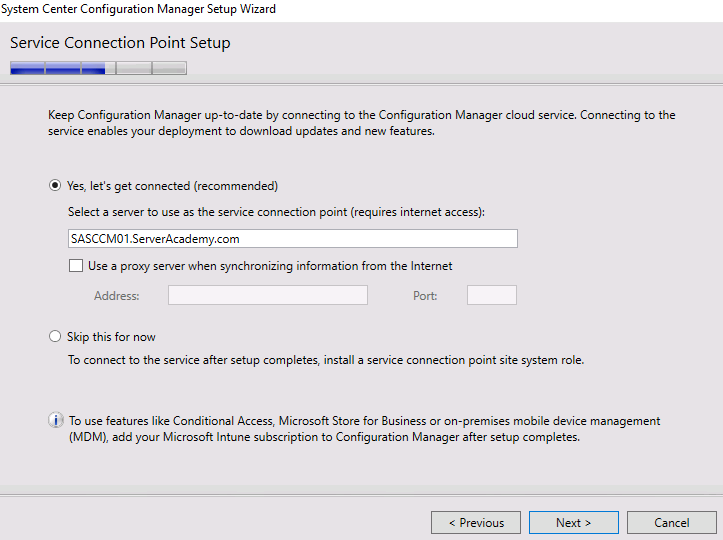
Leave these settings at default and click Next:
Click Next again:
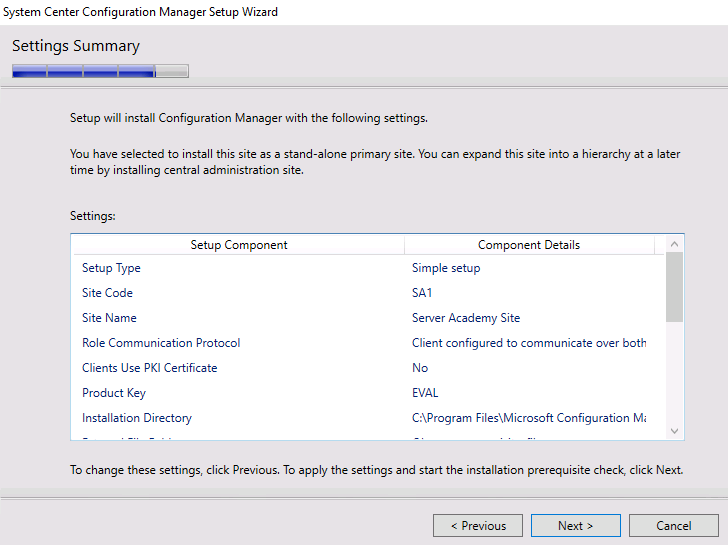
Now the setup is going to run through a prerequisite check before completing the install.
NOTE: I am getting these errors:
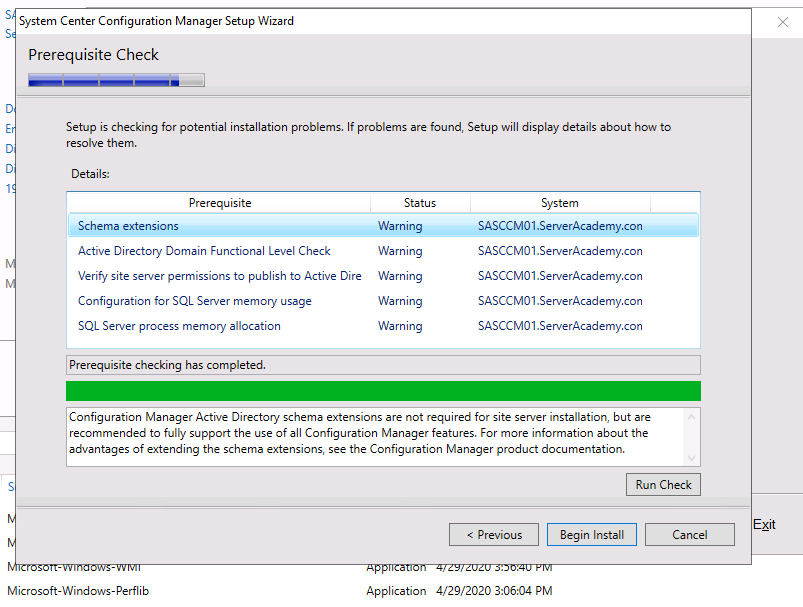
If you get a failed message about the SQL Server TCP Port, this is an easy problem to fix.
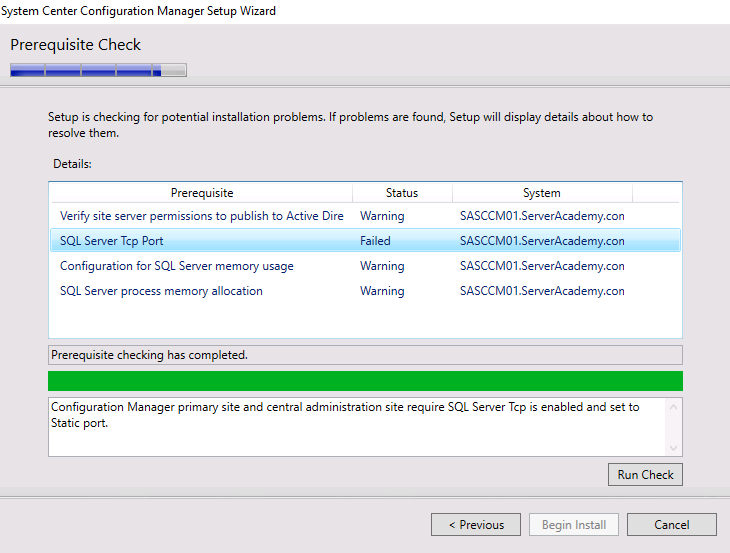
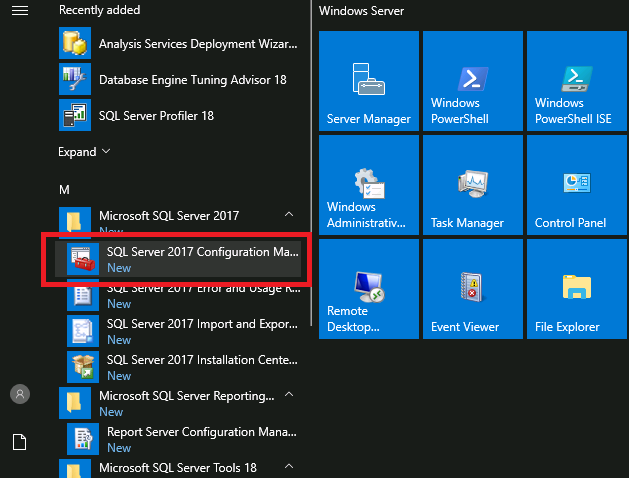
To fix this, launch the SQL Server 2017 Configuration Manager:
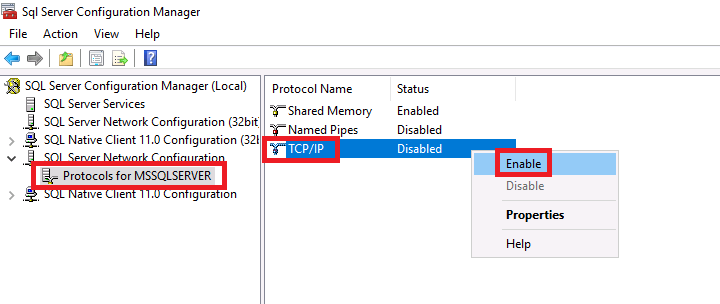
Navigate to SQL Server Network Configuration > Protocols for MSSQLSERVER. Right-click TCP/IP and select Enable.
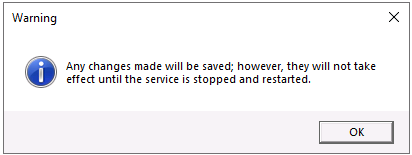
You will receive a message stating that you ned to restart the service before it will take effect.
Navigate to SQL Server Services and right-click SQL Server (MSSQLSERVER) and select Restart.

Go back to the SCCM installation and click Run Check and the error will be gone:

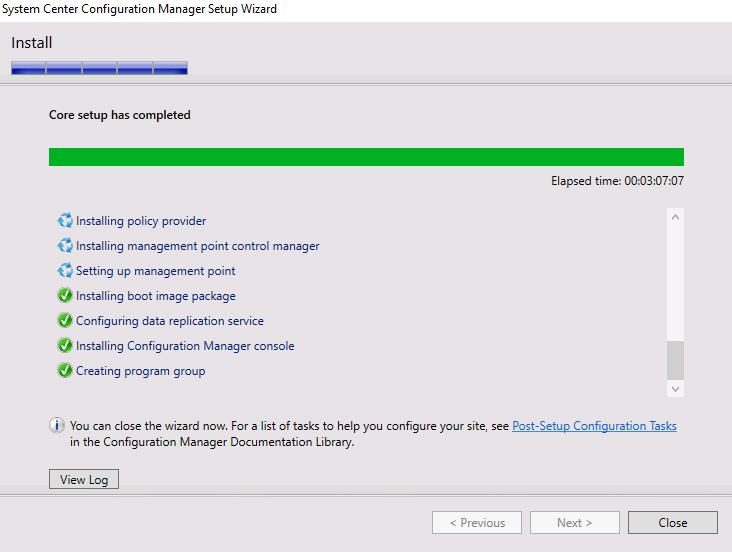
Next click Begin Install. Once the installation launches it is just a waiting game. You’ll notice that in the image below it shows 3 hours in the elapsed time - don’t worry - that was just because I paused the IT lab after starting the install so it appears to have been running longer than it actually did.
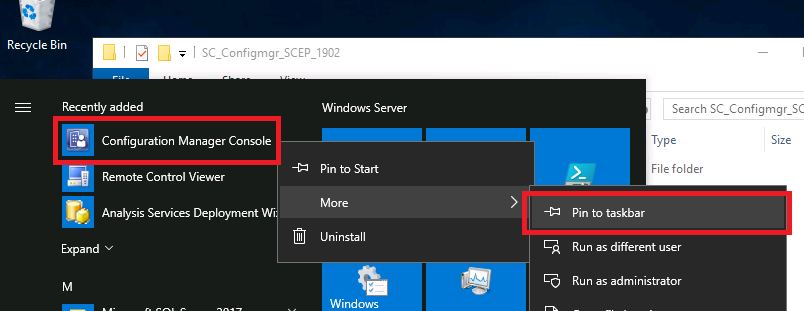
Click the Windows button and right-click the Configuration Manager Console, then pin it to the taskbar.
Now I am going to delete all of the installation files that I no longer need and we are done with this lesson.

Server Academy Members Only
Sorry, this lesson is only available to Server Academy Full Access members. Become a Full-Access Member now and you’ll get instant access to all of our courses.


Paul,
Trying to install SCCM in my own lab and I can not download the prerequisite files. They are not in the zip file you supplied in the earlier lesson. I have tried to download but I get a error message. Can you help to get these files???
Thanks
Jim
Hi James Estrella
Is that for SCCM version 1902 the one you are installing?
Yes. The files are not in the zip file that was supplied
Try downloading the zip file from this temp link.
https://drive.google.com/file/d/1x9Eepp7nhejpNVeWf0I2AmTgoUzCVBWR/view
Later we will be adding it to the rest of the resources with a permanent link.
Hi James Estrella
I am checking again with you to make sure the link provided for the prerequisite files was the one you were looking for.
Thank you,
Ricardo
Yes. Thanks so much.
When I try to do this lab, I do not not have the folder to that has the softwares to install SCCM and the pre-requisite files. Please help with this issue.
Please disregard the last comment. I saw the folder on the desktop of the SASCCM01 computer.