
Configuring our SAWS01 Workstation

Full-Access Members Only
Sorry, this lesson is only available to Server Academy Full-Access members. Become a Full-Access member now and get instant access to this and many more premium courses. Click the button below and get instant access now.
Instructions
Q&A (0)
Notes (0)
Resources (0)
Saving Progress...
Resources
There are no resources for this lesson.
Notes can be saved and accessed anywhere in the course. They also double as bookmarks so you can quickly review important lesson material.
In this lecture, we will be configuring our SAWS01 Windows 10 workstation. We are going to do this by renaming the computer and joining it to our domain.
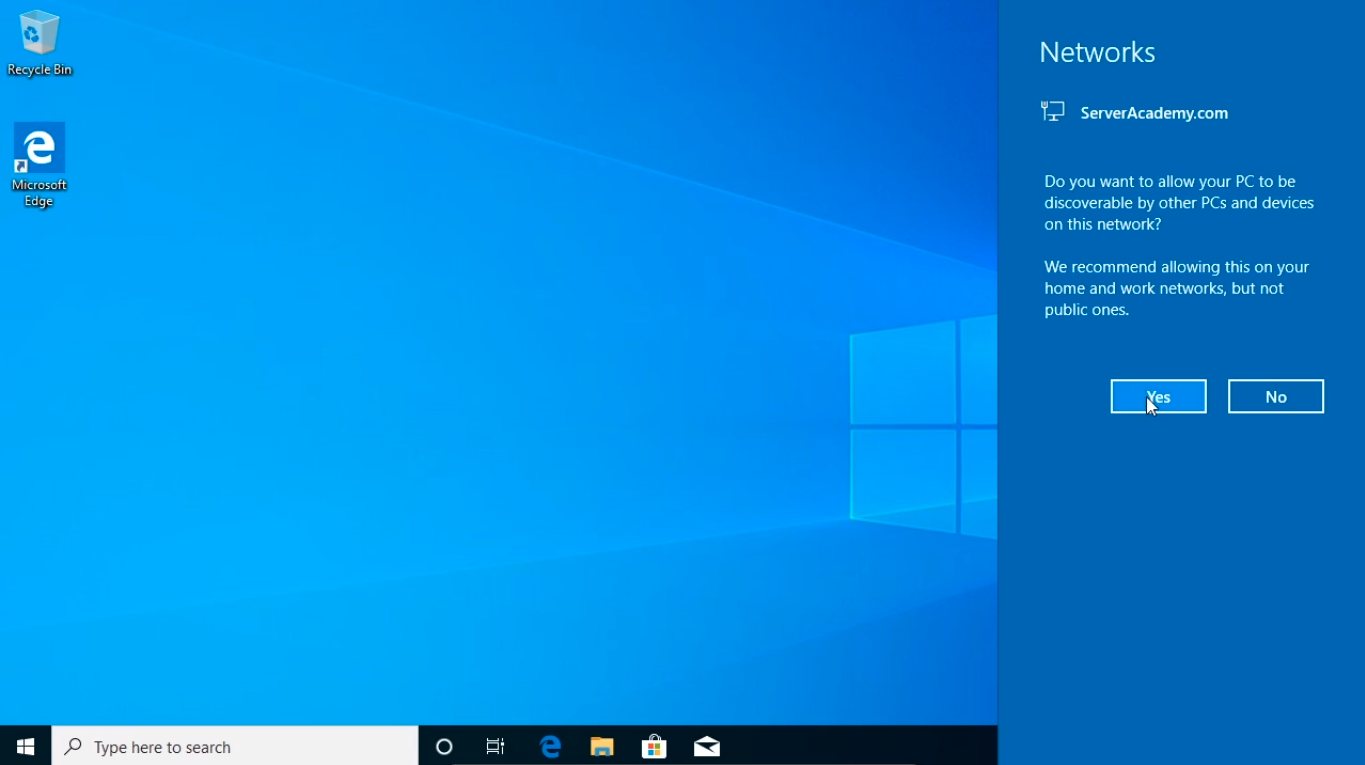
I just logged into the computer and I have a popup window that asks me if I want to be discoverable by other PCs I’ll just click Yes.
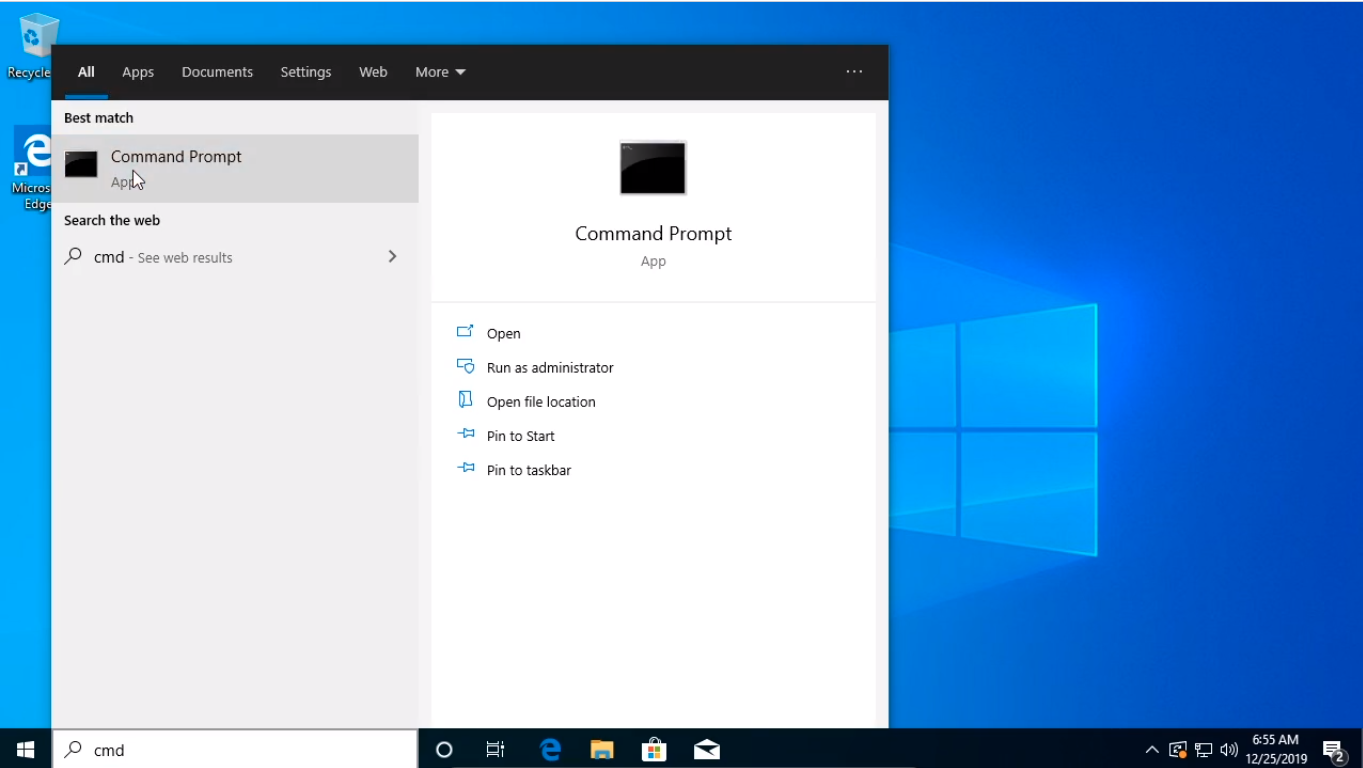
I am going to click the Start button and just check out the IP configuration that this computer has. So I’ll type in cmd. It should be receiving an IP Address from our DHCP server which is SADC01.
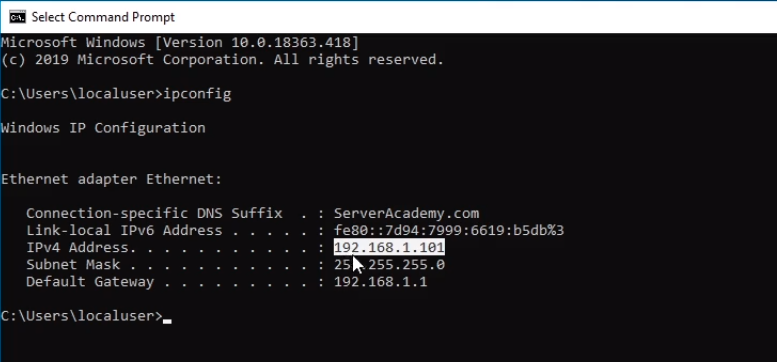
Let’s just type in ipconfig and press Enter to make sure it has the correct IP information.
We have an IPv6 address which we don’t really need and we can turn that off if we would like.
Here we can see we have an IP Address of 192.168.1.101 which fall within the DHCP scope of .100 to .200 that we have configured earlier.
We have the Default Gateway, and it looks like we are connected to the Internet.
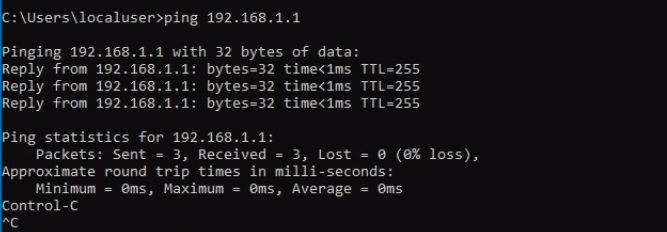
But we can just test this by pinging the Default Gateway, and it looks like that’s working.
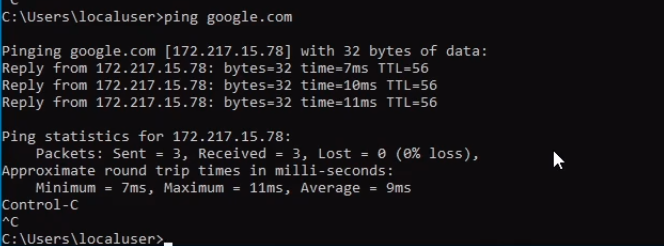
And we can ping google.com. Again that is working
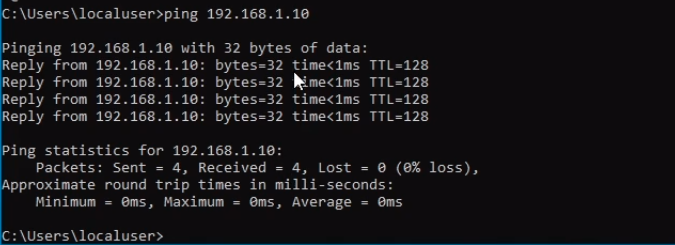
One last thing we can try is to ping the Domain Controller which may or may not work depending on your firewall settings, but if you remember it was 192.168.1.10 so if we press Enter I am able to see I am getting a reply.
Now if you don’t get a reply that doesn’t necessarily mean your connection is broken, it could be a firewall setting, there could be a lot of reasons why this might not work. You might have ICMP replies turned off so if it doesn’t work it is not the biggest deal in the whole world. If you can join the domain then you don’t have anything to worry about.
So what we are going to do is exit. You can either click the X button or type the word exit and press Enter.
And, we are going to go ahead and rename the computer. Click the Start button and we click Settings.
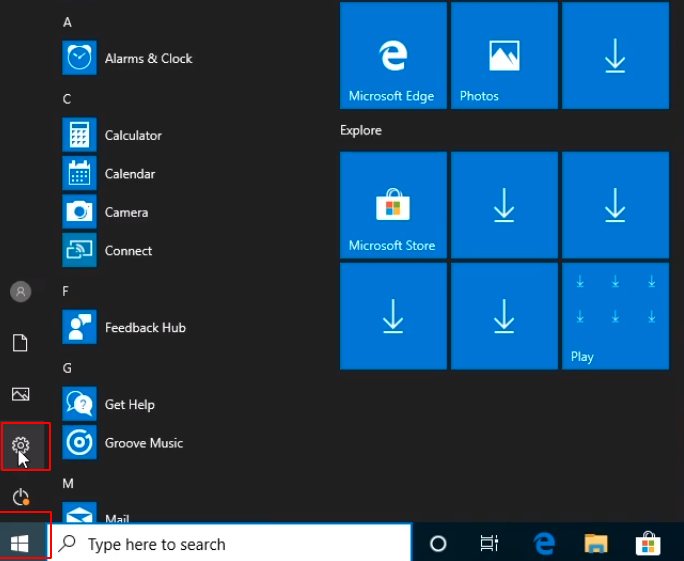
Let’s click on System.
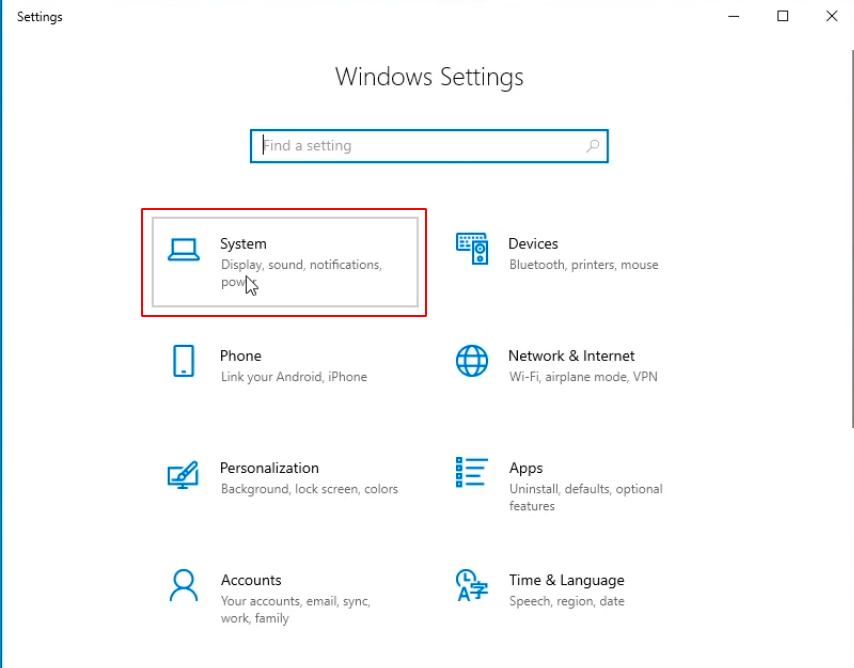
Click About from the left option and click the Rename this PC button.
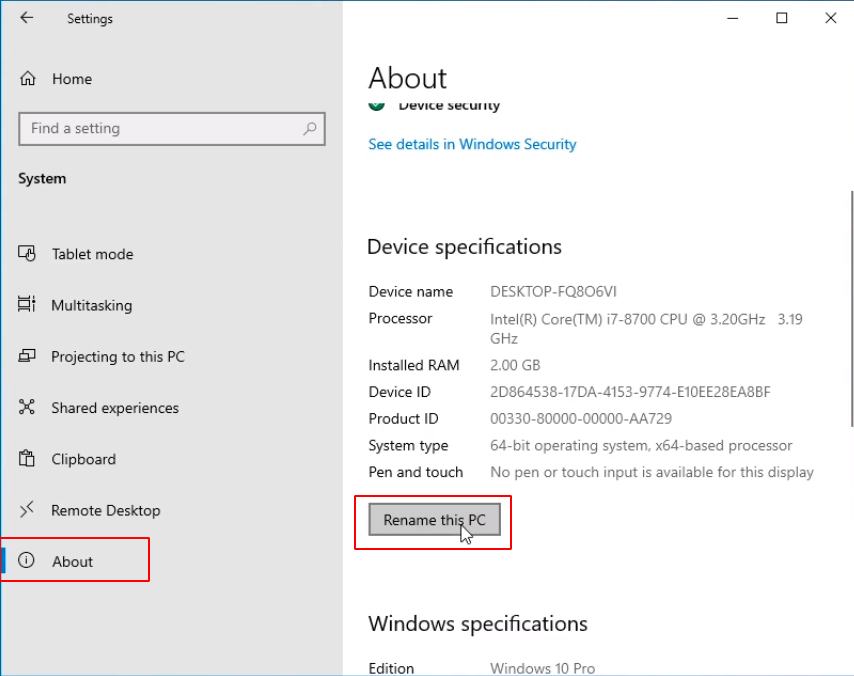
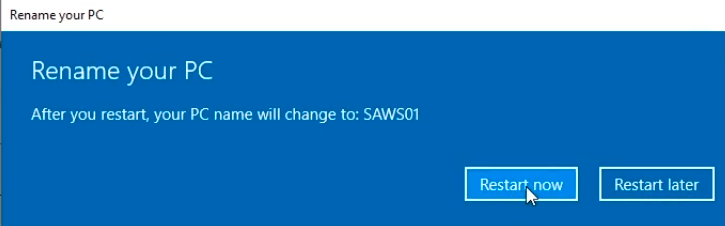
We can see the current name and we can change it by typing SAWS01 and clicking Next.

And this will require a reboot. We are going to click click Restart Now.
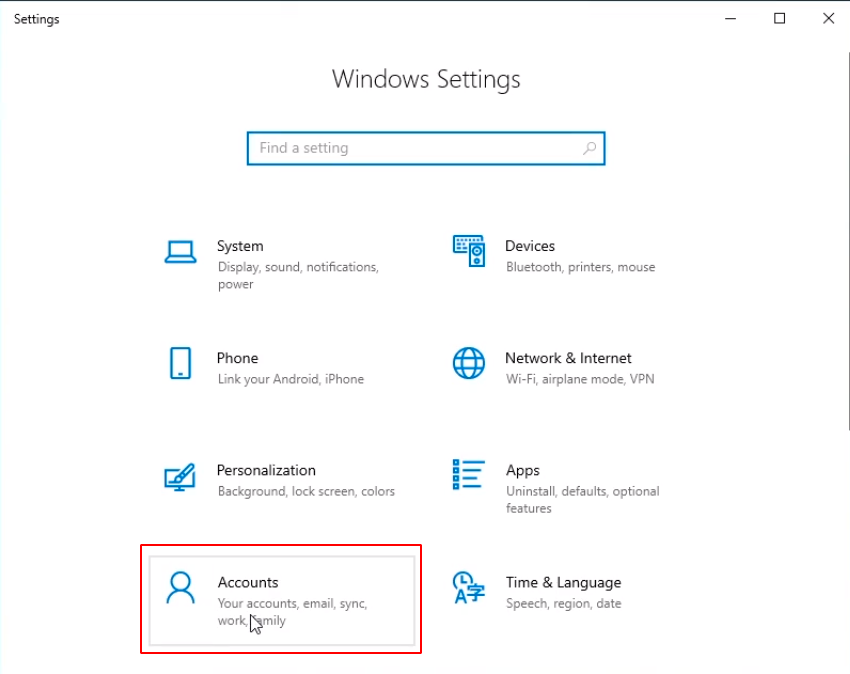
What I am going to do now is click on the Start button and click Settings once more.
Next, we are going to go to Accounts, and we are going to join this computer to the domain.
We are going to click Access work or school and click on the Connect button.
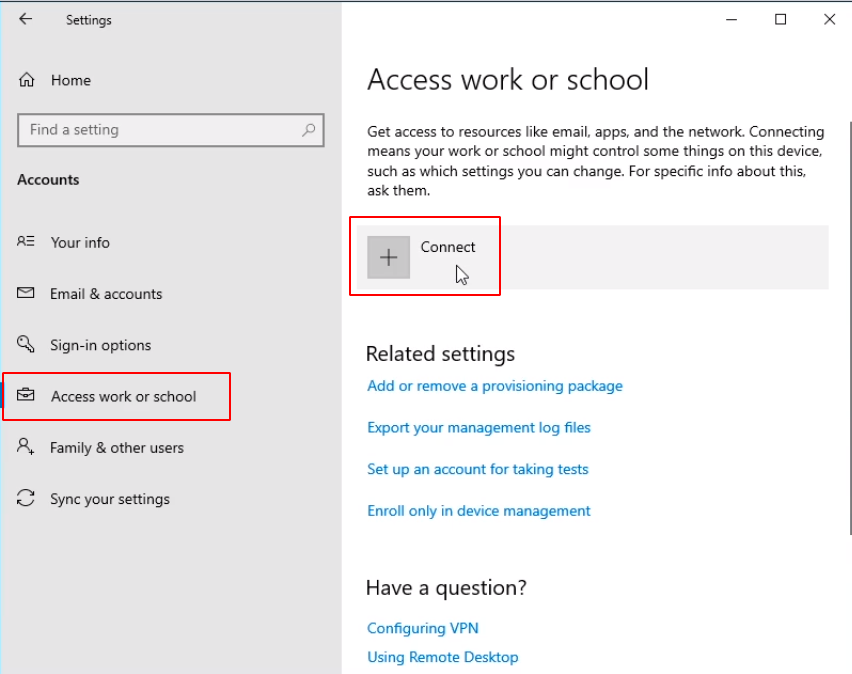
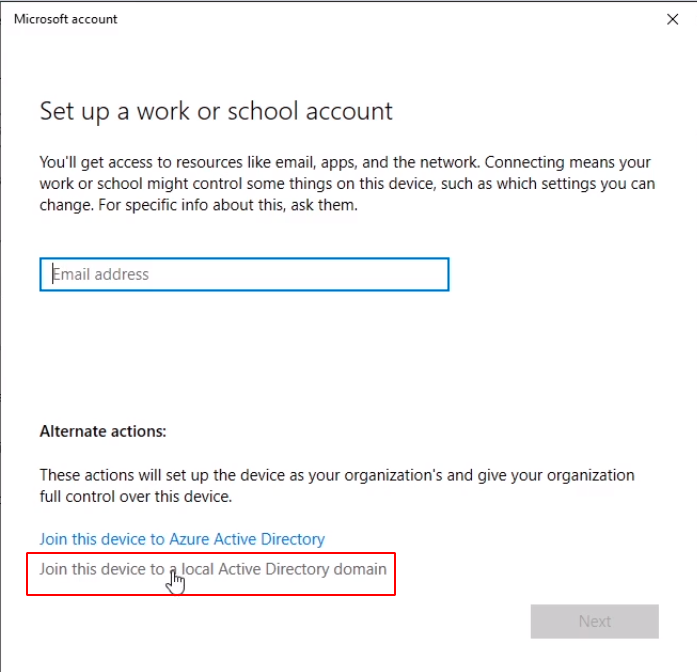
And is going to ask us to connect to a Microsoft Account, but we are going to click on some other options that allows us to join a domain.
Here at the bottom we are going to click Join this device to a local Active Directory domain.
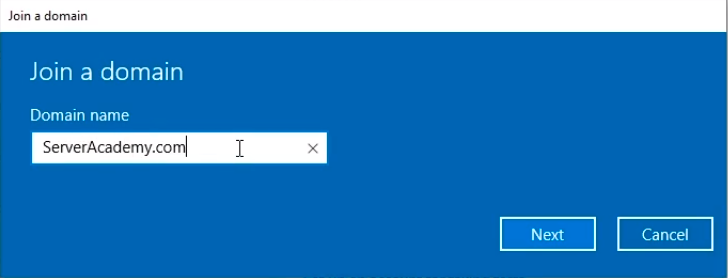
We are going to type the domain name ServerAcademy.com and click Next.
Note I didn’t need to configure any DNS Server or anything like that since it is configured with DHCP.
Type in the administrator credentials Administrator@ServerAcademy.com. And this just let’s the account know that we are using the Domain Administrator account from ServerAcademy.com and not any local administrator account just in case there’s an account on this computer that is also called Administrator.
Now, type in the password for that user and click OK.
Server Academy Members Only
Sorry, this lesson is only available to Server Academy Full Access members. Become a Full-Access Member now and you’ll get instant access to all of our courses.


