
Creating Boundary and Boundary Groups

Full-Access Members Only
Sorry, this lesson is only available to Server Academy Full-Access members. Become a Full-Access member now and get instant access to this and many more premium courses. Click the button below and get instant access now.
Instructions
Q&A (0)
Notes (0)
Resources (0)
Saving Progress...
Resources
There are no resources for this lesson.
Notes can be saved and accessed anywhere in the course. They also double as bookmarks so you can quickly review important lesson material.
SCCM boundaries and boundary groups allow you to logically organize your network locations similar to Active Directory Site Services. They define network locations to
Boundaries can be defined as an IP subnet, IPv6 prefix, an IP address range or an Active Directory Site.
Boundary Groups allow you to “group” together multiple boundaries for SCCM client use. Clients will use their current network information (such as subnet, IP or ad site) to identify which boundary groups they belong to.
This is all done in the name of efficiency. If you have SCCM servers in both Georgia and Colorado - you might create a boundary for each state, and a boundary group for each state. Any client that falls within one of these boundary groups will then use the resources available to them in those boundaries.
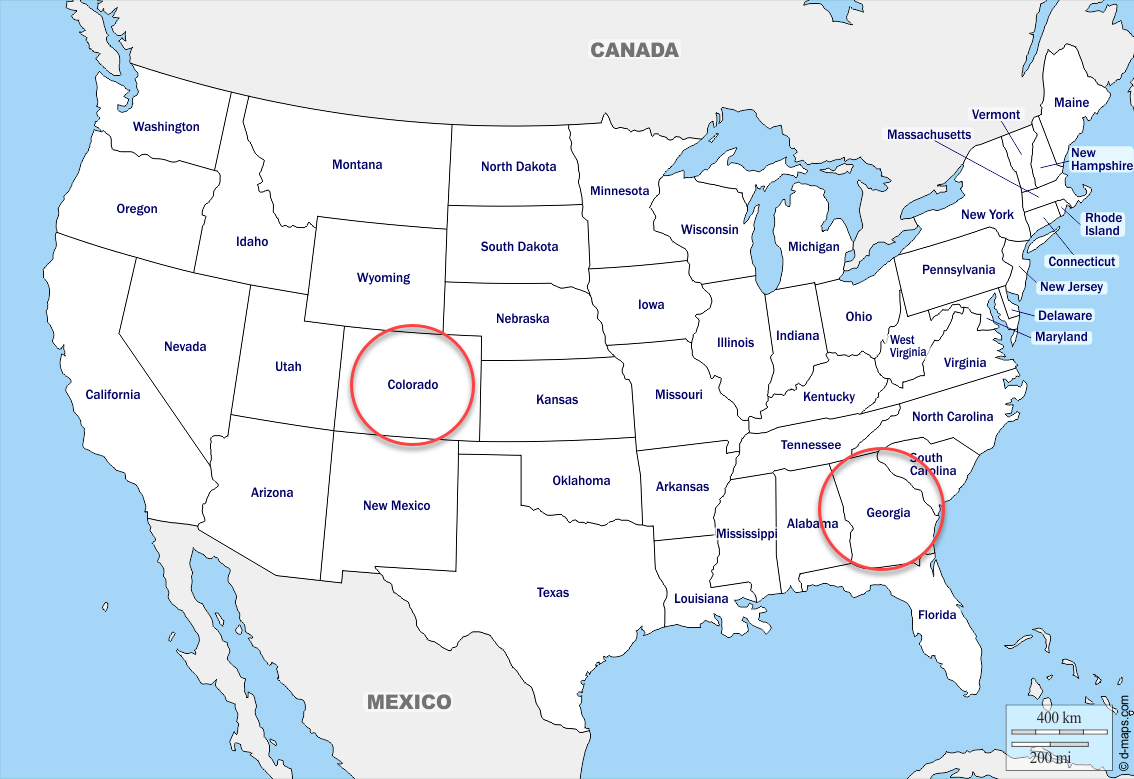
This is better than the alternative of having a client in Georgia reaching out to an SCCM server in Colorado and vice versa.
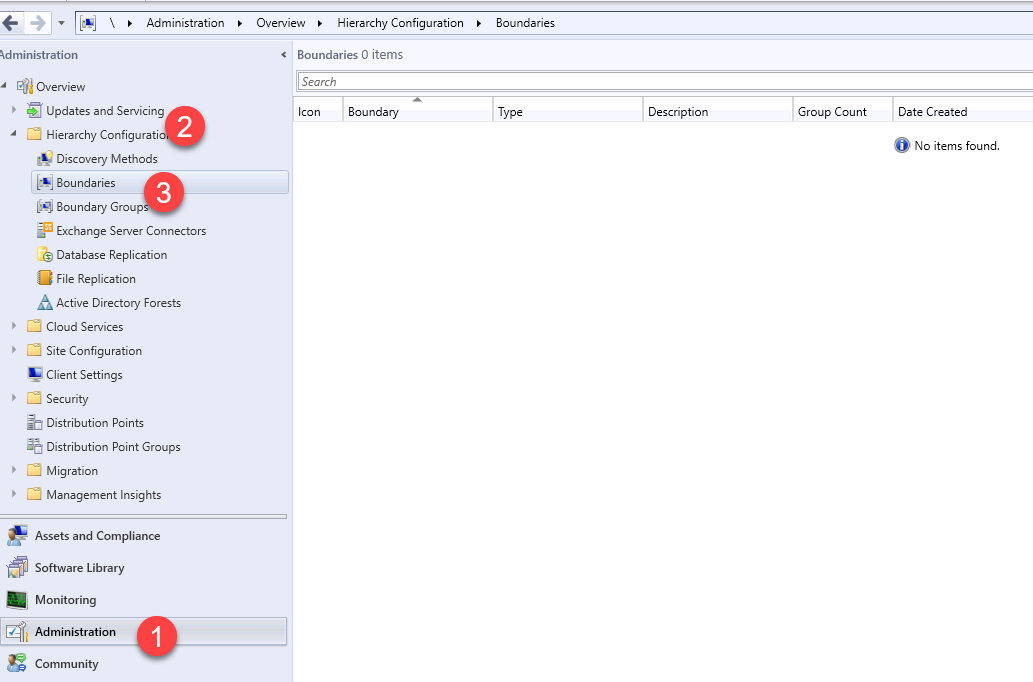
In the SCCM console, select Administration > Hierarchy Configuration > Boundaries:
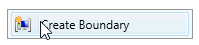
We can create a new boundary by right-clicking and selecting Create Boundary:
I’m going to give it the name Server Academy Boundary. Next under the type I am going to select Active Directory Site so that it uses the same information as Active Directory Sites and Services.
In this particular lab I haven’t done any configuration in ADSS, so I will just have the Default-First-Site-Name site. This could (and probably should) be configured before hand on your domain controller - but ADSS is out of the scope of this lesson so we are just going to go with the first default site.
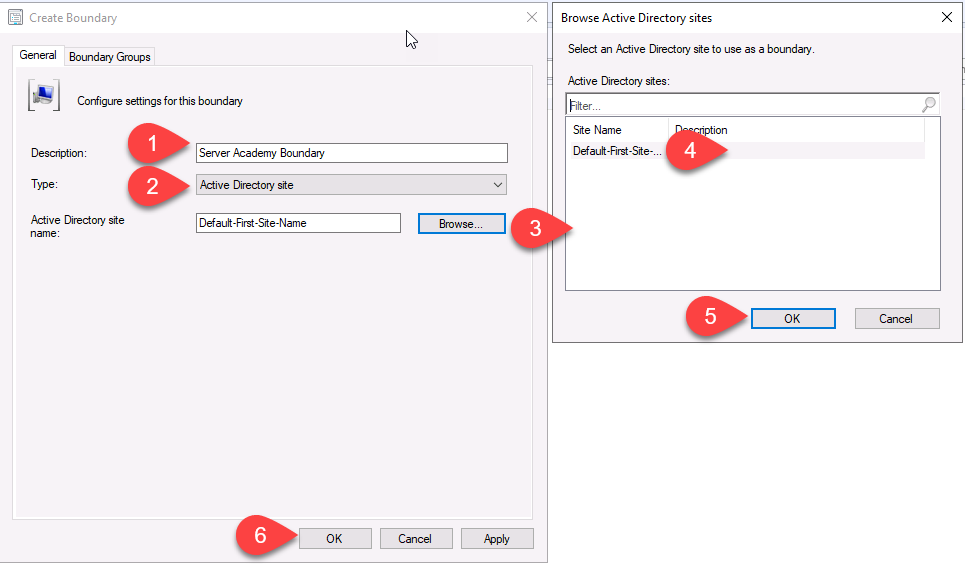
Once you have entered the information click OK to close the windows.

Now we need to create a boundary group to contain the new boundary we just created. In the navigation window, select Boundary Groups. Right-click in the middle pane and select Create Boundary Group:

Type in a name and optionally a description.
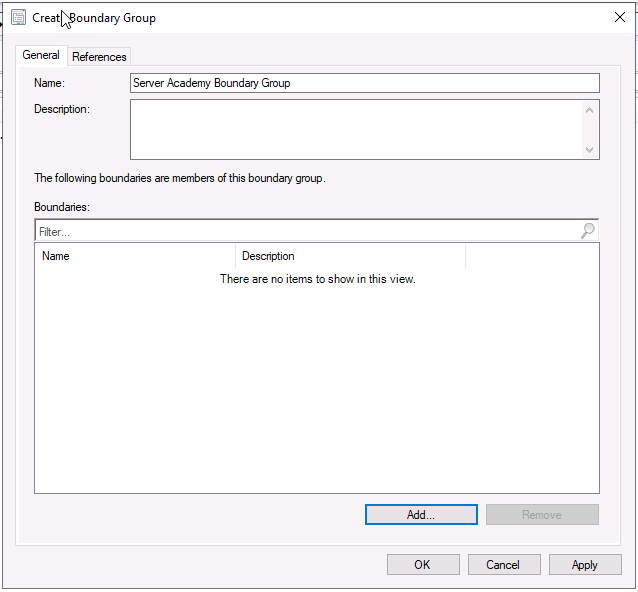
Now click Add and select the boundary we just created then click OK.

Next click the References tab. Click the Use this boundary group for site assignment.. This will assign newly discovered resources to the Assigned Site drop down. Of course, we only have the one which we created when we install SCCM.

Now click Add under Site system servers and select our SASCCM01 server:
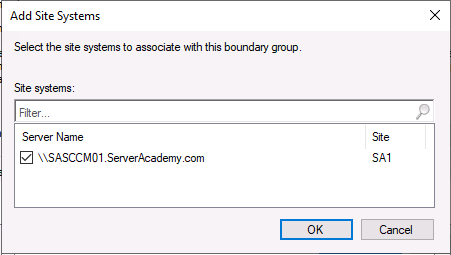
Click OK on both of these dialog boxes and now we can see our newly created boundary group:

That’s it! We are done creating the boundary and boundary group.
Server Academy Members Only
Sorry, this lesson is only available to Server Academy Full Access members. Become a Full-Access Member now and you’ll get instant access to all of our courses.


