
Supersedence Part 1

Full-Access Members Only
Sorry, this lesson is only available to Server Academy Full-Access members. Become a Full-Access member now and get instant access to this and many more premium courses. Click the button below and get instant access now.
Instructions
Q&A (0)
Notes (0)
Resources (0)
Saving Progress...
Resources
There are no resources for this lesson.
Notes can be saved and accessed anywhere in the course. They also double as bookmarks so you can quickly review important lesson material.
Now that we have created our 32 and 64 bit 7-Zip application using version 1604. We need to repeat those steps with the latest version of 7-Zip and create one application and two deployment types.
In our previous office scenario, we had 100 computers, 50 computers running Windows 10 64- bit O/S and 50 computers running Windows 10 32-bit O/S.
Even though we only deployed version 1604 to one computer the technique is still the same. Now let’s say you want to upgrade that version of 7-Zip to the latest version. How would you do this?
In application management Supersedence allows you to upgrade or replace existing applications. In our example we have already deployed version 7-Zip version 1604, Now we will create a 7-Zip Application version 19.00 with two deployments one for 64-bit windows 10 and one for 32-bit Windows 10.
To prepare for Supersedence we are going to follow the same process as we did previously for version 1604.
Now let’s go ahead and create our application
From the console click the Software Library, then click Application Management, then click Applications, then right click create application.
From the General screen we are going to create our deployment type for this application.
- Now we want to choose the default MSI file, and now browse out to our software location, then click open. So in my case that will be \\SASCCM01\Software\7-zip_msi\7z 1900 x64.
·Now click next. At the warning click Yes and ignore the error. Now click next
·Here is the General Information for the software application.
Stop the video while you fill out the Name, Publisher and software version.
Notice again that the MSI installer pre-filled the install command line and the /q parameter which is a quiet install.
·For the Install behavior, click the down arrow and choose, Install for system.
·Now click next , then next again.
·Now the application creation process has completed. Click close.
·From the console we see our application, right click and click properties
·From the general screen we will want to check to allow this application to be installed from a task sequence.
·Now click the Application Catalog
We can add categories, documentation links and the privacy URL is the license.txt file for the 7-zip program.
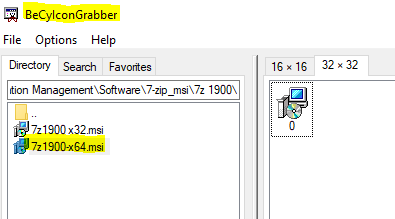
Now let’s add an icon to the application. Again, you can get these icons from the msi or use an Icon Extractor like Be-Cy-lconGrabber.
Now to add the icon click browse, and browse out to the icon file, choose the file, then click open, click apply. Then click ok
Now from the console click the Deployment types tab at the bottom
Right click on the deployment type, and click properties, and lets rename the Deployment Type. Considering that we will create another deployment type I want the name to be a little more descriptive.
- Now we will change the name of the deployment type to 7-Zip 1900 MSI_x64
·The content tab shows the location of our MSI x64 software that we have already defined.
·Now click the Programs tab and here we see the pre-filled command line Installation and Uninstall command lines taken from the MSI’s product code.
·The next tab is the Detection Method. The detection method determines if the software has already been installed.
·On the left click the arrow, then click edit clause. Here we see the product code. Click ok.
·Now click User Experience, we need to verify these settings. Install for System and whether or not a user is logged on.
Server Academy Members Only
Sorry, this lesson is only available to Server Academy Full Access members. Become a Full-Access Member now and you’ll get instant access to all of our courses.


