
Configuration Manager Update Overview

Full-Access Members Only
Sorry, this lesson is only available to Server Academy Full-Access members. Become a Full-Access member now and get instant access to this and many more premium courses. Click the button below and get instant access now.
Instructions
Q&A (0)
Notes (0)
Resources (0)
Saving Progress...
Resources
There are no resources for this lesson.
Notes can be saved and accessed anywhere in the course. They also double as bookmarks so you can quickly review important lesson material.
In this section, I will show you how to:
- Analyze our Current SCCM Configuration
- Then we will Update Configuration Manager
- Then we will Analyze the Configuration Changes in the CM Console
First, let’s Analyze our Current Configuration.
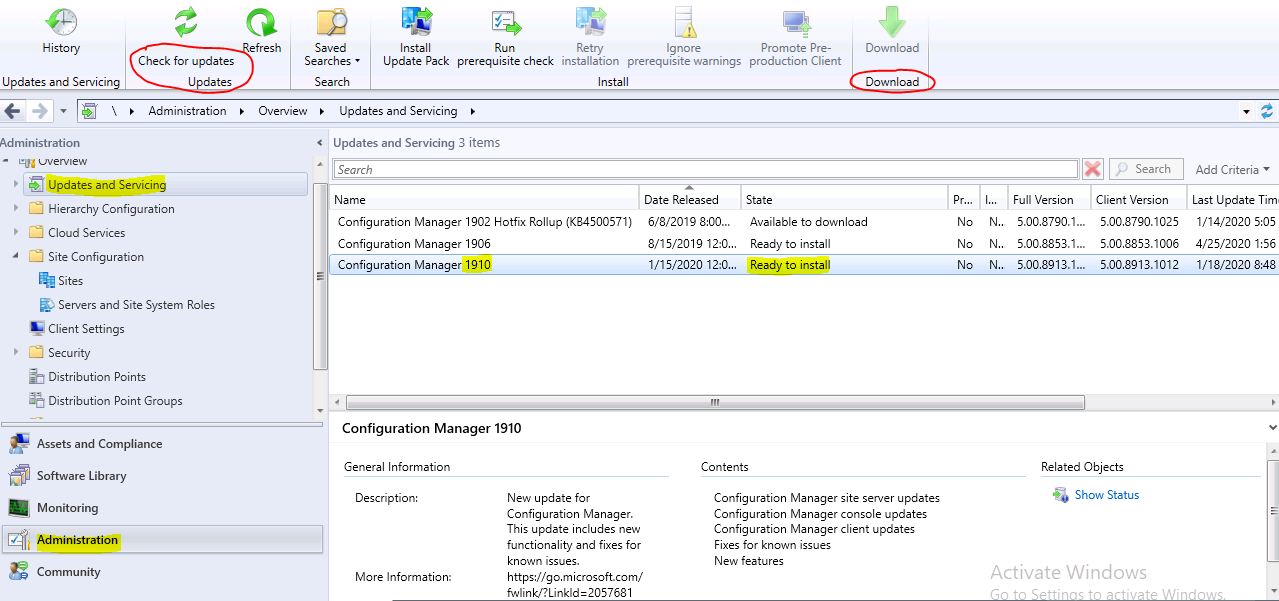
- Let’s go out and check for the CM update – From Administration, Updates and Servicing verify that version 1910 is ready to be installed. If you installed SCCM version 1902, you should see version 1910 ready to be downloaded or ready to be installed. If not, click the check for updates button. Click refresh, once the update appears, then click download.
- Analyze the Current Configuration
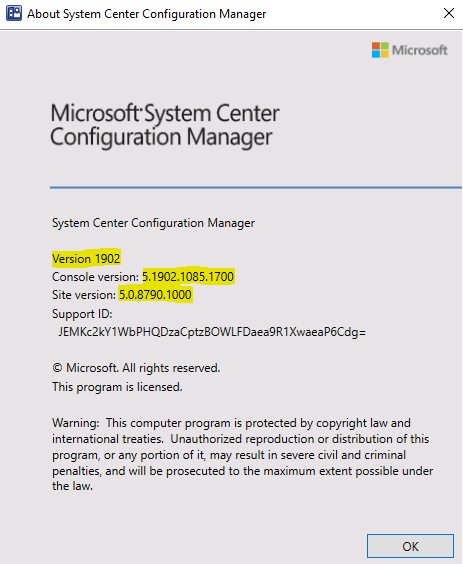
- First, we will Verify the current version of SCCM.
From the console, above the ribbon click the down arrow,
- Then click about Configuration Manager. In this case, we have SCCM Version 1902, Console Version 5.1902.1085.1700, Site Version 5.0.8790.1000
After the update, these version numbers will change.
- Now let’s Verify the ADK version.
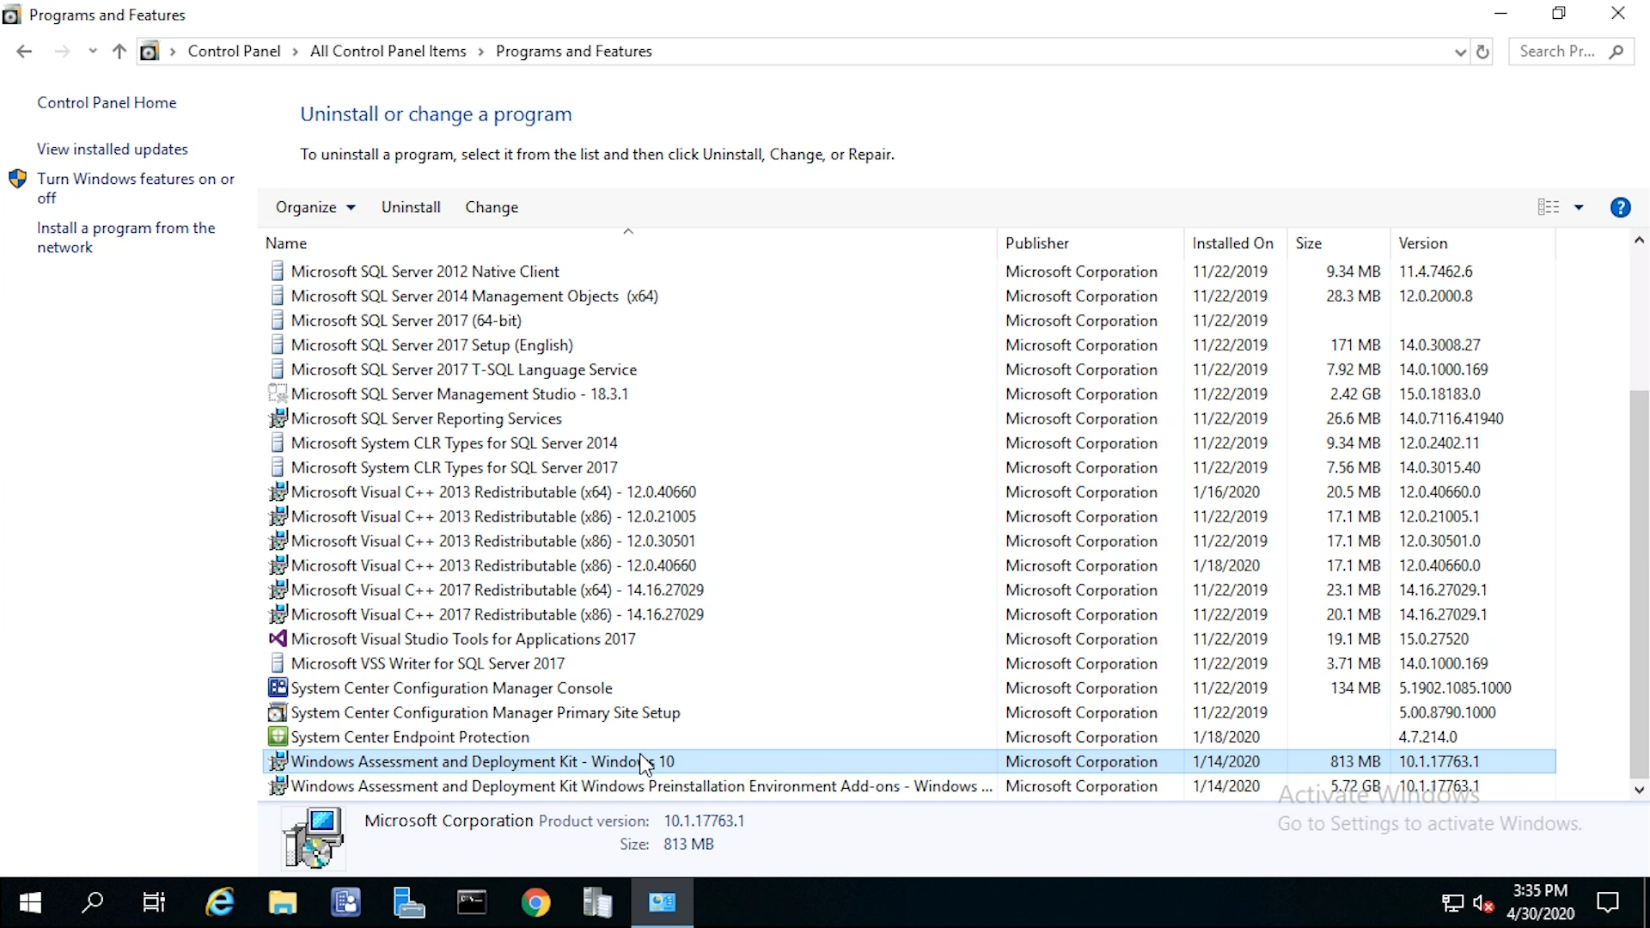
- From the Windows search icon, type con, double click the control panel, click Programs, and Features. Scroll down until you see Windows Assessment and Deployment kit. Here we have ADK version 17763.1 which is ADK Version 1809
And PE version 17763.1, which is version 1809. Your versions may be different.
- Now let’s check our ADK compatibility chart. Here we see that ADK version 1809 is compatible with Configuration Manager 1902, and “should be” BC with 1906 and 1910.
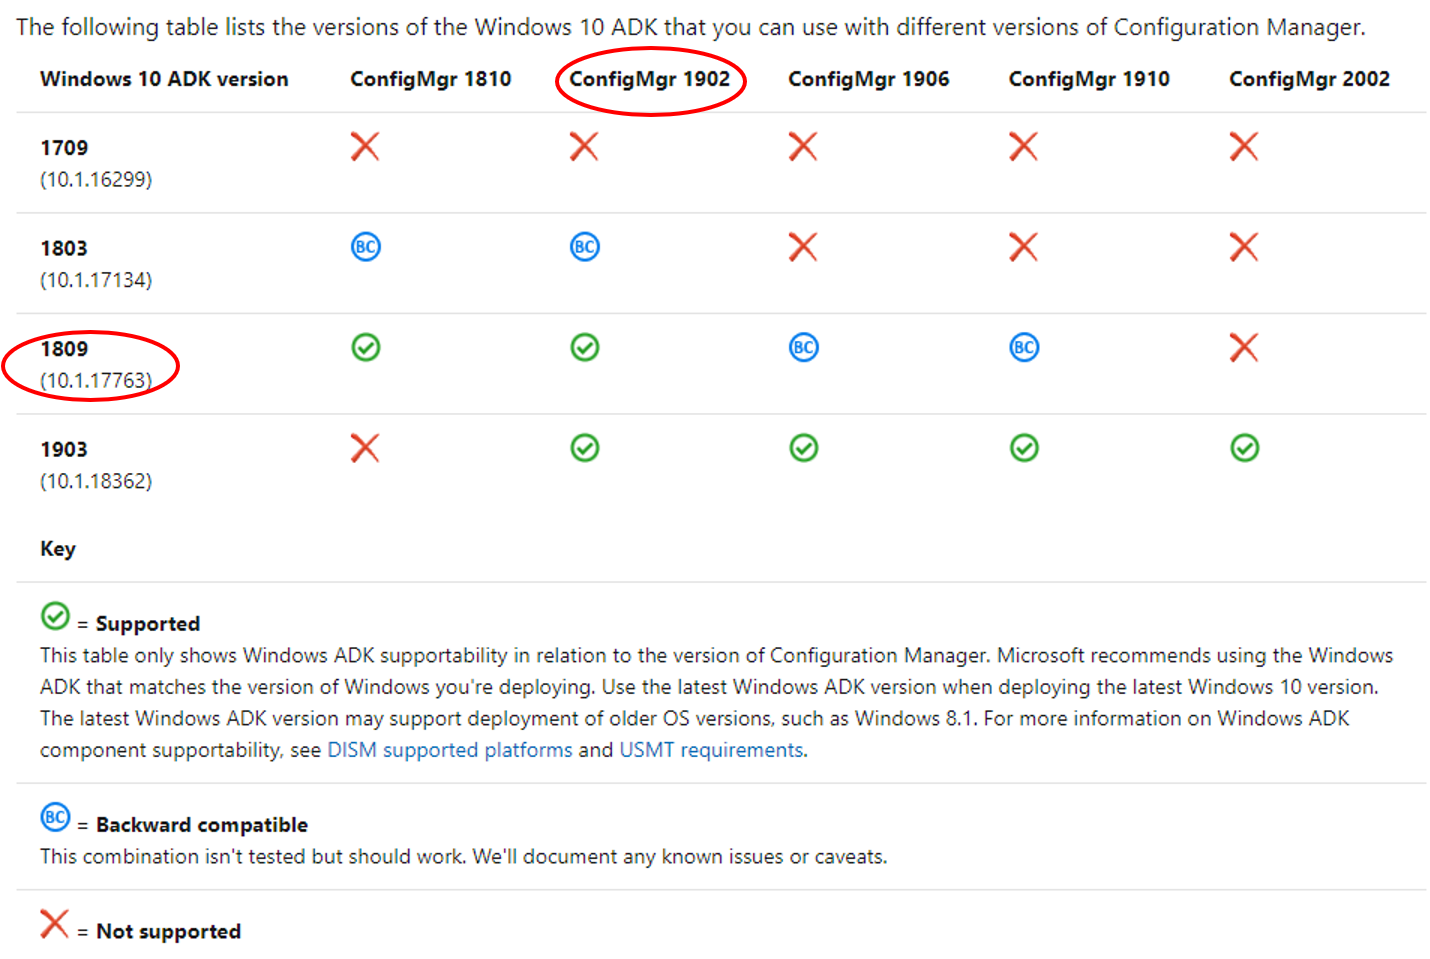
- Even though the compatibility chart says, ADK 1809 is backward compatible, but not tested. It would be better to uninstall version ADK 1809 and reinstall ADK 1903 and Windows PE.
- I’ll show you how to do this in this section
- As far as Windows 10 Compatibility ADK 1903 is compatible with Windows 10 1909

Now let’s take a look at our default Client Packages.
- From Software Library, click Application Management, Click Packages
- When we installed CM 1902 and the ADK with the Preinstallation Environment. Configuration Manager provided us with two default packages. Both of these components will be updated during CM update.
- CM Client package – Is the software Pushed to client, to enable CM to manage the client.
- User State Migration Tool – USMT is used to transfer files and settings between two PCs during a migration.

Now let’s check out our boot images
From Software Library, Operating Systems, click Boot Images
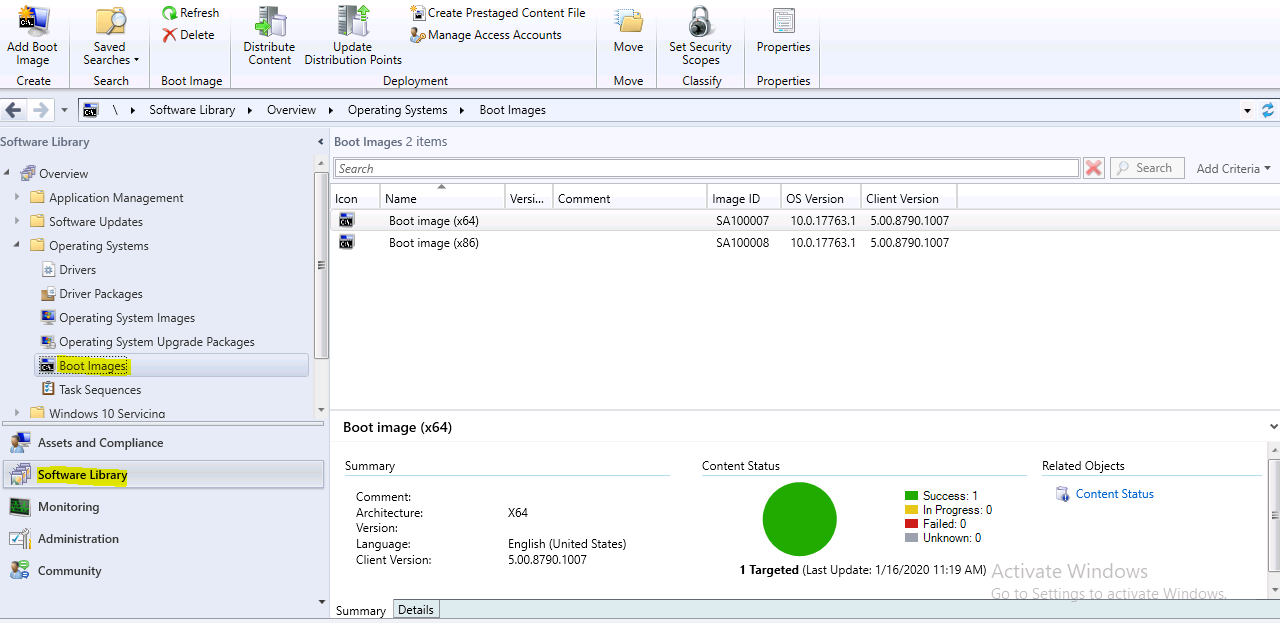
• A boot image is a Windows PE image that is used during O/S deployment. Boot images are used to start a computer in Windows Preinstallation Environment. Which is a small operating system.
One boot image for a 64 bit O/S, and one image for 32bit O/S.
• Boot image version is 17763.1. These Boot images are Windows version 1809
• After the SCCM update, the version for both Boot images should be 10.0.18362.1.
If you need to uninstall, ADK follow this procedure.
From the SCCM01 server, click Windows search, Now type con, then click the control panel,
double click Programs, and Features.
• Hightlight Windows Assessment and Deployment Kit
• up at the top click uninstall.
• Take couple minutes go ahead and Stop the video
• After the uninstall completes click close
- Now using the same procedure uninstall Windows PE.
- When you're done, go ahead and Restart the SCCM Server.
Server Academy Members Only
Sorry, this lesson is only available to Server Academy Full Access members. Become a Full-Access Member now and you’ll get instant access to all of our courses.


