
How to Download Windows Server
Instructions
Q&A (0)
Notes (0)
Resources (0)
Saving Progress...
Resources
There are no resources for this lesson.
Notes can be saved and accessed anywhere in the course. They also double as bookmarks so you can quickly review important lesson material.
In this lesson, you are going to learn how to download Windows Server.
Now, most of you probably won’t need to do this because you will be using the Cloud Hosted IT Labs, and all this will be already done for you, but I want you to understand how to do it in case that you are at work and you need to build a new Server and you have to download it. I don’t want you guys to be lost or not know what to do.
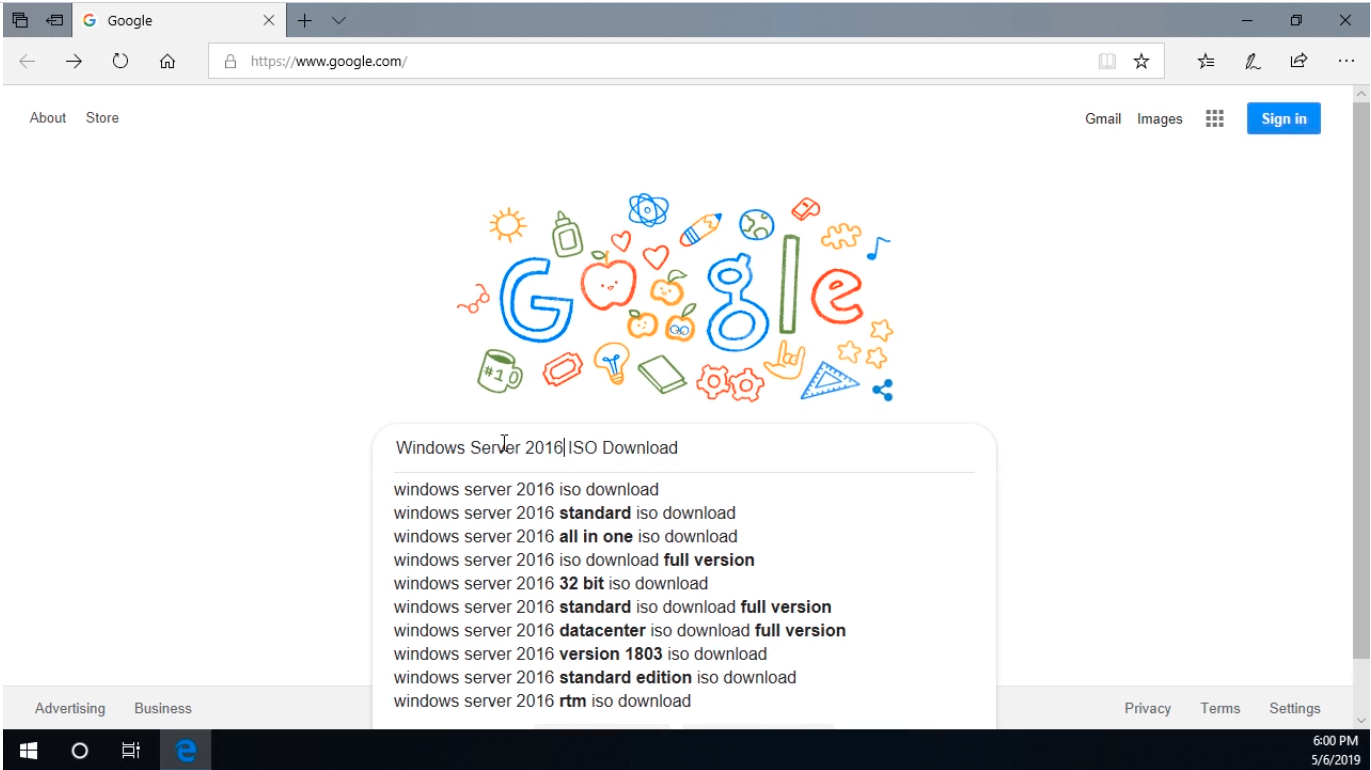
So, what we are going to do is open our preferred web browser and navigate to https://www.google.com and search for Windows Server.
You can type whatever version you want, 2012, 2016, 2019. Basically, all this will be based on your requirements, and a lot of times it is based on the type of license that you are issued. So your boss might give you Server 2012, here’s the license for a Datacenter, go ahead and download that. Well, if that is the case you will type in Windows Server 2012 ISO Download. It might be Windows Server 2016 ISO Download just as easily if we just download that and press Enter.
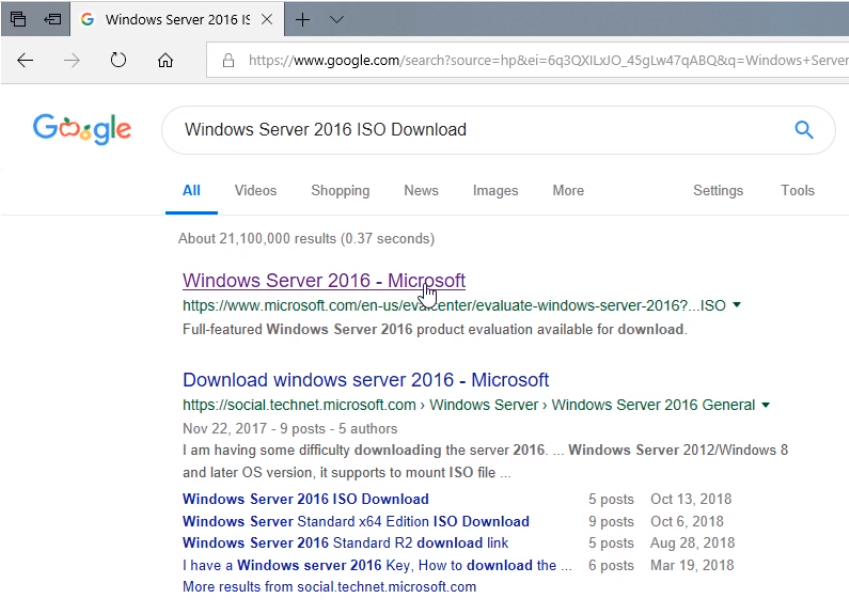
What’s going to happen is that we are going to be brought to this eval center, this Microsoft URL https://www.microsoft.com/en-us/evalcenter/evaluate-windows-server-2016?filetype=ISO
Now, we could just as easily browse to the Microsoft.com page and go to the Evaluation Center. I prefer a Google search for it and find it that way. If you have trouble finding it in Google Search then just go to Microsoft.com and locate the Eval Center.
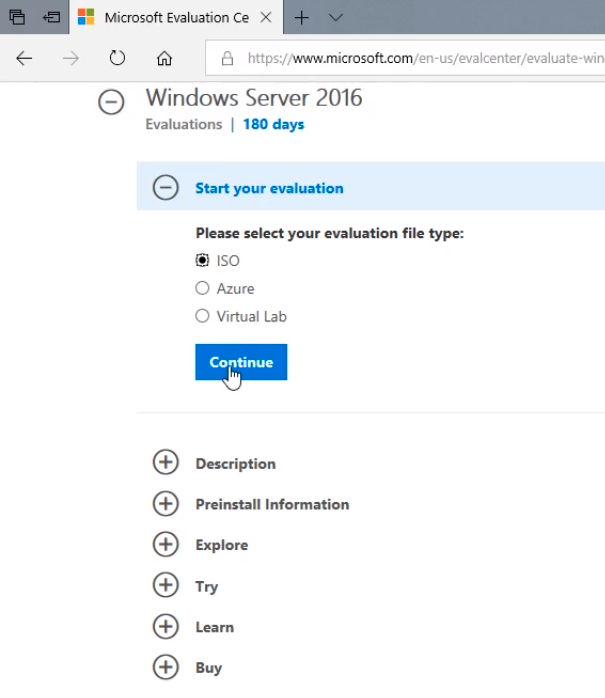
From here we can see we have Windows Server 2016 and we can choose either an ISO, an Azure, or a Virtual Lab.
Now, the ISO is a format that is more than likely to be used as this can be easily burned to a DVD Drive or an external Hard Drive.
An Azure is if you are using the Microsoft Azure Cloud Infrastructure you can choose this option or if you have a Hyper-V virtualization or you want to have a Virtual Lab you can download Virtual Lab instead.
Also, if you are using VirtualBox you can just go by the ISO even if you are technically running a virtual Lab the ISO file will work just as well.
Now what we are going to do is choose ISO and click the Continue button.
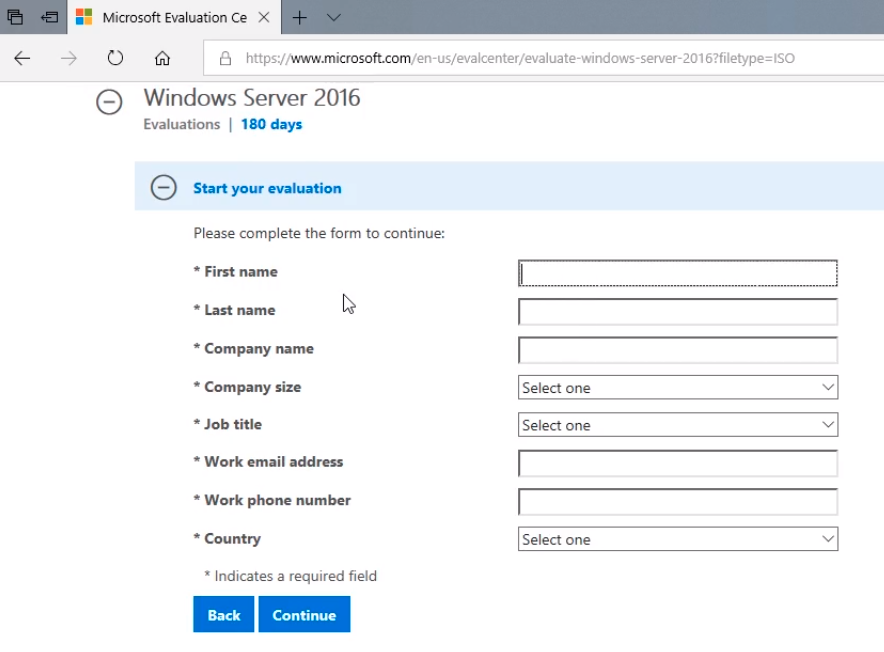
And, we have to register. I am going to type all this information.
Next, we click on Continue.
Now we need to choose a Language. It is actually very important that you choose the correct language. Generally, you want to go for English and click Download.
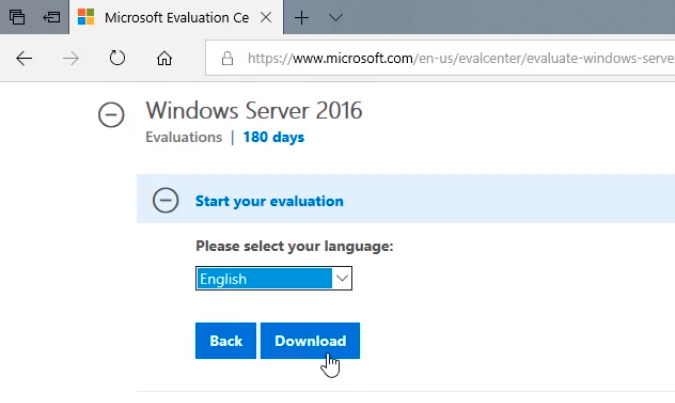
You generally don’t want to click Open because that only temporarily downloads the ISO and then discards it when done.
So I am going to Click Save and the download is going to begin.

Once the download is complete we can take this ISO and mount it to a Virtual Machine or we can burn it to a disk or Hard Disk drive.
So, that’s all we are going to cover in this lecture.


