
Disk Initialization and Partition Styles

Full-Access Members Only
Sorry, this lesson is only available to Server Academy Full-Access members. Become a Full-Access member now and get instant access to this and many more premium courses. Click the button below and get instant access now.
Instructions
Q&A (0)
Notes (0)
Resources (0)
Saving Progress...
Resources
There are no resources for this lesson.
Notes can be saved and accessed anywhere in the course. They also double as bookmarks so you can quickly review important lesson material.
In this lecture, you are going to learn how you can initialize a new disk that you’ve added to your Windows Server operating system, and how to configure its partition styles.
This is something you will have to do every time you take a physical hard disk and insert it into a physical server or you add a new Virtual Hard Disk to a new Virtual Machine.
The first thing we are going to do is we are going to prepare the disk with the utility called diskpart. You can find this utility by hitting the Windows button and typing in diskpart or you can launch Command Prompt and type in the command diskpart.
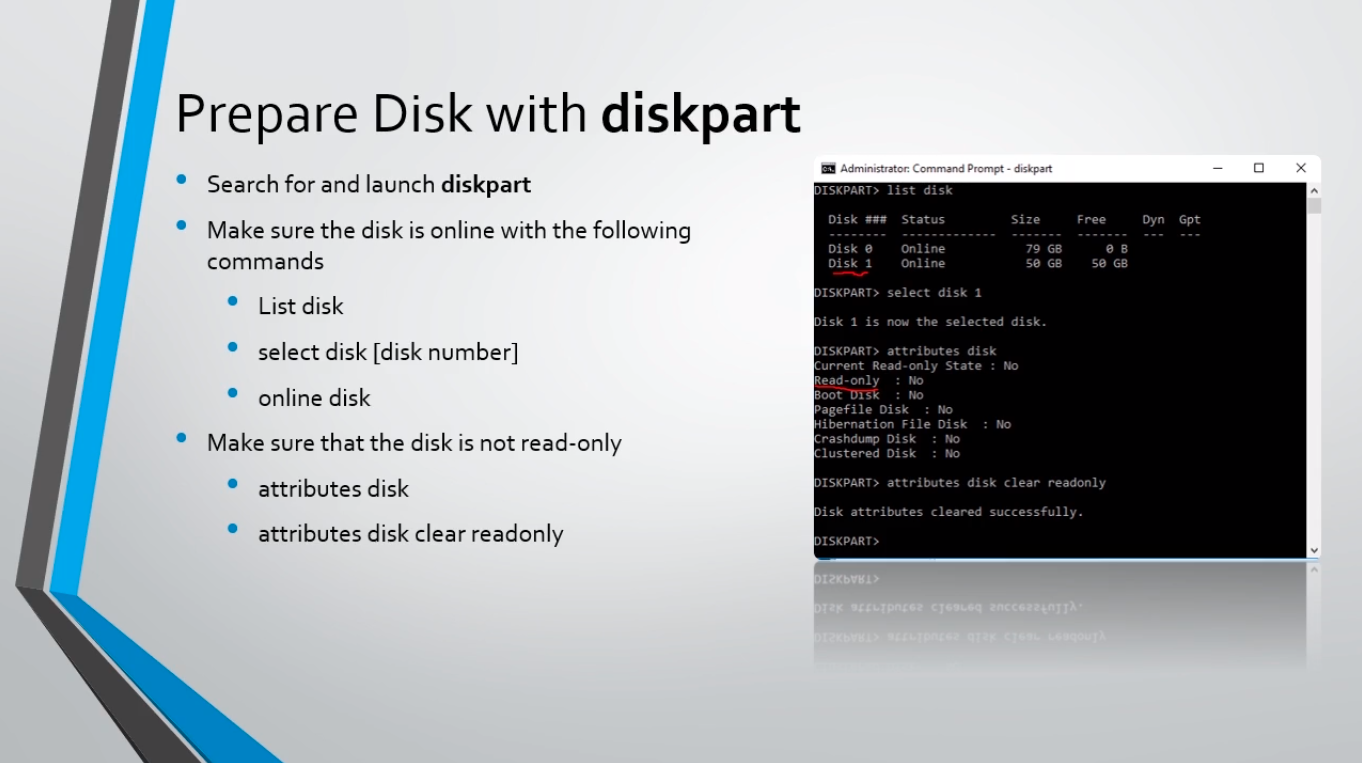
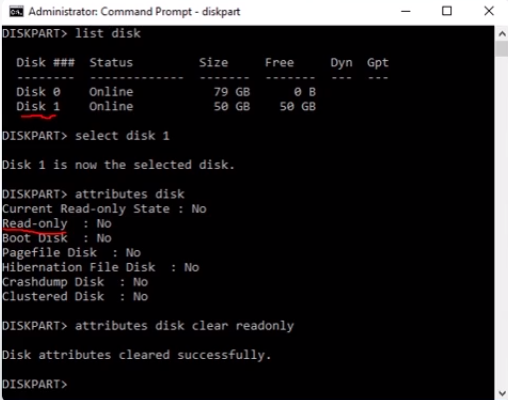
Once you’ve launched diskpart there’s a couple of commands we are going to use. First, we are going to type list disk, and over here at the right-hand side, we can see that I’ve typed in that command, and we get all the disks that are on this computer. We have Disk 0 which is 79 GB and we have Disk 1 which is 50 GB.
Now Disk 0 is going to be generally your operating system, and in this case, Disk 1 is a new 50 GB hard drive that I have added to the server. So, what we want to do is select disk 1. Once we select that disk we are going to run the command online disk.
The next thing we are going to do is to make sure that we can Read and Write to the disk. Sometimes this will initialize and come online as Read Only and we do not want that to be the case. And, we can find out if this disk is Read-Only by simply typing in the command attributes disk. Since we have already selected the disk there’s no need to say attributes disk 1 or anything like that. Any command that we type in from now on after we select the disk will be executed on that disk.
Now, in this particular case Read Only is set to No. If that was set to Yes then we will need to run the command attributes disk clear readonly and then it will be set to No and then we are free to create a volume and format the disk as we need to.
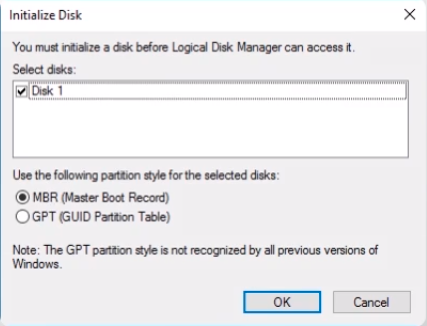
Now we are going to need to Initialize the disk with the utility called diskmgmt.msc.
Again, you can launch this utility by hitting the Windows button and typing in Disk Management or diskmgmt.msc.

Once you’ve launched the utility you are going to see a prompt that asks you to Initialize the disk. You are going to select the disk and if you have multiple new hard disk drives you’ve added to the computer or to the server you will need to initialize each of them.
Next, you are going to choose the partition style for this disk. It’s either going to be the MBR, which is the Master Boot Record, or the GPT which is the GUID Partition Table. It also gives us a warning that The GPT partition style is not recognized by all previous versions of Windows.
So, if you are working on Windows Server 2000 for example, you probably wouldn’t want to use GPT. MBR is more common but a little less robust, and the GPT is newer and improved partition style but isn’t supported as widely as MBR as noted here in this warning.
Now, let’s talk about the differences between the Master Boot Record and the GPT.
First, the Master Boot Record, as I said before, is a very common partition style, and it provides the most compatibility.
Server Academy Members Only
Sorry, this lesson is only available to Server Academy Full Access members. Become a Full-Access Member now and you’ll get instant access to all of our courses.


hey admin,
you chose to have 2014mb for the new disk space.. but once created it’s actually 1.97gb? shouldn’t it show the partition instead of the whole volume? could you explain that part. thnks
Hey ALWI DELGADO ALAUDIN
The reason why it does not show a full 2GB size (assuming you chose 2048MB instead of 2014MB) is because there are other factors when the partition is created such as formatting overhead or reserved space for the file system. Typically it is said that the partition table is taking up some space as part of the formatting.
Ricardo