
Configuring Windows Server Desktop Experience
Instructions
Q&A (0)
Notes (0)
Resources (0)
Saving Progress...
Resources
There are no resources for this lesson.
Notes can be saved and accessed anywhere in the course. They also double as bookmarks so you can quickly review important lesson material.
In this lesson, you will learn how to complete a basic configuration for Windows Server.
This is something that you will do after you install Windows Server. What we are basically going to do is rename the computer and we are going to configure a static IP Address.
Now, there could be more things you want to do, like run Windows Updates, join it to an Active Directory Domain, etc.
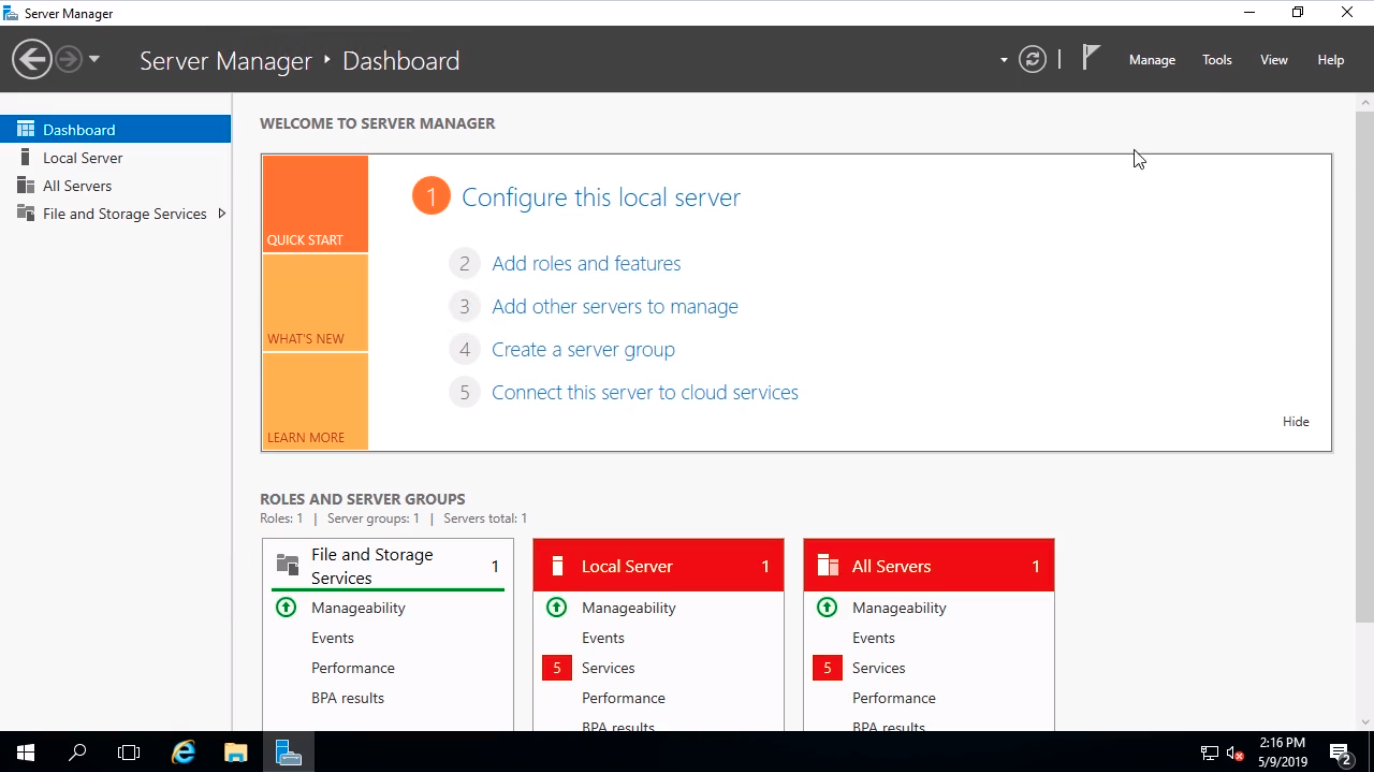
After installing Windows Server we are brought to the Windows Desktop and Server Manager will show up by default.
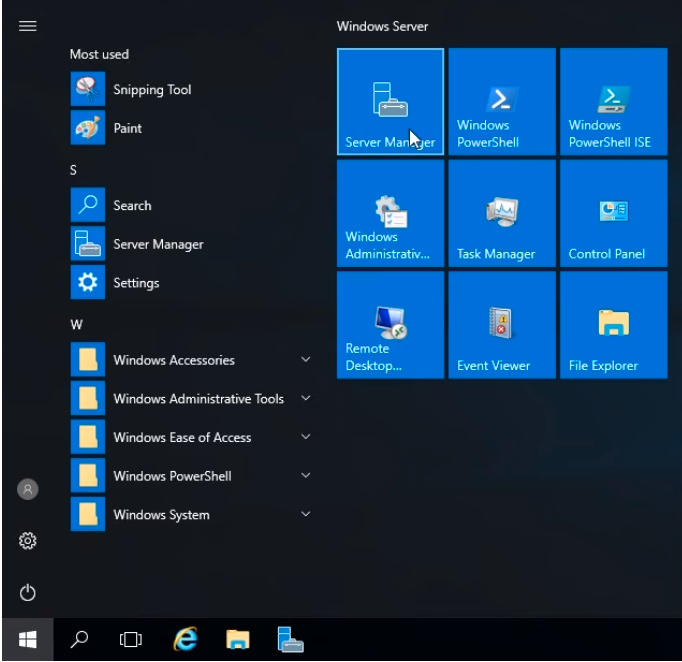
If Server Manager did not start by default you can always open it by clicking on Start and selecting Server Manager.
To start, click on the Local Server tab to the left of the window. Local Server manages just this server.

The other options are All Servers and File and Storage Services.
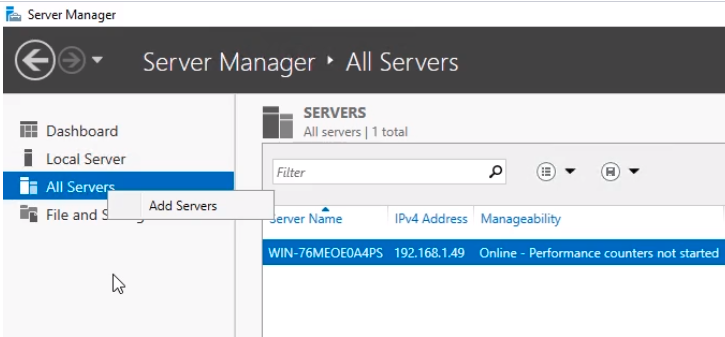
If we click on All Servers we can Add a Server to manage it remotely. Currently, we just have our local server on the list.
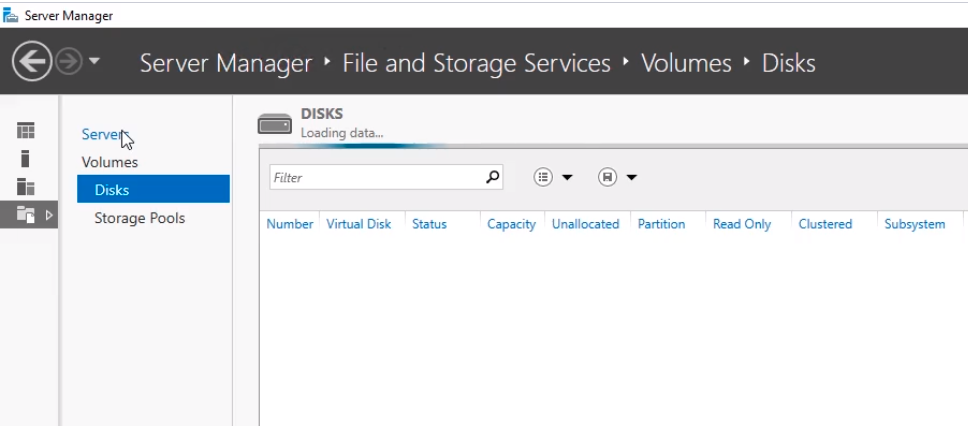
File and Storage Services is where we can administer our Volumes, Disks, and Storage Pools.
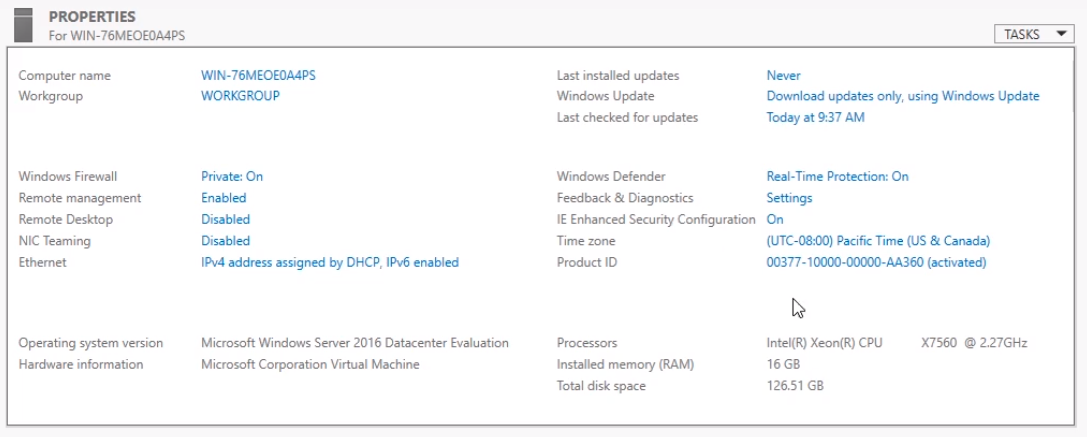
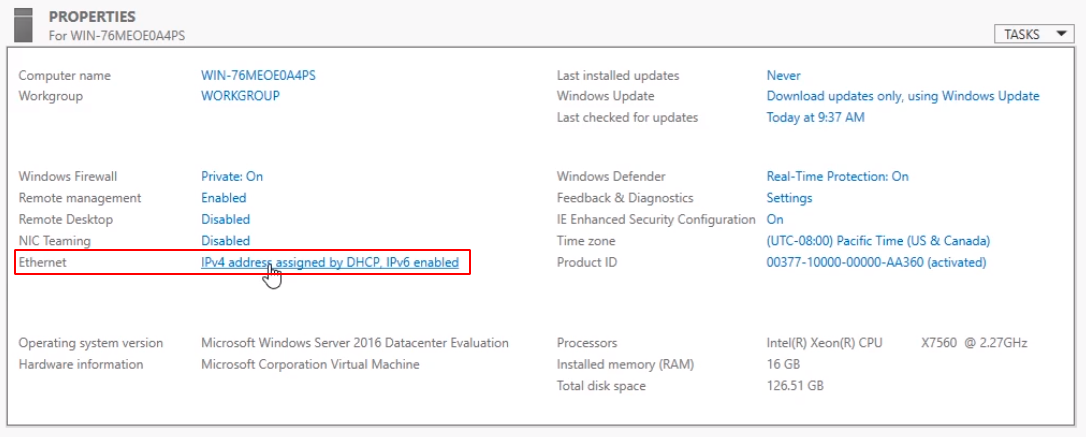
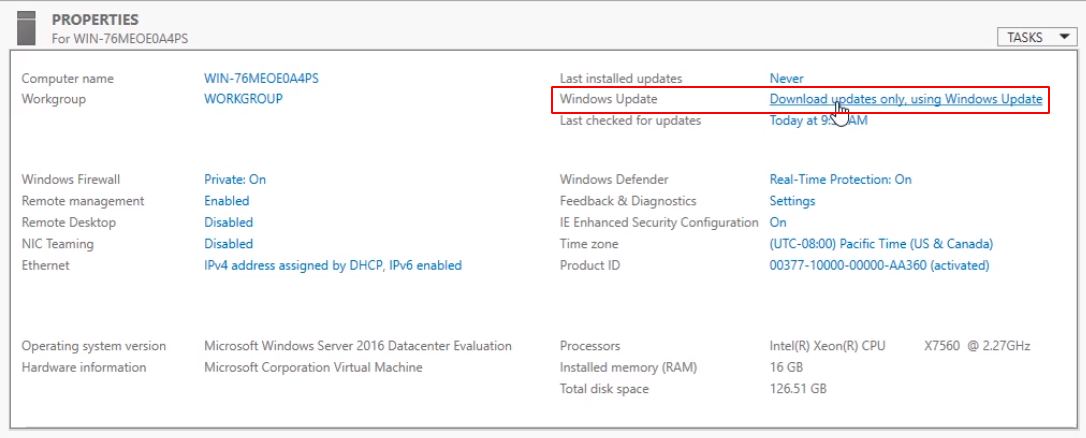
Back to the Local Server tab, we can see we have in the middle pane the Properties of the server we are logged into like Computer Name, Workgroup, Windows Firewall, and a bunch of other high-level information.
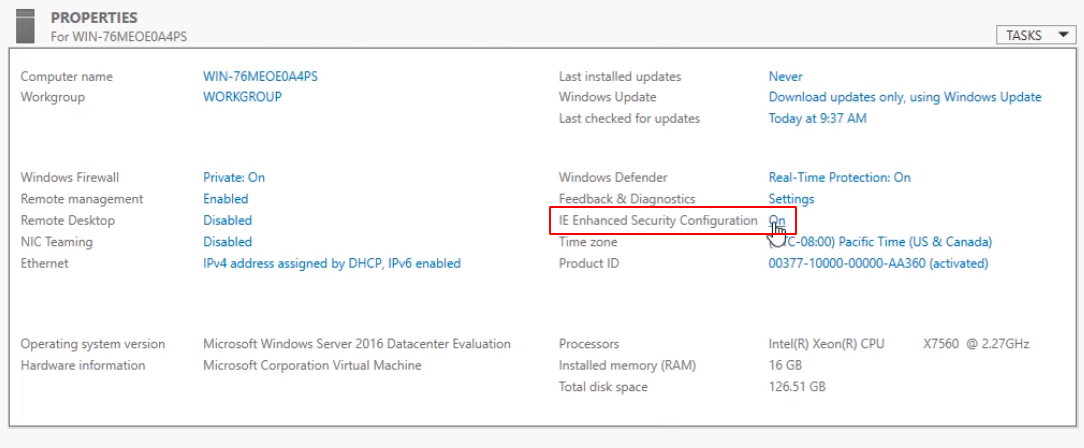
Click on IE Enhanced Security Configuration.
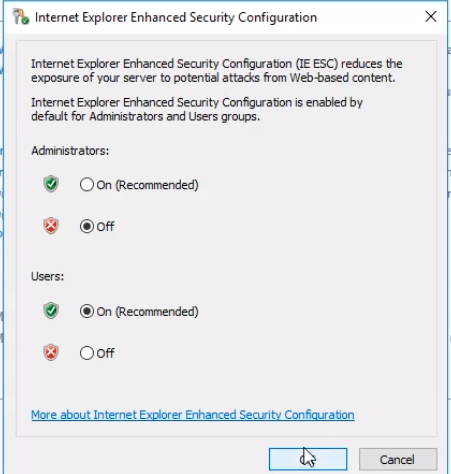
We will choose to Turn it Off for Administrators because every time you try to open a webpage during a configuration you will get a lot of popups saying if you would like to allow the pages to be blocked, adding a security exception for them.
Click OK to close the window.
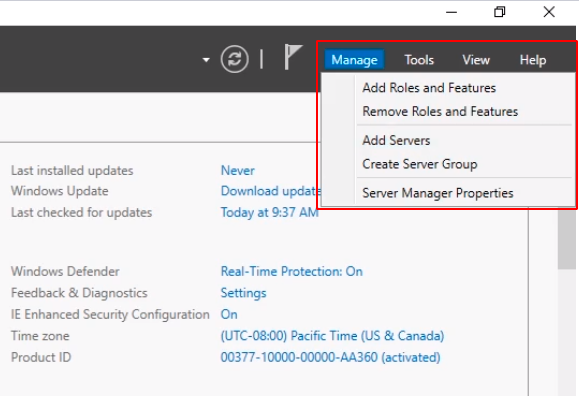
Now, when you click on Manage on the upper left you can Add Roles and Features, Remove Roles and Features, Add Servers, Create Server Groups, and see the Server Manager Properties.
If you click Tools you will see you have all the tools to manage your server. As you add more Roles and Features you’ll get new tools added to the list.
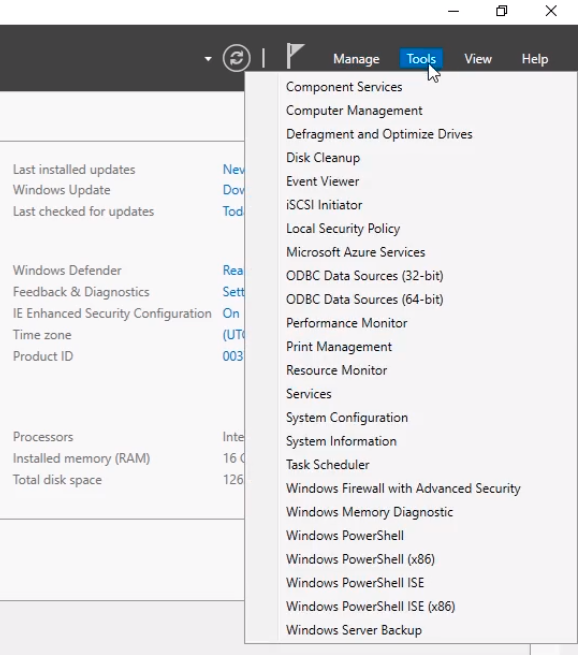
You can also change the views by increasing or reducing the font size when clicking on View.

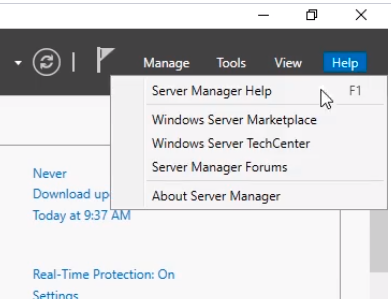
You can also click on Help to see some helpful information.
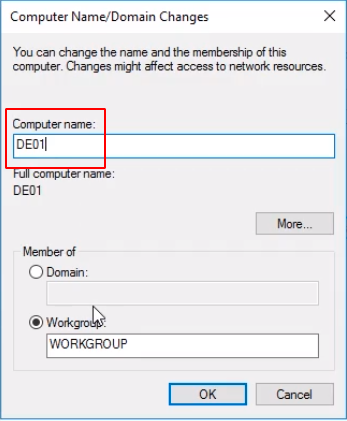
Now, let’s rename the computer by clicking on the Computer Name blue text link.
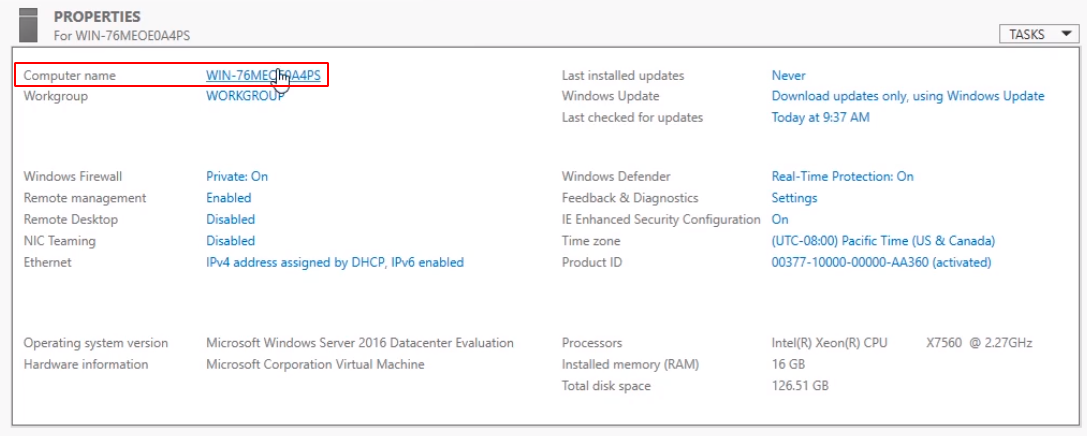
The current name is a randomly generated link that Microsoft assigns to the computer during installation.
From the System Properties window click on the Change button.
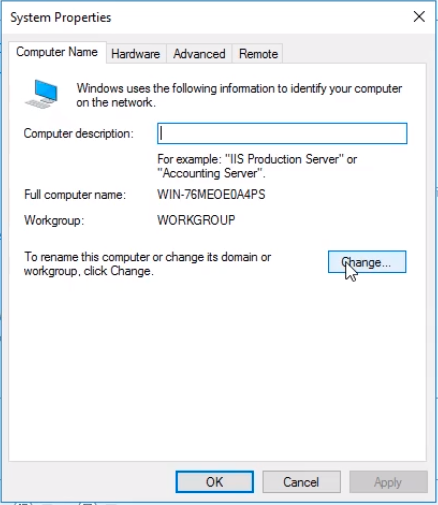
Now, most organizations will have a standard naming convention so do not name it anything you want. What we are going to do is enter a simple naming convention like DE for Desktop Experience and 01 because this is our first server.
Optionally you can enter a domain name if you have one already. If not, select WORKGROUP.
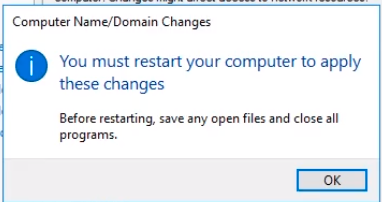
Click OK to close the windows.
You will get a prompt to restart the computer to apply the name change.
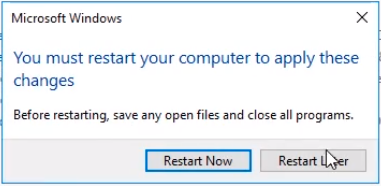
When clicking OK you will get a new message window to Restart. Click on Restart Later.
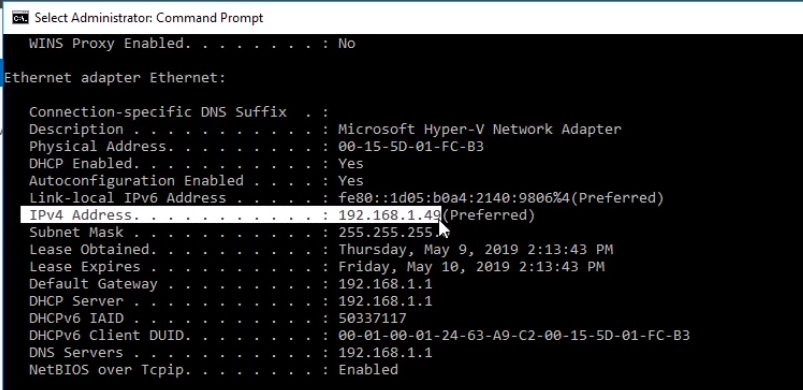
Now, we need to assign an IP Address since we have a DHCP IP Address assigned and we need to have a Static IP Address so the address doesn't change.
To see our current IP Address we open a command prompt window by clicking on the Windows Start icon and typing cmd.

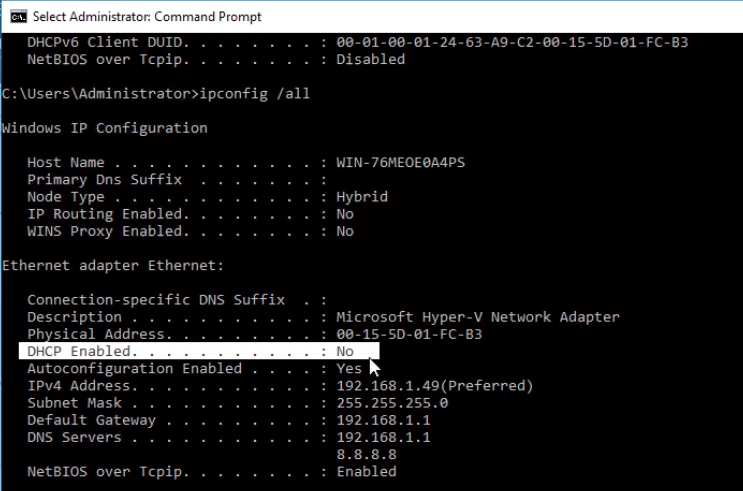
From the command prompt window type ipconfig /all and press Enter. Here we can see our IP Address information.
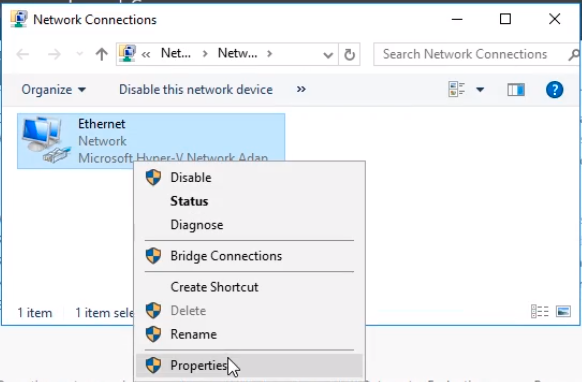
Click on the Ethernet blue link text next to it.
From the Network Connections window right-click the Ethernet adapter icon and choose Properties.
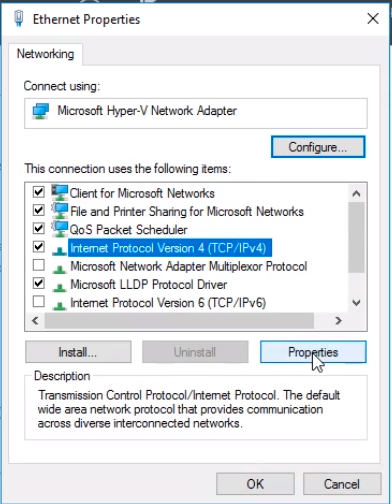
I’ll be disabling the Internet Protocol Version 6 (TCP/IPv6) option from the Ethernet Properties window since we are not going to use it.
Select Internet Protocol Version 4 (TCP/IPv4) and click on the Properties button.
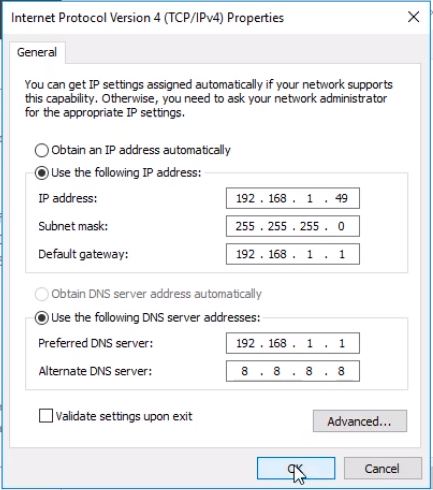
Choose the option Use the Following IP Address radio button to enable the fields and enter the IP Address. Generally, your IP Address will be provided by your Network Administrator. Enter the information from the command prompt windows earlier.
Click OK to close the window. Click Close and close any other window opened.
If we type ipconfig /all again in the command prompt we see we are using a static IP Address since DHCP Enabled is set to No.
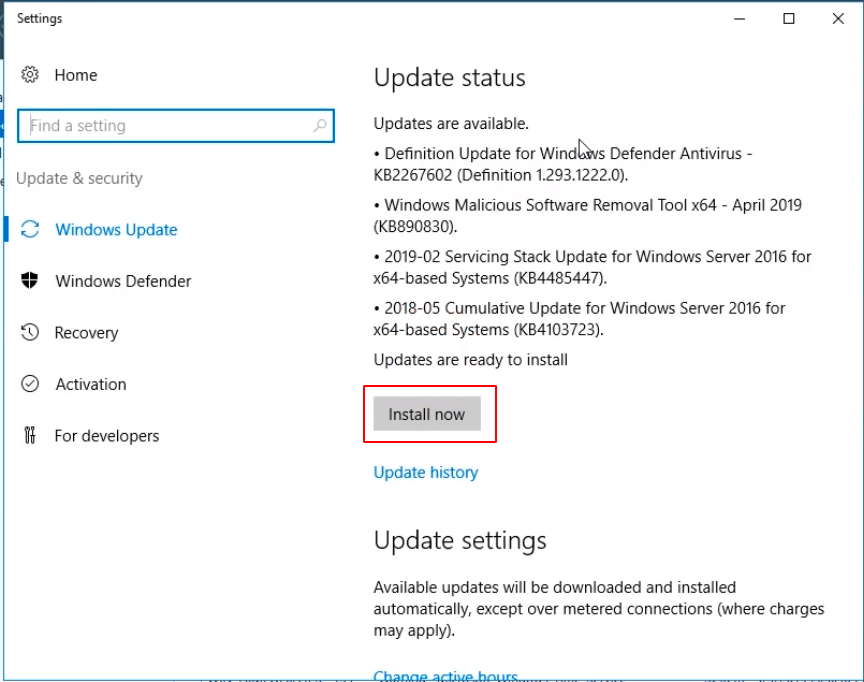
The last thing you would most likely do is run Windows Update. Click on the blue link next to Windows Update.
In a lab environment, this is not necessary.
If you are in a corporate environment you would most likely install Windows Updates.
And, that is how you Configure Windows Server Desktop Experience.


can u move the comment popup to the other side.. thnks.. i wanna scroll through the lesson vids in peace
Thanks for the feedback ALWI DELGADO ALAUDIN. For now, there’s no way to move it from the left, but I will ping
  Paul Hill so that in future platform updates, there can be an option to close or move it from the left side.