Configuring The Local Config Manager for DSC Push
Instructions
Q&A (0)
Notes (0)
Resources (0)
Saving Progress...
Resources
There are no resources for this lesson.
Notes can be saved and accessed anywhere in the course. They also double as bookmarks so you can quickly review important lesson material.
To get started, we need to log in to our Domain Controller and open the PowerShell ISE as an Administrator:
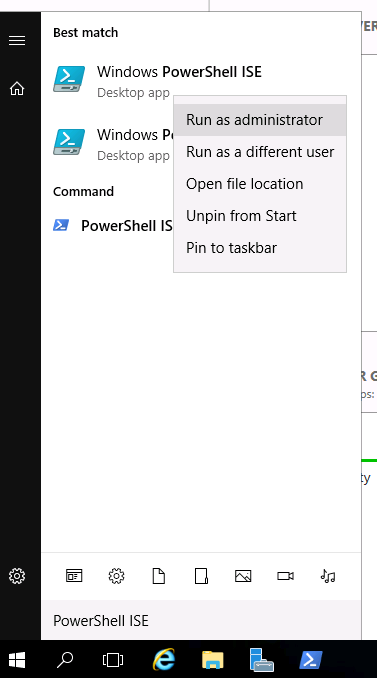
Important: If you don’t run the ISE as an administrator, then the DSC commands will fail!
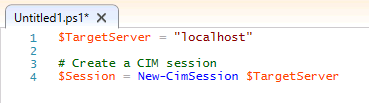
To test these settings, type the following commands:
$TargetServer = "SAMS01"
# Create a CIM session
$Session = New-CimSession $TargetServer
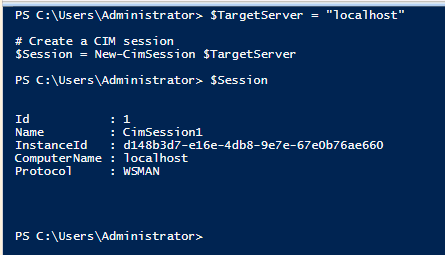
When we execute the script with F5 we should get the following:
If you get an error about the WinRM service or access denied, check the following:
- You are running the PowerShell ISE as an administrator
- The “Enable PSRemoting” GPO we created earlier is being applied to the target server or workstation
If you have errors, please refer to the lecture for enabling PSRemoting with Group Policy.
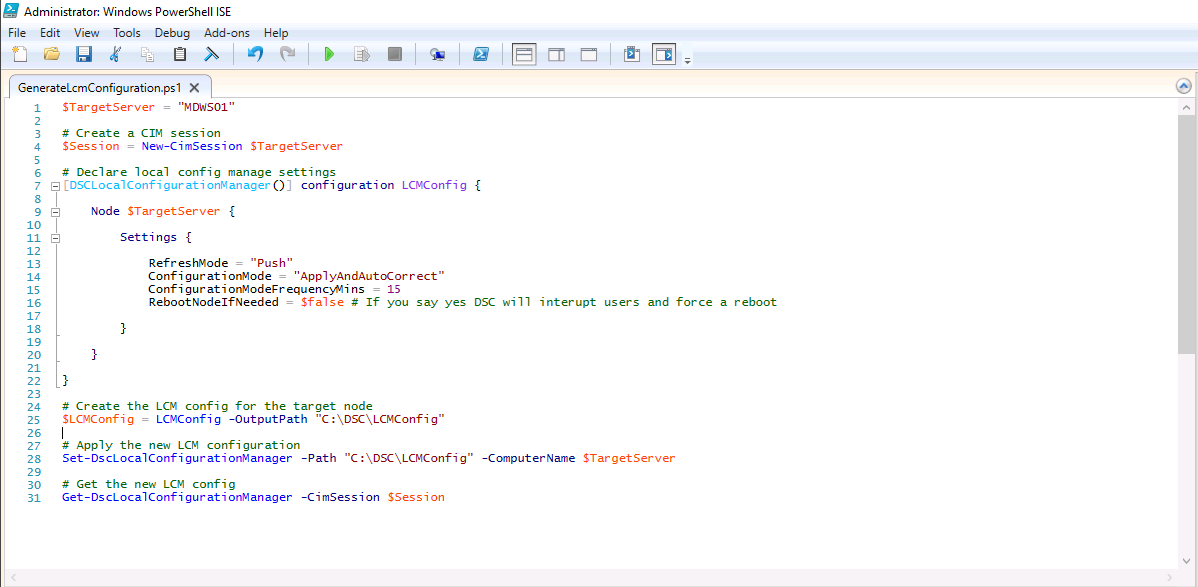
Next, we have to configure the Local Configuration Manager or LCM. We can do this with the code below:
# Declare local config manage settings
[DSCLocalConfigurationManager()] configuration LCMConfig {
Node $TargetServer {
Settings {
RefreshMode = "Push"
ConfigurationMode = "ApplyAndAutoCorrect"
ConfigurationModeFrequencyMins = 15
RebootNodeIfNeeded = $false # If you say yes DSC will interrupt users and force a reboot
}
}
}
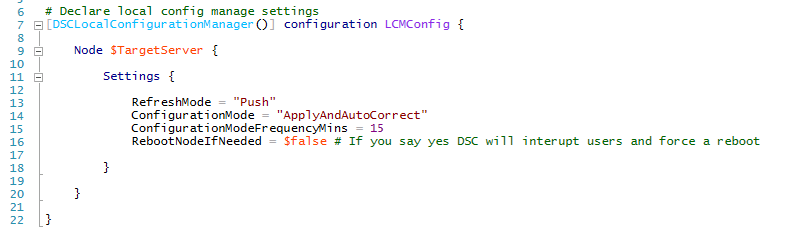
First, we are declaring the configuration object as a DSC local configuration manager object type with the [DSCLocalConfigurationManager()] attribute on line 7. Then we declare the configuration as “LCMConfig”. You can think of configurations similar to a function.
Next, we call the node we want to modify. In this case, it is the variable “$TargetServer” which we have set to “MDWS01”. On line 11 we are declaring the settings we want to apply to the LCM.
- RefreshMode could be Disabled, Push or Pull
- ConfigurationMode could be ApplyOnly, ApplyAndMonitor or ApplyAndAutoCorrect
- ConfigurationModeFrequencyMins can be any integer above 10
- RebootNodeIfNeeded can be $true or $false
There are many more settings you can modify and learn about in the Microsoft documentation:
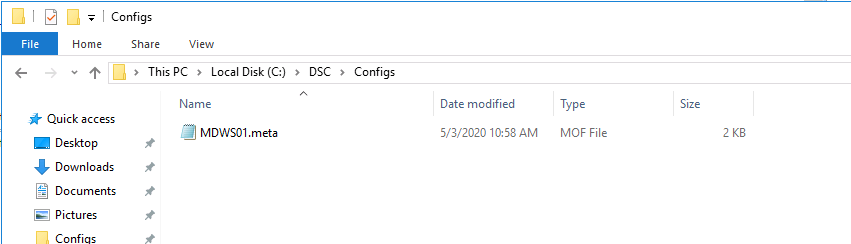
Now we need to take these settings and create a configuration file for the target node. Thankfully PowerShell will do this for us. We just need a folder to store these configuration files. I’m going to make a folder called “DSC” on the C drive:

Back in the PowerShell ISE, let’s create the new LCM configuration file with the following command:
$LCMConfig = LCMConfig -OutputPath “C:\DSC\Config”
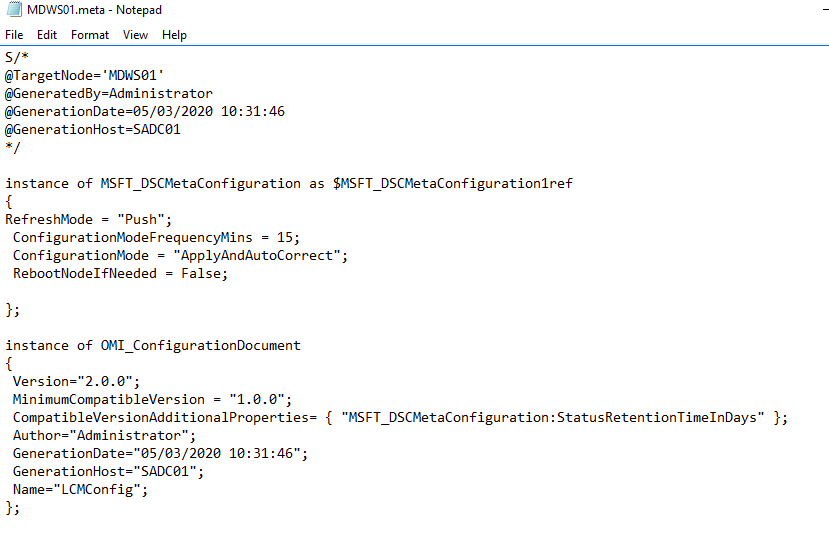
This will generate a MOF file with the hostname like MDWS01.meta.mof:
This is the actual DSC config file that is applied to the machine. You can open the file and see the settings that are being applied - but you don’t need to do anything with the file.
Back at the ISE, we need to apply the configuration to the target server. We can do that with the following command:
Set-DscLocalConfigurationManager -Path “C:\DSC\Configs” -ComputerName $TargetServer
This will look inside the LCMConfig folder for a MOF file with the same host name as “$TargetComputer”. In our example, it’s MDWS01. Then it will apply that MOF file to the target host.
Once we execute that command, the settings have been applied to the target computer.

Now we can see what settings are currently being applied with the “Get-DscLocalConfigurationManager -CimSession $Session” command:
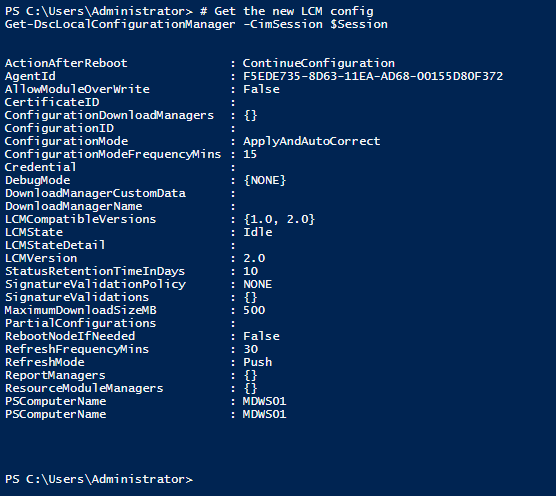
We can see the RefreshMode, ConfigurationMode, ConfigurationModeFrequencyMins, and RebootNodeIfNeeded settings that we configured have been applied to the computer.
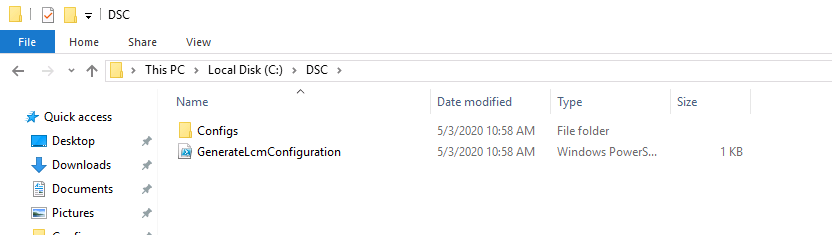
As a final step I am going to save the script as “GenerateLcmConfiguration.ps1” under “C:\DSC”:
And that’s it! The final script is below incase you want to copy / paste:
$TargetServer = "SAMS01"
# Create a CIM session
$Session = New-CimSession $TargetServer
# Declare local config manage settings
[DSCLocalConfigurationManager()] configuration LCMConfig {
Node $TargetServer {
Settings {
RefreshMode = "Push"
ConfigurationMode = "ApplyAndAutoCorrect"
ConfigurationModeFrequencyMins = 30
RebootNodeIfNeeded = $false # If you say yes DSC will interupt users and force a reboot
}
}
}
# Create LCM config for the target node
$LCMConfig = LCMConfig -OutputPath "C:\DSC\Config"
# Apply the new LCM config
Set-DscLocalConfigurationManager -Path “C:\DSC\Config” -ComputerName $TargetServer
# Get the new LCM config
Get-DscLocalConfigurationManager -CimSession $Session