Promoting Our Second Domain Controller

Full-Access Members Only
Sorry, this lesson is only available to Server Academy Full-Access members. Become a Full-Access member now and get instant access to this and many more premium courses. Click the button below and get instant access now.
Instructions
Q&A (0)
Notes (0)
Resources (0)

Saving Progress...
Resources
There are no resources for this lesson.
Notes can be saved and accessed anywhere in the course. They also double as bookmarks so you can quickly review important lesson material.
In this lecture, we’ll be promoting our second domain controller to our domain.
Now, a second domain controller is built for redundancy purposes and for larger networks that you would like to do some type of load balancing or you want to have multiple domain controllers that your users and clients can use.
It can also be useful if you have two different sites, so if you configure Active Directory Sites and Services and you have a location in New York and another in Chicago you may want to promote a Domain Controller in Chicago and have all your users use the closest Domain Controller to their location.
At this point, you should have created your second VM with the Windows Server operating system and you should have configured the computer name and IP address.
Let’s dig into the IP configuration since this is very important.
Open your Ethernet Adapter properties.
NOTE: For the lab use the following network settings for your second domain controller if you are using our IT labs:
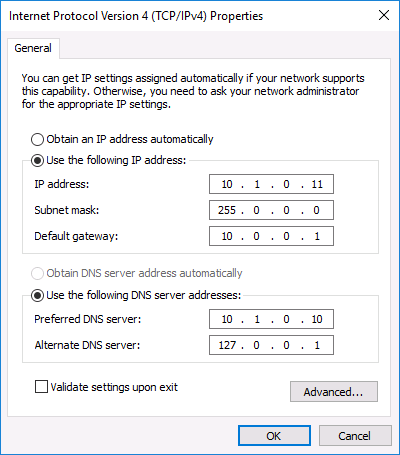
We are using an IP address ending in .11 since our primary Domain Controller has an IP ending in .10.
The preferred DNS server is the Primary Domain Controller’s IP Address and that is because it has the DNS Server role installed. That means that when we try to resolve serveracademy.com or ad.serveracademy.com it will resolve to the IP Address of the Primary Domain Controller.
If we do not do this we will not be able to resolve the domain name we are trying to join this server to.
To test we can open a Command Prompt and type nslookup ad.serveracademy.com. What this does is return the IP Address of my primary Domain Controller.
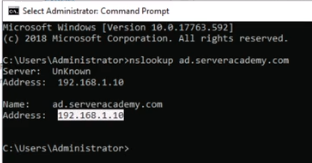
This is possible because we have configured the IP Address of the Primary Domain Controller as the preferred DNS server.
If you have issues joining the secondary server to the domain, check the DNS IP Address of the local server.
Now, let’s promote the server as a Domain Controller. In Server Manager click Manage and select Add Roles and Features.
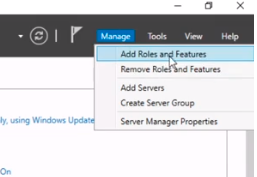
Click Next on the Before you begin Window.

In the Select installation type window select the radio button Role-based or feature-based installation and click Next.
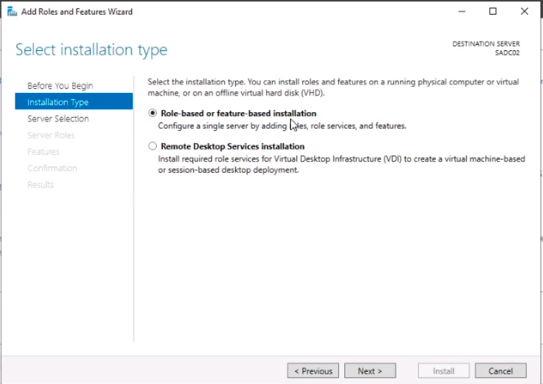
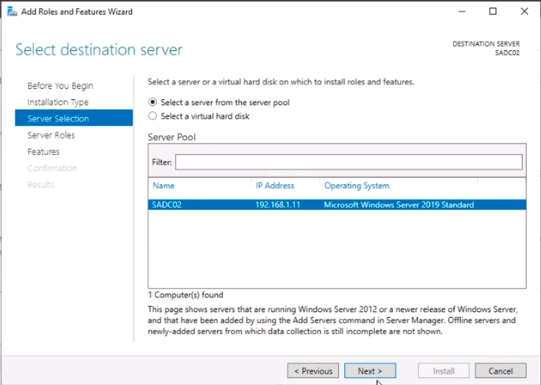
Select the radio button Select a server from the server pool and click on the server SADC02 and click Next.
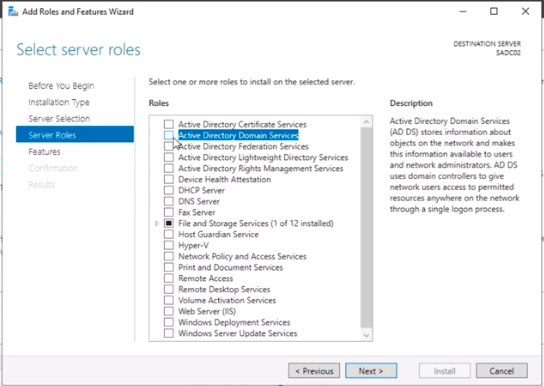
Now, for the Server Role select Active Directory Domain Services. This is similar as when we installed our primary Domain Controller. The difference will be when we promote the Domain Controller.
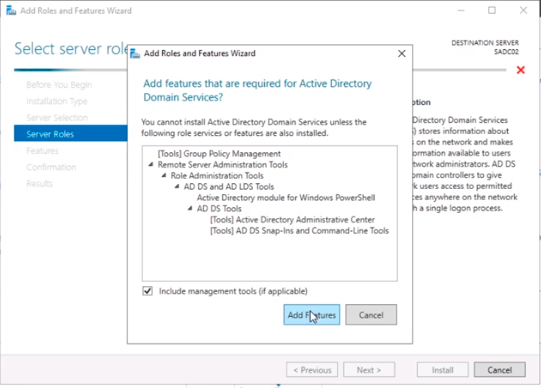
Click on the Add Features button to add all the features for our AD DS server role.
Click Next to continue the wizard.
Click Next a couple of times to get to the Install button on the Confirm installation selection window.
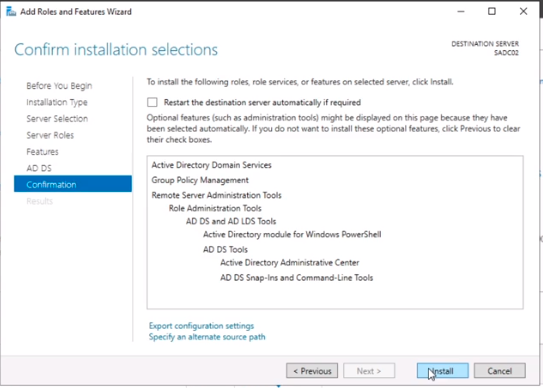
Now we just need the installation to complete to promote this server as a Secondary Domain Controller to our existing domain.
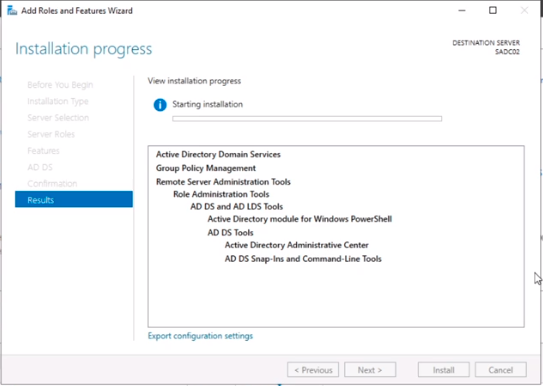
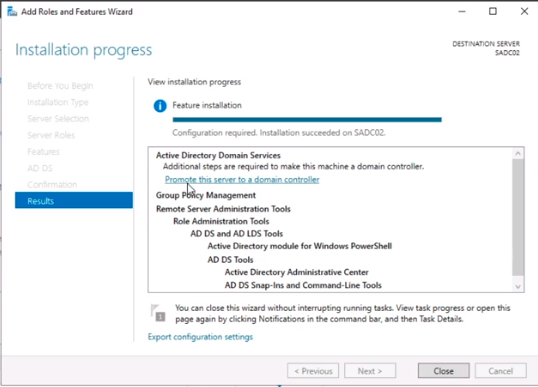
Now that the installation is complete we can click on the hyperlink Promote this server to a domain controller.
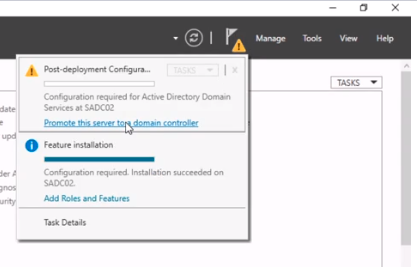
Optionally, if you close the window you can click the flag at the upper right and click the same link there.
Now we are presented with three options. We can add this Domain Controller to an existing domain, add the domain to an existing forest, and add a new forest.
When we first created the first domain we chose to add a new forest. Since we already have an existing domain we are going to choose the first option to Add a domain controller to an existing domain.
Then we type the domain we are adding the server to ad.serveracademy.com.

Server Academy Members Only
Sorry, this lesson is only available to Server Academy Full Access members. Become a Full-Access Member now and you’ll get instant access to all of our courses.


with regards to setting the dns to the primary domain, from what i understand, its to make sure that in the future the sub domain is contactable? it adds its ip add to the resolver?
Hi Beno Tsintsadze
That’s correct. It is for the future subdomain to be able to find the domain controller, which typically has the DNS server role.
Ricardo
hi admin,
with regards to how sadc02 was created, isit just having another vm with wserver installed and the name was changed? it’s kind of confusing to me and you immediately went to show me sadc02… pls clarify
thnks
Hi ALWI DELGADO ALAUDIN
Right, it was missing some introduction on how it appeared on the network all of a sudden. SADC02 is just, as you said, a virtual machine on the same network as Windows Server with the name changed to SADC02. From here, Paul explains how to install the role.
Ricardo
isit in the same network? if it isn’t how would i configure sadc02 if i was in brazil and sadc01 was in taiwan?
They are on the same network. You will see this later under the section Active Directory Sites and Services. Another way would be to use a Site to Sire VPN, and I am sure there might be other ways of interconnecting two separate sites and subnets.
Is this able to be done with Virtual box? Because I have installed 2 VMs of 2016 in Virtual box and havent had issues until now.
Hi Joseph Whelan
Yes, it can be done with VirtualBox. What are the issues you are having?
In the video, the static IP to SADC02 is 192.168.1.11 but in the Lab objective, we have to assign 10.1.0.11. What am I missing here?
Hi MoSalah,
Right, we are sorry for the confusion. The IT lab have a different subnet than the one used on the video due to the network on which the labs run. When recording the video was on VirtualBox so that is why.
If you have any other subnet range, you will need to have them with different IP addresses and they should be able to communicate.
Ricardo
I am wanting to get the “Active Directory Administrator Certificate” to help me get a job. However the requirements differ from the learning path advised. Should I stick to the requirements or the learning path?
Hi Paul Shepherd,
What are the requirements? “Active Directory Administrator Certificate” learning path will give you a good understanding of Active Directory to get a job, but there might be more to study depending on the job requirements.
The requirements to get that certificate from Server Academy not in line with the advised Learning Path. Should I stick to the learning path advised on the dashboard?
Oh!, I see what you mean. Follow the “Active Directory Administrator Certificate” courses to learn and understand how to manage Active Directory in a domain. With the certificate that can help a lot start looking for a job.
living in Germany working with german keyboard. But since I changed from Windows 10 to Windows 11, I can’t choose and use the german keyboard like I used to. I can’t type backslash or at signs anymore
Hi Yannick Teguimdje,
Check Your Keyboard Layout Settings to see if there’s a German keyboard layout. You can add one in Settings > Time & Language > Language & region > Add a language.
-Ricardo