
Configuring Active Directory Sites and Services

Full-Access Members Only
Sorry, this lesson is only available to Server Academy Full-Access members. Become a Full-Access member now and get instant access to this and many more premium courses. Click the button below and get instant access now.
Instructions
Q&A (0)
Notes (0)
Resources (0)
Saving Progress...
Resources
There are no resources for this lesson.
Notes can be saved and accessed anywhere in the course. They also double as bookmarks so you can quickly review important lesson material.
In this lecture, we are going to be working in Active Directory Sites and Services.
First thing we are going to do is rename our Primary Site, then we are going to create a New Site for ITFDC02 subnet, and we are going to move the server to the New Site. We are going to create a subnet, and we are going to create or rename our Site Link that we are using that is created by default.
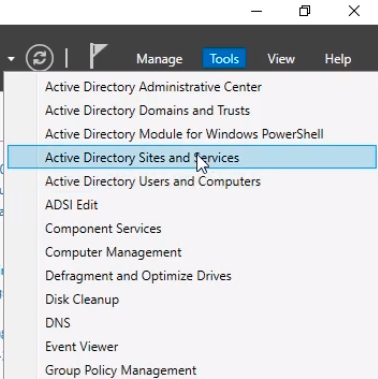
Login to ITFDC01 and on Server Manager > Tools > Active Directory Sites and Services.
Active Directory Sites and Services console open with the default options when you build a new Domain using Active Directory Domain Services.
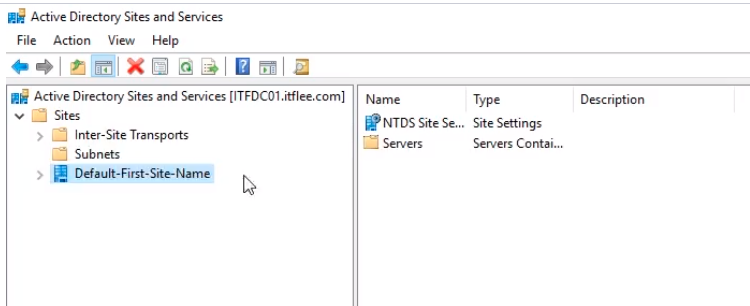
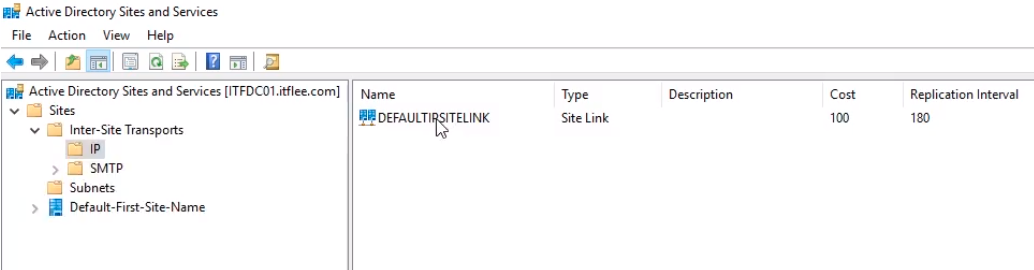
The first folder under Sites, Inter-Site Transports are basically our Site Links. This is how we connect our sites together. So we have an IP and SMTP folder.
Most of the time we are going to use the IP. SMTP is only used when there’s no physical line connecting you to networks. This literally means you can replicate Active Directory Sites and Services with SMTP over email. It is important that you realize that it is not replicating the actual domain controller SYSVOLume and things like that it is just replicating Active Directory Sites and Services.
Under SMTP there will be no information.
Under Subnets will not be listed any information.
Under Default First Site Name if we expand it we see a Server folder we have our Domain Controllers ITFDC01 and ITFDC02 listed.
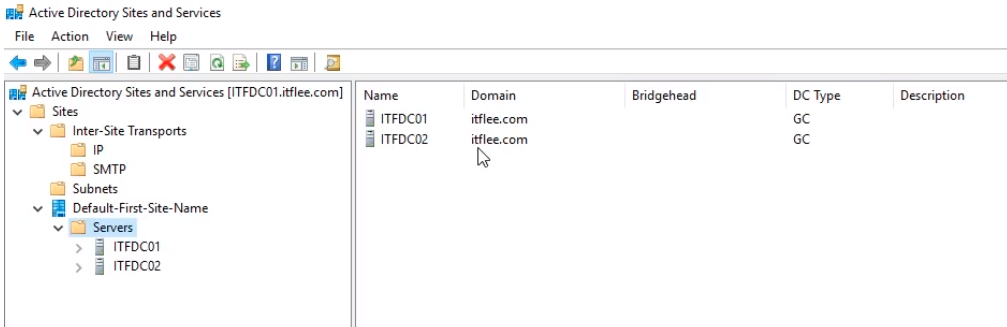
Remember that we’ve put ITFDC02 in a different subnet, so we are pretending this server is in a different location.
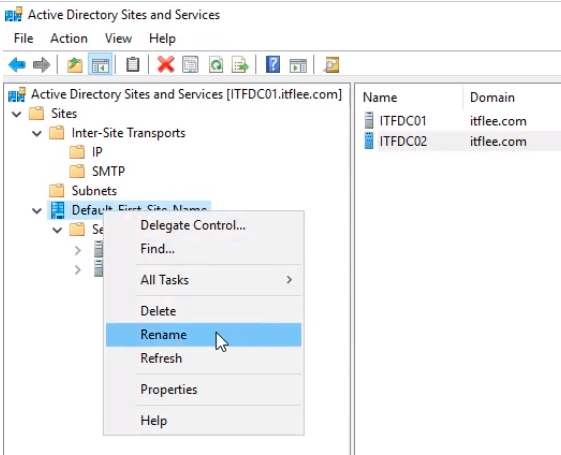
First thing we want to do is rename the Default First Site Name and we will give it a more descriptive name. Right-click and select Rename and name it NewYork.
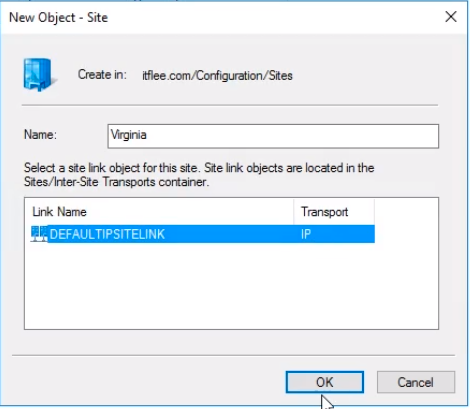
Now we are going to create a New Site. Right-click on Site and select New Site...

Let’s name it Virginia and choose a Site Link that we are going to add the Site to. We only have one option for Site Link. Choose the DEFAULTIPSITELINK Site Link and click OK.
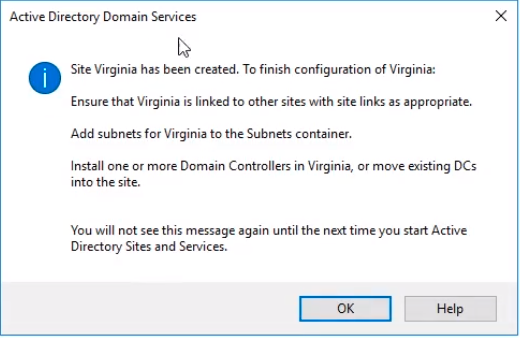
We can see a little popup. Read the information on the things we need to do. Click OK to close it.
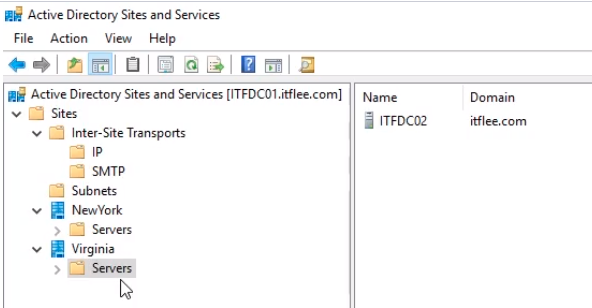
Expand the new Virginia Site to show all the information. If we expand the Servers folder we see it is empty.

Click on the NewYork Servers folder and select ITFDC02 and either drag it to the Virginia Server folder or we can right-click it and select Move.
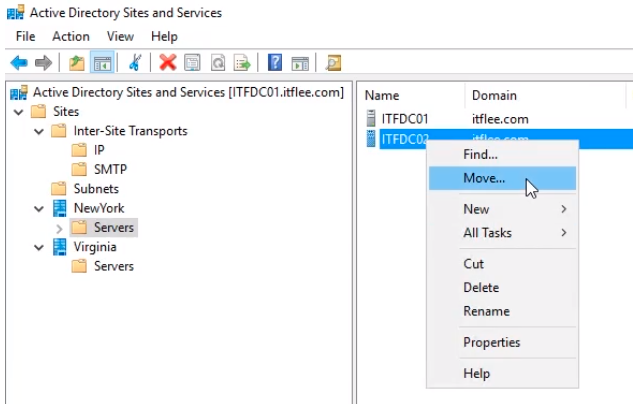
Select Virginia from the popup window and click OK.
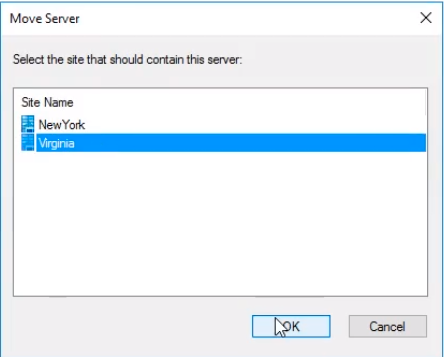
Now if we click under the Virginia Site and on the Servers folder we see we have now ITFDC02 server.
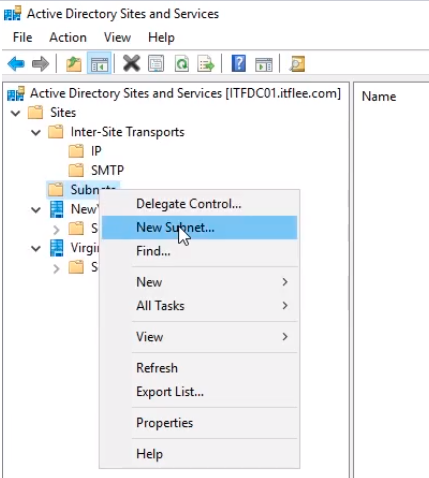
Now we need to create a subnet that states that all the computers under this subnet go to this Site.
Click on the Subnets folder and right click it and select New Subnet...
Now in the new window we will define the subnet for the NewYork site. Type the prefix 192.168.0.0/24 because we are using the whole network. Select NewYork and click OK.
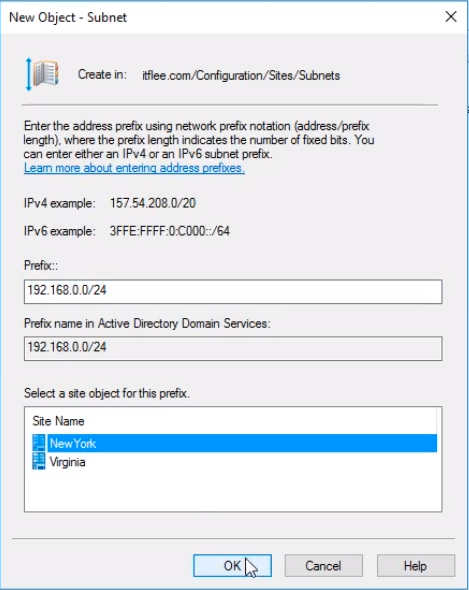
We repeat the same steps for Virginia. For the prefix type 192.18.2.0/24 and select Virginia and OK.
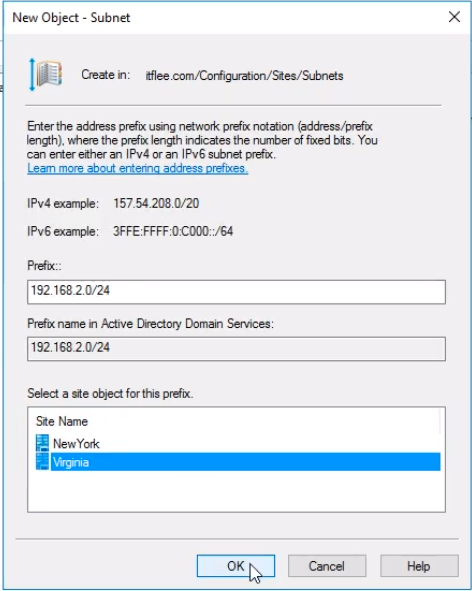
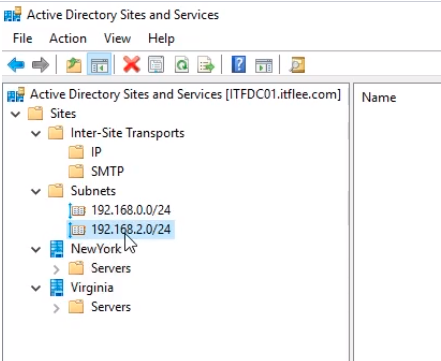
We have now two subnets under the Subnets folder. Any computer that joins the domain under one of the subnets will be automatically added to a site that belongs to the subnet.
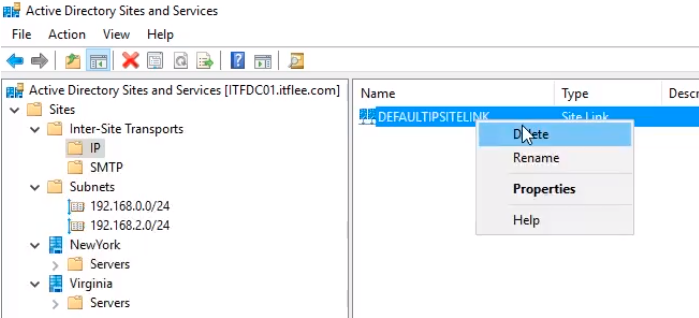
The last thing we need to do now is under Inter-Site-Transports > IP > DEFAULTIPSITETRANSPORT right click and choose Delete.
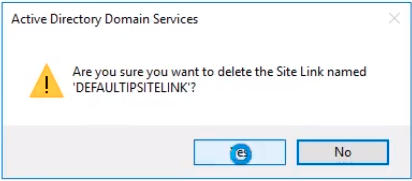
Click OK on the confirmation popup.
Now, right-click the IP folder and select New Site Link...
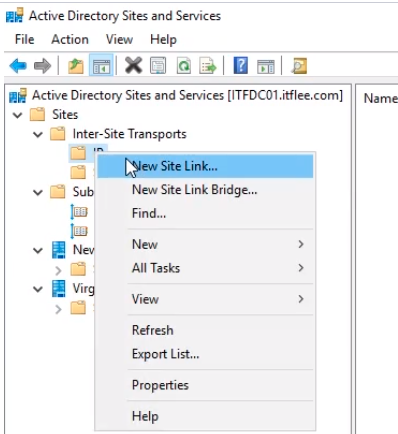
On the New Object - Site Link window for the Name type NewYork-Virginia and click OK.
Server Academy Members Only
Sorry, this lesson is only available to Server Academy Full Access members. Become a Full-Access Member now and you’ll get instant access to all of our courses.


this is where it’s getting a little bit confusing to me?
How-to/steps are well prepared, but I miss a little bit of theory upfront to understand what exactly is this about and why would I need it configured in such way.
In other words, why would I create these site links and connections between DCs and locations?
To replicate all the content (objects, OUs, policies etc.) between many Domain Controllers in different locations and different networks?
Sorry for such question, it has been a long day and I’m exhausted AF.
Hi-1.jpg) Ivan Komorny
Ivan Komorny
You will create the site links and connections if you have different locations where your ADs are located. This is to replicate AD info across wan links. The site links are assigned a replication interval and the cost that represents the underlying network characteristics. This is to replicate information between two sites only once per night or at a time when network demands are low, allowing more bandwidth availability to replicate AD DS information to all those ADs.
More information:
https://learn.microsoft.com/en-us/windows-server/identity/ad-ds/get-started/replication/active-directory-replication-concepts
Ricardo