
Configuring Our WSUS Server

Full-Access Members Only
Sorry, this lesson is only available to Server Academy Full-Access members. Become a Full-Access member now and get instant access to this and many more premium courses. Click the button below and get instant access now.
Instructions
Q&A (0)
Notes (0)
Resources (0)
Saving Progress...
Resources
There are no resources for this lesson.
Notes can be saved and accessed anywhere in the course. They also double as bookmarks so you can quickly review important lesson material.
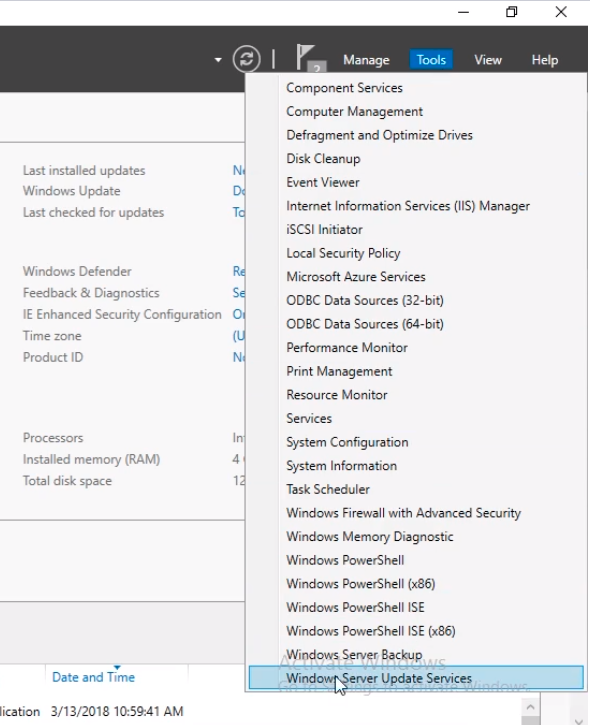
In this lecture, we are going to be configuring our IPWSUS01 Windows Server Update Services instance.
Open Server Manager > Tools > Windows Server Update Services.
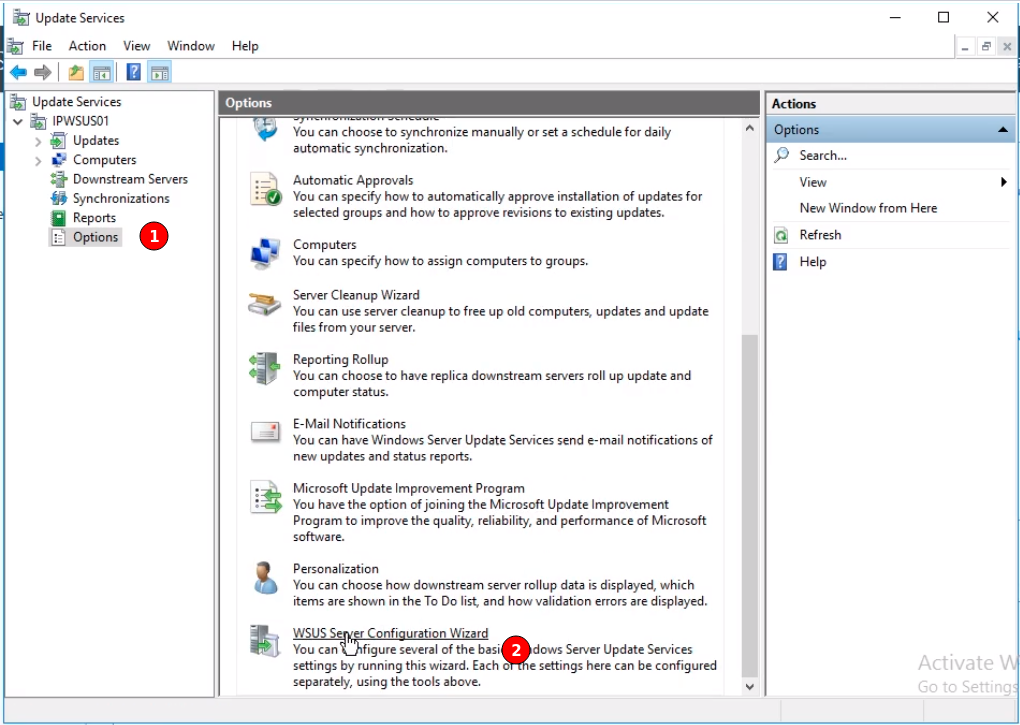
Now, we notice that when opening it we have a wizard that is asking us to configure WSUS.
If you close the wizard and have WSUS open, you can navigate to Options (1) > WSUS Server Configuration WIzard (2).
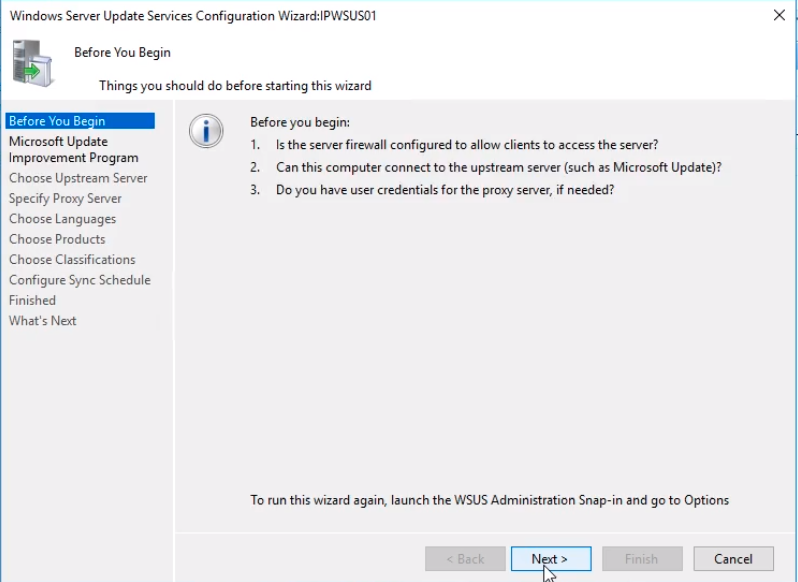
On the Before You Begin page we have a couple of questions we need to consider. Click Next to continue.
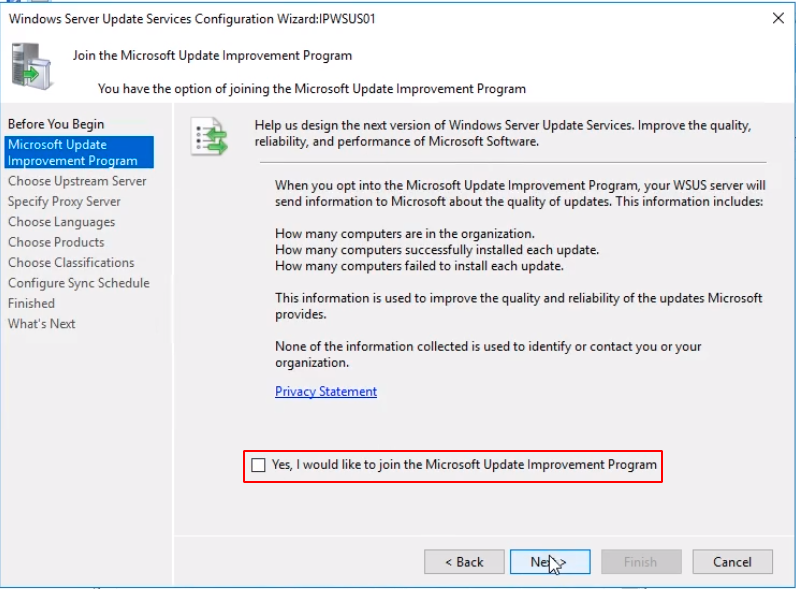
We have the option to opt into the Microsoft Update Improvement Program. Since we are in a lab environment we are going to uncheck that option.
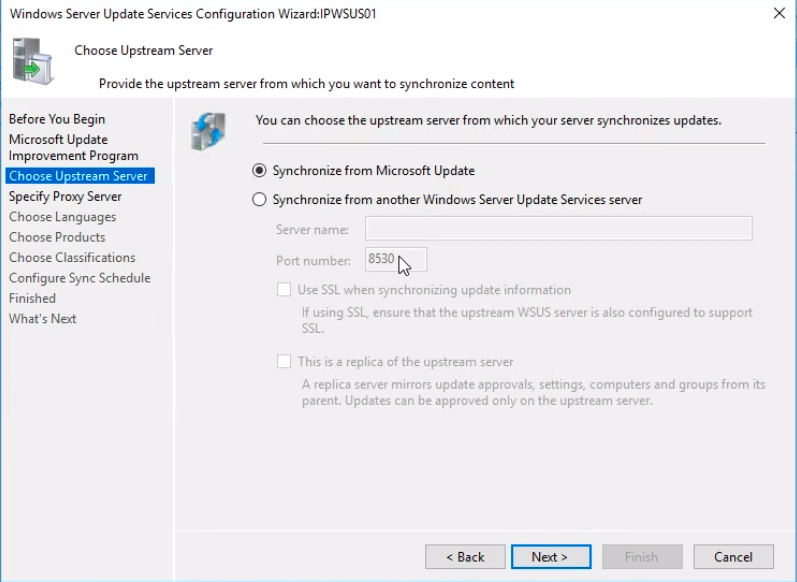
Now we need to Choose Upstream Server. We choose the radio button to Synchronize from Microsoft Update. Click Next to continue.
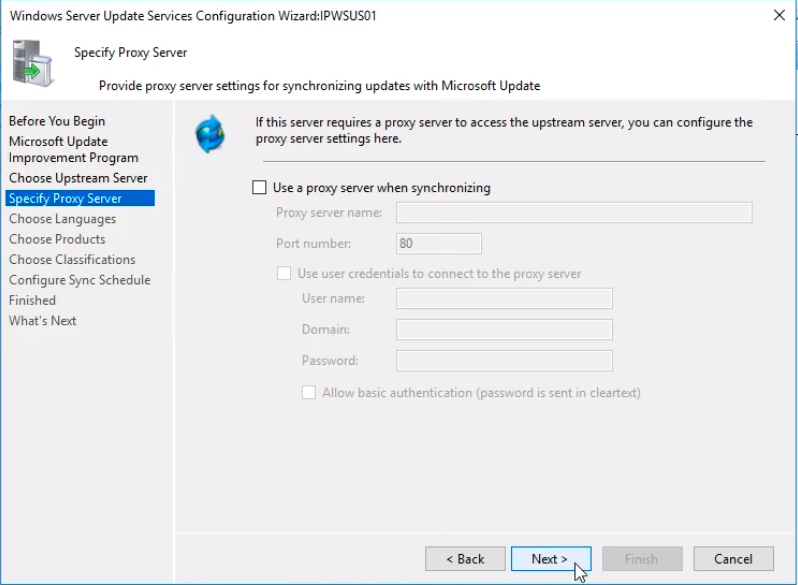
In the Specify Proxy Server window, we can enter proxy information for our network if we have one. Since we don’t have it in our lab environment we click Next.
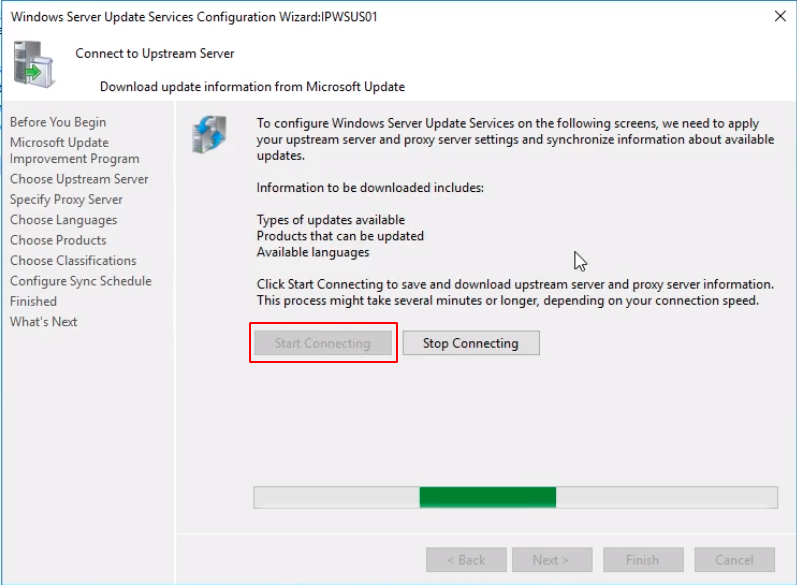
Now in the Connect to Upstream Server window we need to test our connection by clicking the Start Connecting button. This will initiate a test process. This process takes around 5 minutes.
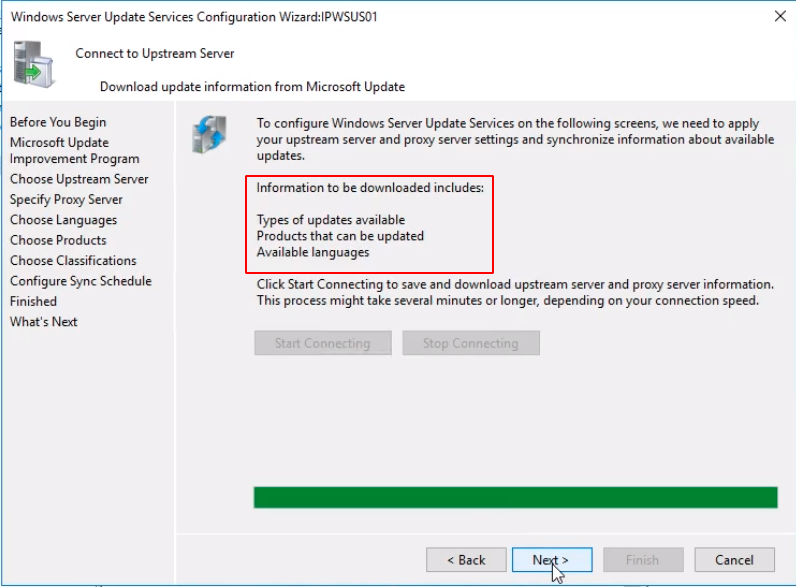
When done we will see the information to be downloaded. That includes Types of updates available, Products that can be updated, Available languages. Click on Next to continue.
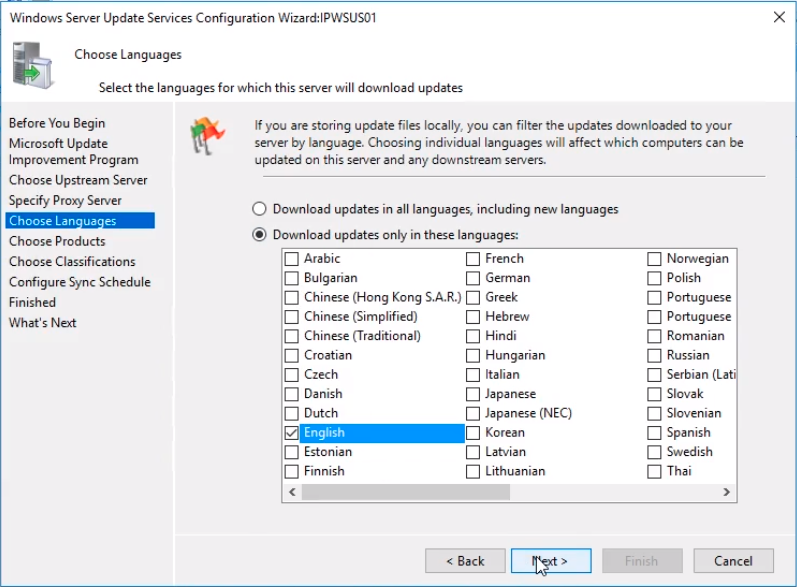
We are now brought to the screen Choose Language for languages we want to download updates for. By default, it selects Download updates in all languages, including new languages. Now, I strongly recommend NOT to choose this option unless you have a specific need to do so, or if you have a very large hard drive to store all the languages. It is better to select just the languages you need like English. Choose Download updates only in these languages radio button and check English and click Next to continue.
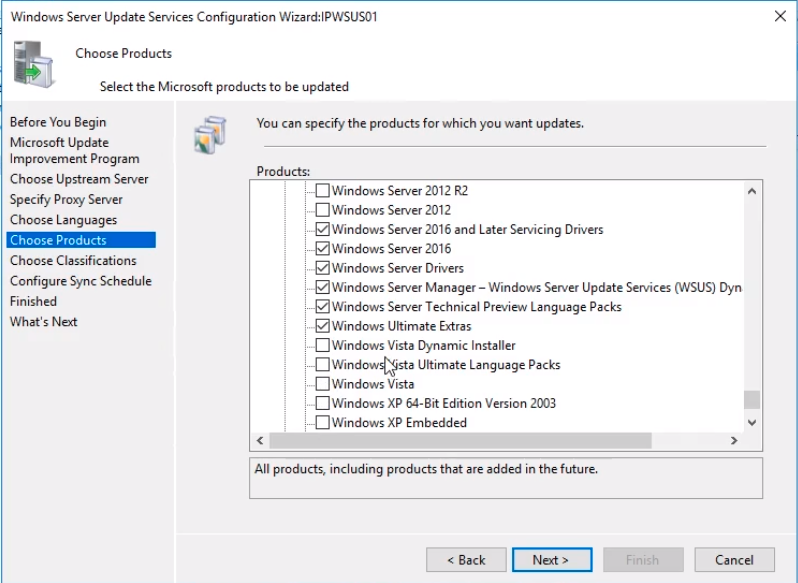
Under the Choose Products selection window we need to choose products that we want to download updates for. Scroll down to select the products you use like Windows 10 and Windows Server 2016. We can enable more options later if we choose to change the products in use. When done click Next.
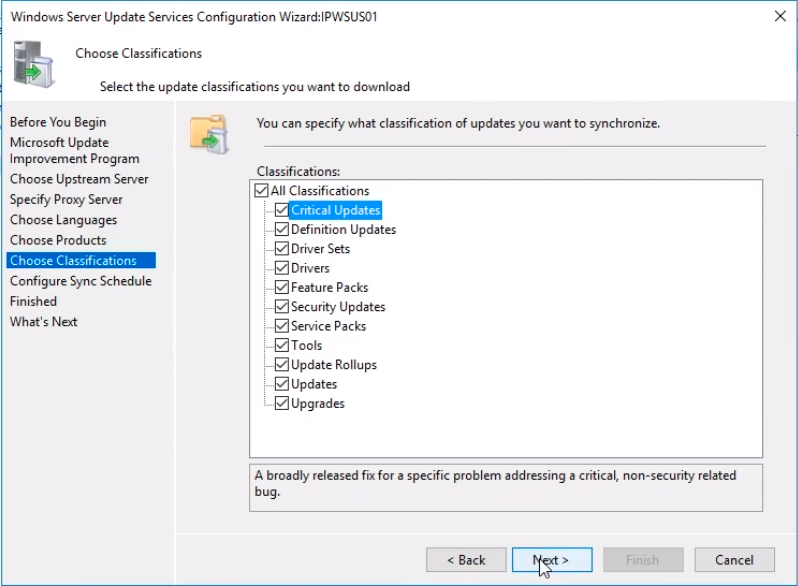
Now we need to choose the classification on the Choose Classification window. Choose the items you think you need. We are being liberal in our selections and including everything but you might not need everything in your environment. When done click Next.
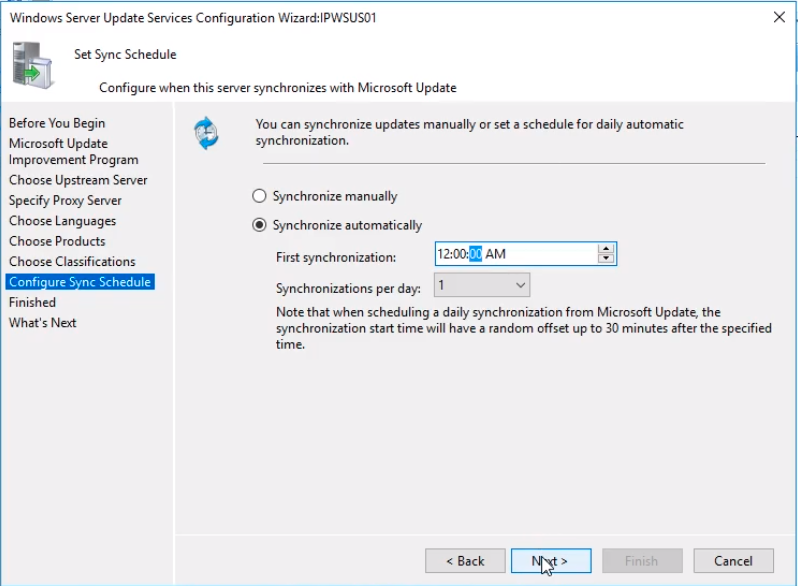
We now need to Set a Sync Schedule for synchronization with Microsoft Update. We select a schedule out of business hours. We set it to run early in the morning at 12:00:00 AM when selecting Synchronize automatically. Click Next to continue.
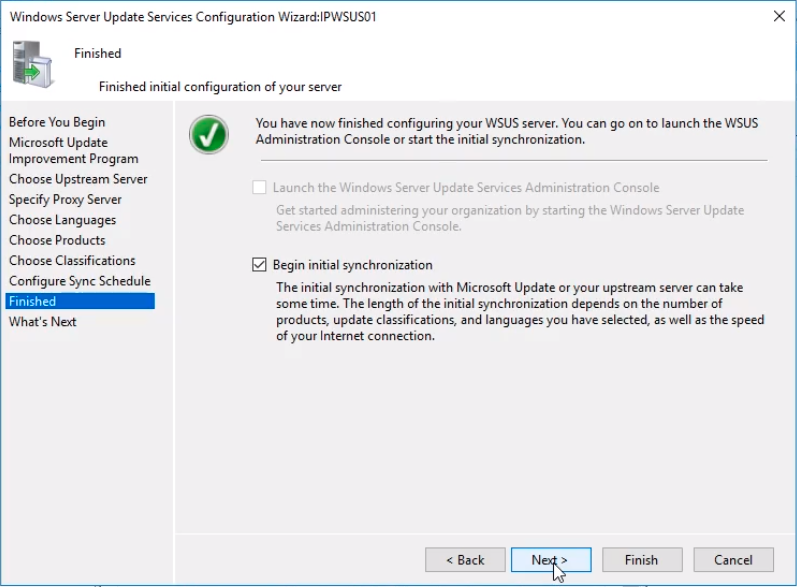
On the Finished screen, we select the option to Begin the initial synchronization checkbox. Click the Next button.
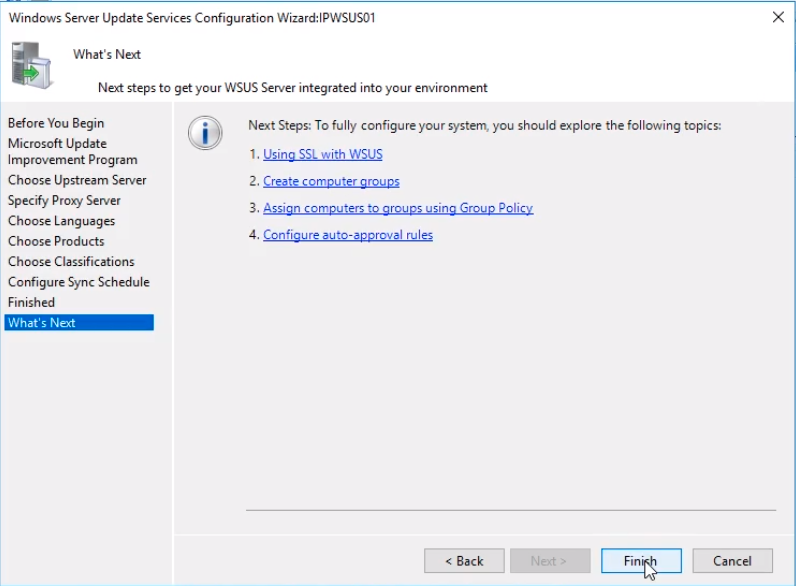
Now, on the What’s Next window we have some recommendations on how to configure our system. We will cover these later in the course. Click Finish to end the wizard.
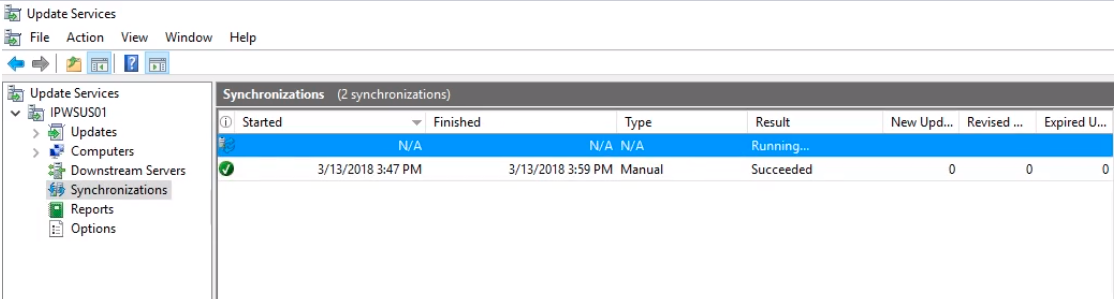
If we check the Synchronizations Tab we can see that the initial synchronization is running. Once complete we will have updated the Windows internal database with the available updates that we could download. Updates are NOT downloaded until we approve the updates.
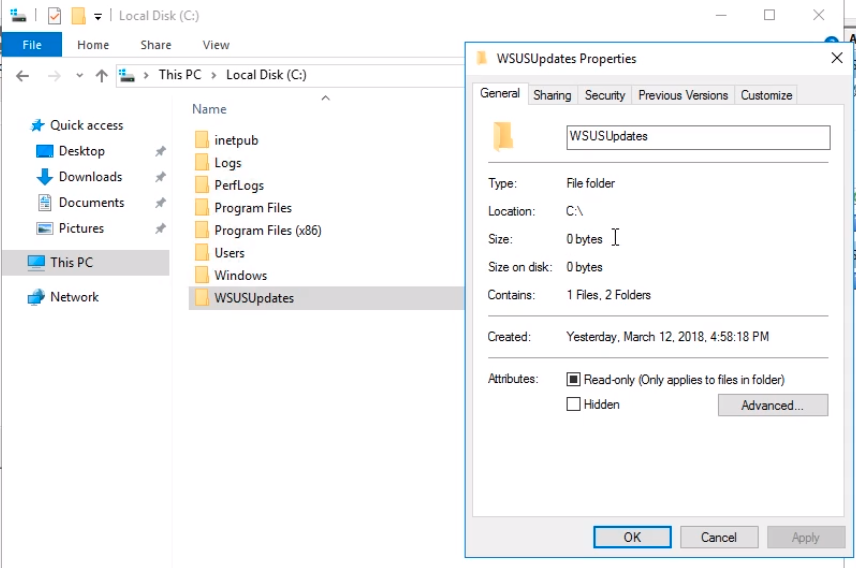
If we check our WSUSUpdates folder under C:\ and check the size, we can see the size is 0 bytes. Once the synchronization completes it will be around ~20 MB but it will not be in the GB range like if we download the updates.
One last thing that we want to check is the Firewall just to make sure we have the correct ports open.
Open Server Manager and click on the Windows Firewall link Domain On.
Server Academy Members Only
Sorry, this lesson is only available to Server Academy Full Access members. Become a Full-Access Member now and you’ll get instant access to all of our courses.


