
Deploying Software with Group Policy
Instructions
Q&A (0)
Notes (0)
Resources (1)
Saving Progress...
Resources
7z1701.msi
Open URL
Notes can be saved and accessed anywhere in the course. They also double as bookmarks so you can quickly review important lesson material.
In this lecture, I am going to be showing you how to deploy MSI to your network with Group Policy.
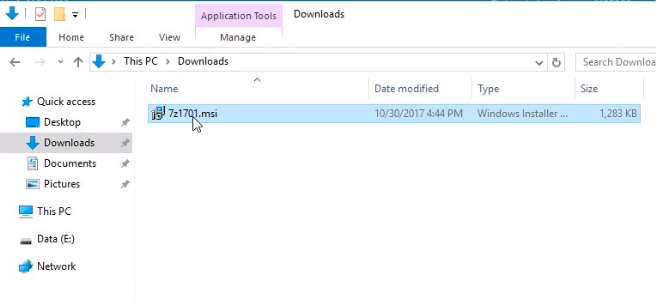
We are going to deploy 7zip. We have already downloaded it under the Resources of this lecture so you can find it here. You can google for 7zip MSI download to download it. Sometimes these MSI are updated or removed from the internet so we have attached them to this lecture.
Once we have downloaded the file 7z1701.msi.
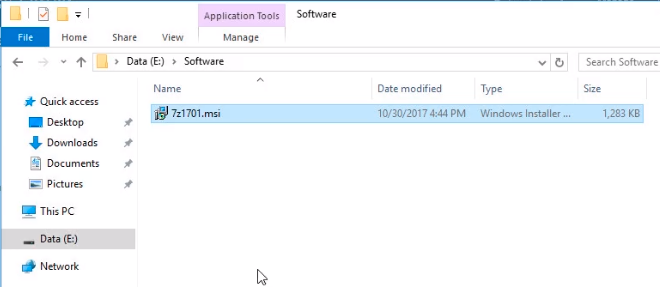
What we need to do now is to put it in a file share where our computers will have access to it. We are moving the file to our E:\ drive under a new folder named Software.
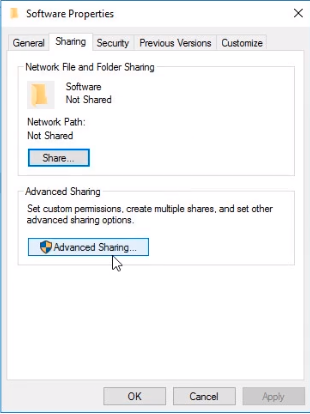
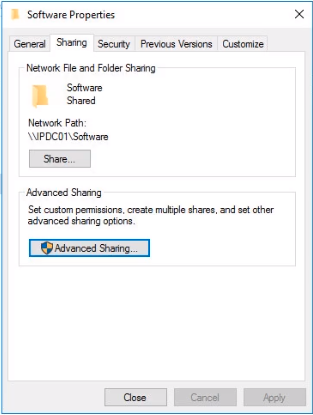
Right-click the Software folder and choose Properties, click on the Sharing Tab and click on the Advanced Sharing button.
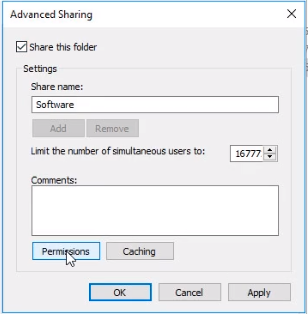
Click the Share this folder checkbox and click on the Permissions button.
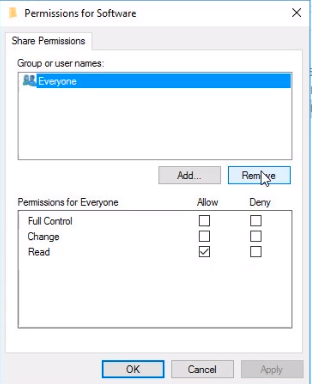
Now, let's remove the Everyone group by selecting it and clicking on the Remove button.
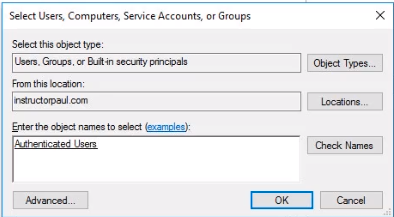
Click Add button and search from the box typing Authenticated Users and click on the Check Names button. If the group name is underlined then click on the Ok button.
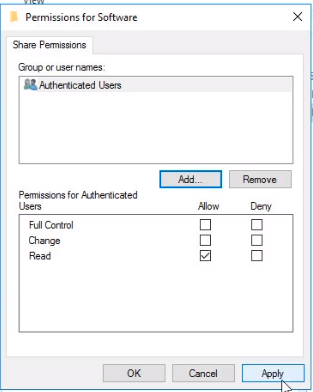
Make sure the Authenticated Users have Read permissions and click on the Apply and OK buttons.
Here we can see the network path to our shared folder. Copy the UNC path to your clipboard by right-clicking it and choosing copy.
Now, let’s create the Group Policy. Open Server Manager > Tools > Group Policy Management.
There are a couple of ways we can do this. We can install this on a per-user basis or a computer basis. We also need to decide where we want to link the GPO. We want to install 7zip for every computer on my domain.
If you are deploying software for a certain computer or user make sure you link the GPO to the desired OUs.
Right-click on instructorpaul.com on the root domain so that the GPO can apply to the entire domain and select Create a GPO in this domain, and Link it here...
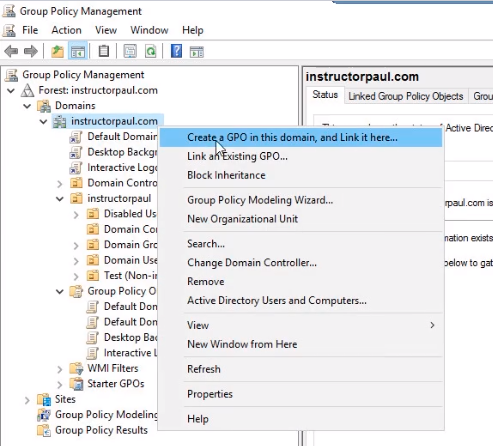
Name the GPO Software_Deployment_7zip_v1701 and click the OK button.
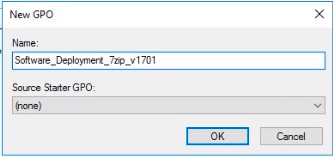
TIP: The naming convention we have selected allows us to identify what we are doing with the group policy.
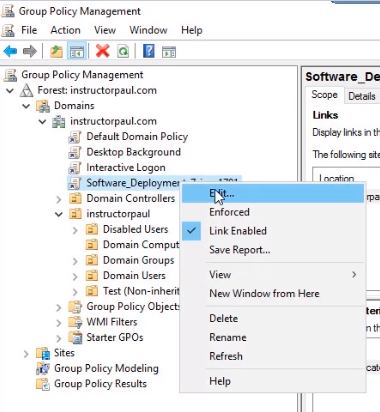
Now, right-click on the recently created GPO and select Edit.
We need to either select a Computer Configuration or a User Configuration. We could do either because we are linking this GPO (in my case) to the root of the domain and below this domain are both user accounts and computer accounts.
TIP: There are both Pros and Cons in using both. First, if I deploy it under the Computer Configuration this Group Policy will require a reboot in order for the policy to take effect and the software to be installed. If we deploy it under the User Configuration, every time a user logs in to a different computer it will install the software. I prefer to use the computer configuration and have it installed on my computers regardless of the user accounts.
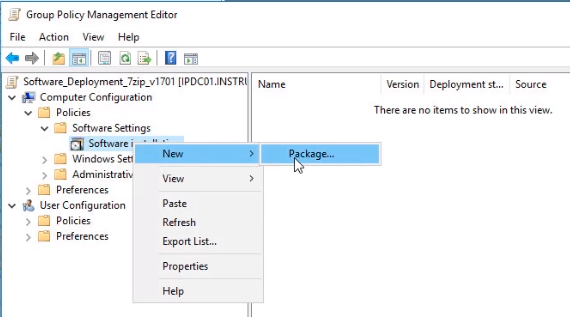
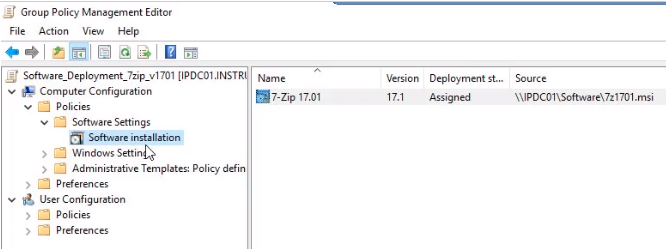
Expand Computer Configuration > Policies > Software Settings > Software Installations and right click New > Package
Now, instead of going to the data drive directly we will enter the UNC path \\IPDC01\Software\ and press Enter key. We can see our software package. Click to select it and click Open.

Now we have the Deploy Software window. Select Assigned and click on the OK button.
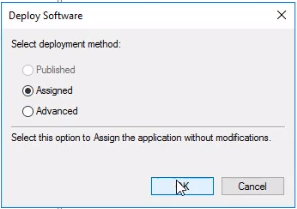
NOTE: We have Assigned and Advanced options available. Published is grayed out because we are under the Computer Configuration. If we were under the User Configuration we would be able to choose it. In Published the user would have the option of installing the software. Since we are deploying this to the computer itself it would not be able to choose if it wants it or not (the software). If we choose Assigned it is just going to assign the application without modifications. If we choose Advanced this will allow us to configure the published or assigned options and apply modifications to the package.
In the Group Policy window, we can see now that we are deploying our 7zip package, and the source is \\DC01\Software\7z1701.msi.
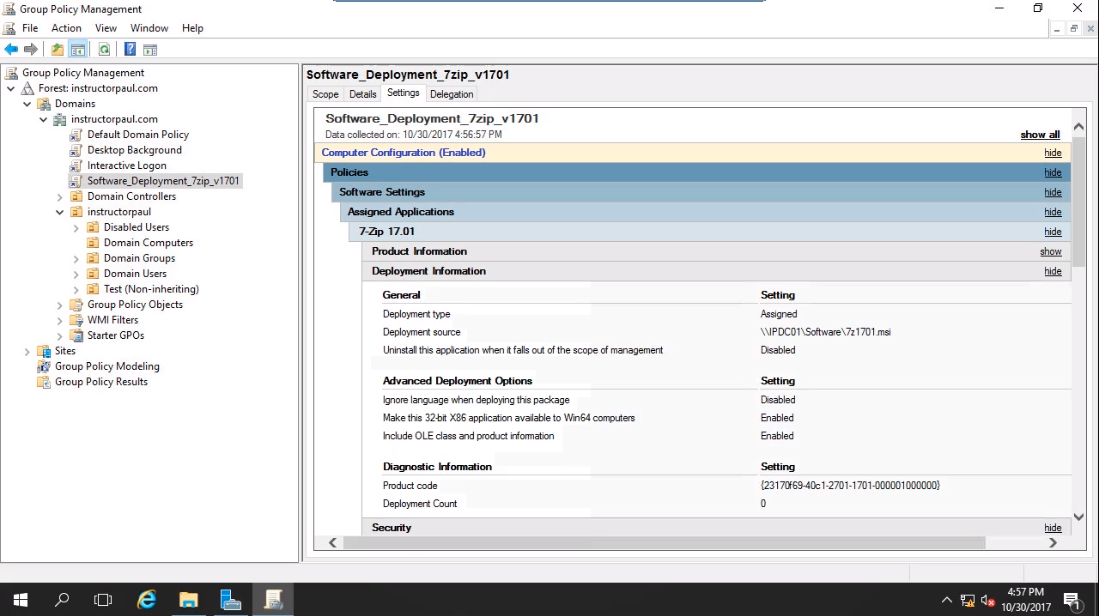
Now closing the Group Policy window editor and back to the Group Policy Management window in the Settings tab for the recently created policy we can see the options configured.
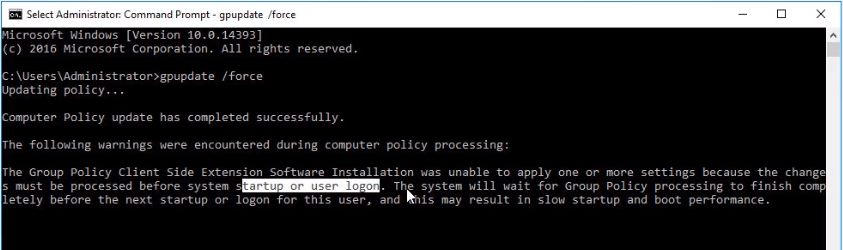
Open Command Prompt and type gpupdate /force.
We have a message that The Group Policy Client Side Extension Software Installation was unable to apply one or more settings because the changes must be processed before system startup or user logon.
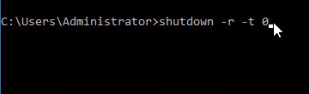
We will go ahead and restart the server. We can type from the command prompt shutdown -r -t 0 to restart the server.
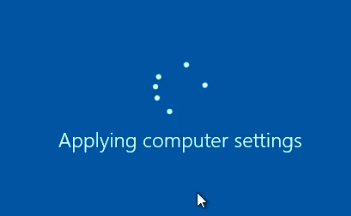
During the computer startup when you see Applying computer settings it will be installing the software we just have deployed. This might seem to take more time than usual.
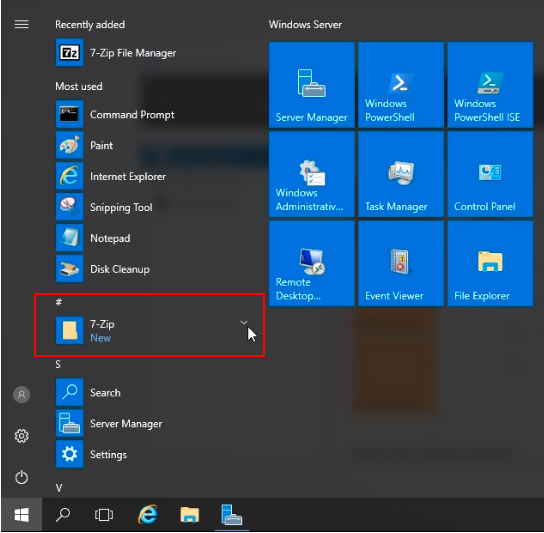
If we click on the Windows icon at the bottom left we will see from the list of programs that 7-Zip has been installed.
That’s how you install and deploy an application with Group Policy.


Sorry if I’m missing it, but I’m not seeing the downloadable resources that go with the “Deploying Software with Group Policy” lecture.
Hi Christian Sanchez
We now have added the resource to this lesson.
Ricardo
Ricardo,
I think the resource it missing again!
Thank you, Jose Mattey. We have updated the resource.
thank you, it worked for me, but after all my users are updated i cannot remove the task from software settings
Hi Cristhian Valenzuela,
Go back to the policy and right-click the package that you want to remove, select All Tasks -> Remove.
Choose either “Immediately uninstall the software from users and computers” or “Allow users to continue to use the software but prevent new installations”, depending on your choice.
Ricardo