
Configuring Roaming Profiles for User Accounts

Full-Access Members Only
Sorry, this lesson is only available to Server Academy Full-Access members. Become a Full-Access member now and get instant access to this and many more premium courses. Click the button below and get instant access now.
Instructions
Q&A (0)
Notes (0)
Resources (0)
Saving Progress...
Resources
There are no resources for this lesson.
Notes can be saved and accessed anywhere in the course. They also double as bookmarks so you can quickly review important lesson material.
In this lecture, we are going to be setting the shared folder for our Roaming Profile set up that we will have going on in Active Directory.
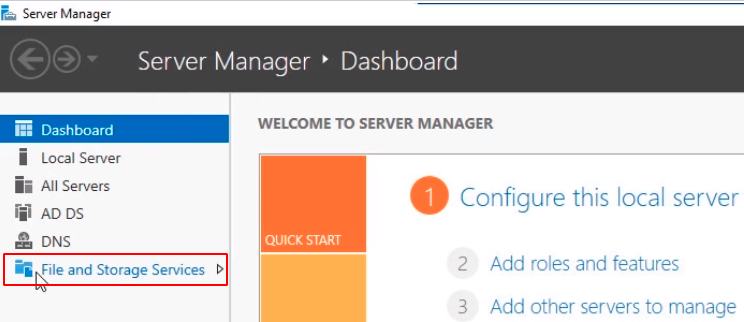
We have seen how to create a shared folder with File Explorer so this time let’s do it with Server Manager.
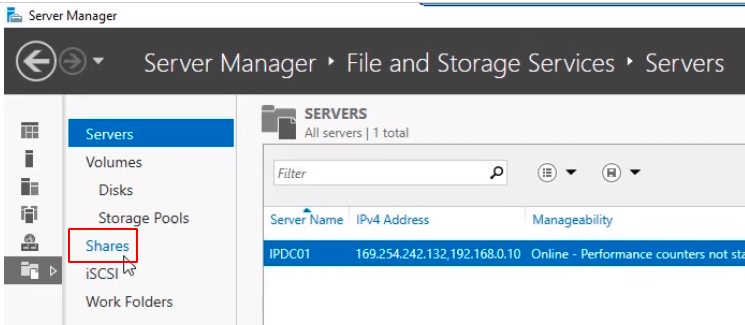
Click on File and Storage Services and then select Shares.
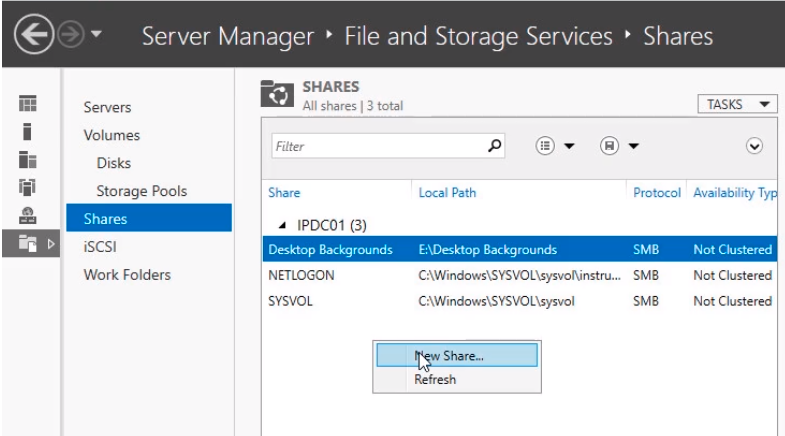
Now on the middle pane right-click and select New Share...
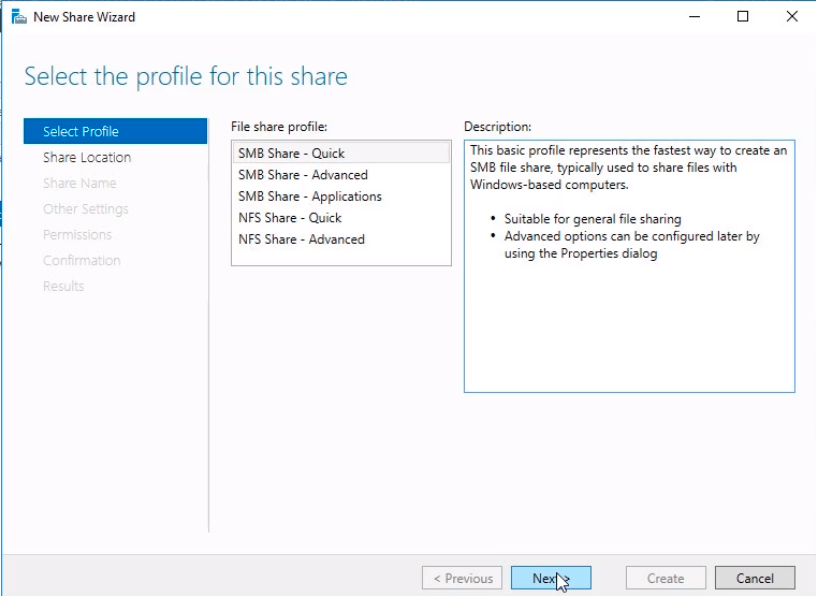
The New Share Wizard window will pop up. Select SMB Share - Quick. This is the fastest way to create a share. Click Next to continue.
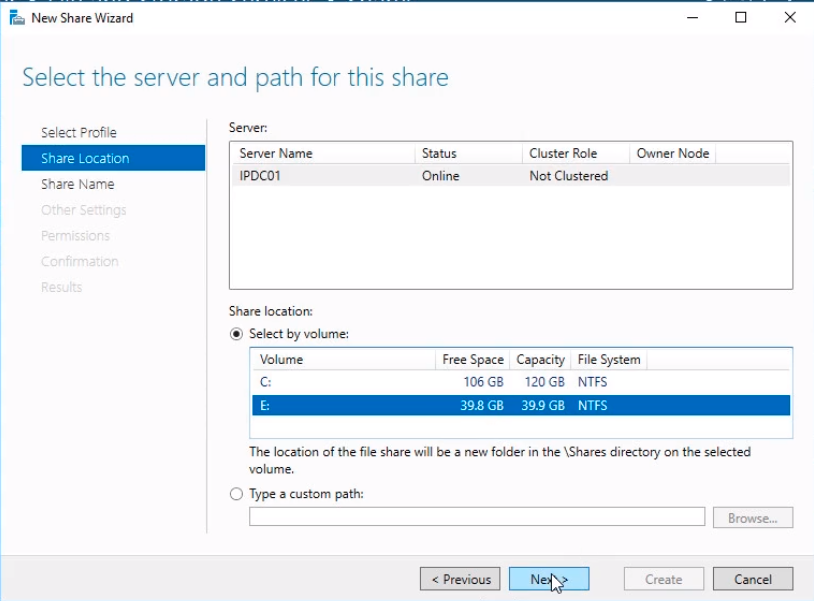
In the Select the server and path for this share window select IPDC01 and on the Share Location choose the E:\ drive and click Next.
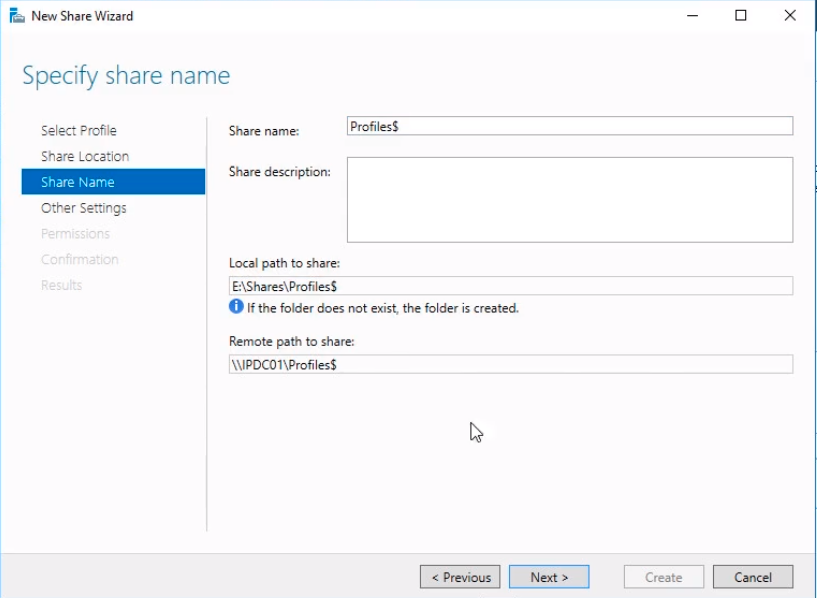
Now we need to Specify share name. Type the Share Name Profiles$. The dollar sign ($) makes the folder hidden so that its not easily viewable by people browsing the share path. Click Next to continue.
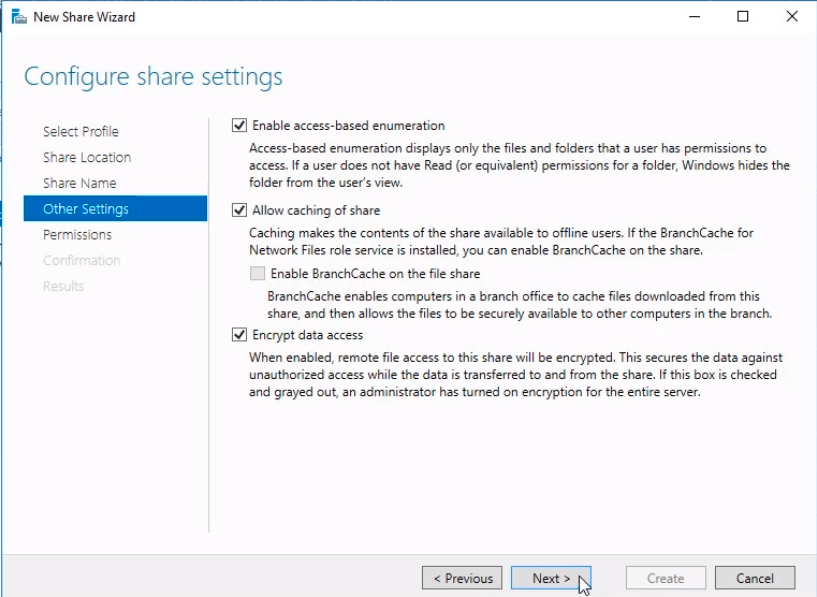
On the Configure sharing settings window, we need to mark Enable access-based enumeration. This enables users to only see folders and files that they have access to. Click on Encrypt data access. This is going to allow us to have more security by encrypting the remote file access. Click Next to continue.
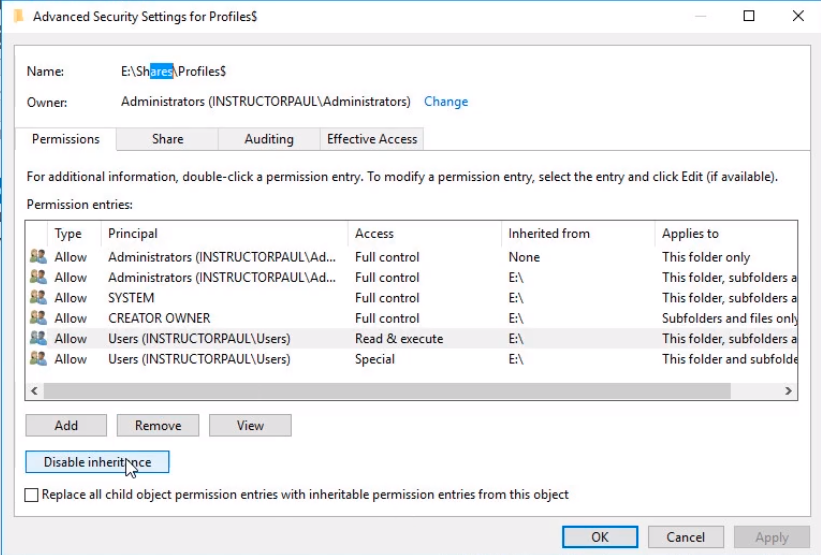
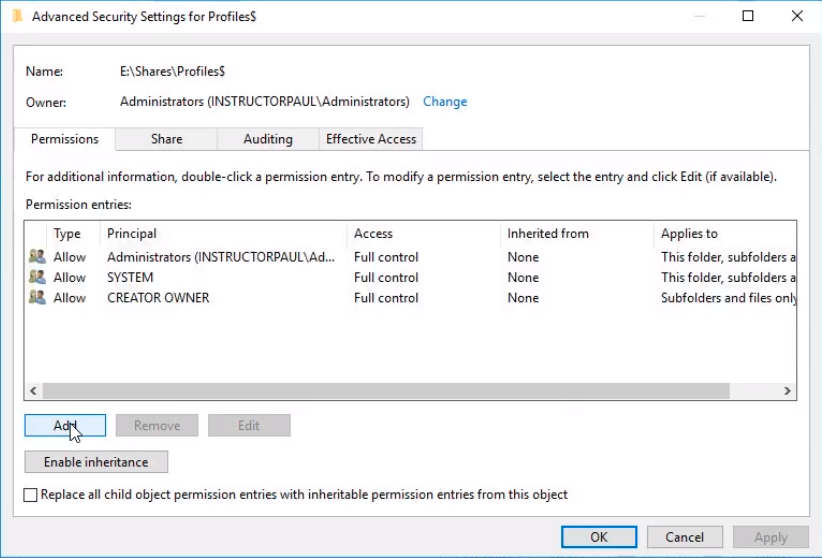
Now we need to specify who is going to be able to access the file share under the Specify permissions to control access window. Click on Customize permissions… button.
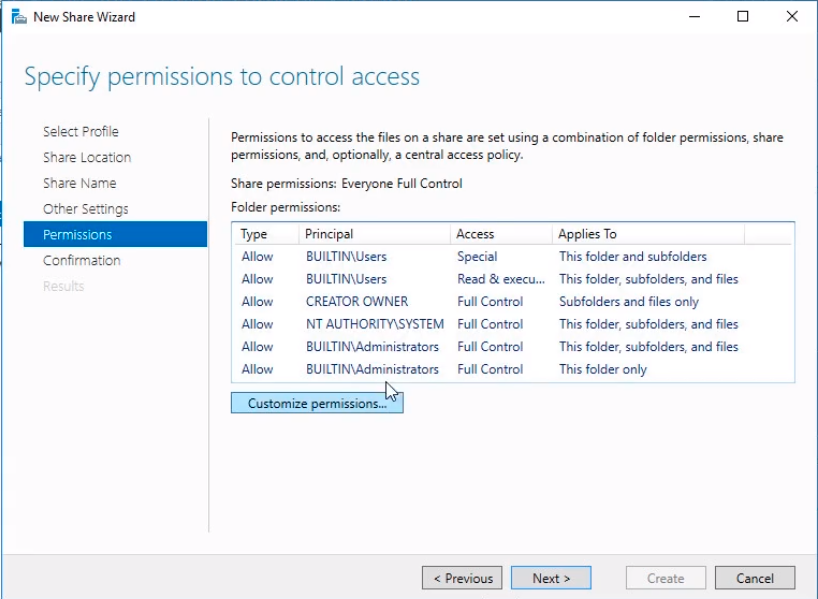
Microsoft recommends that we remove the user groups that are by default added to the permissions. First, we need to disable inheritance by clicking on the Disable Inheritance button.
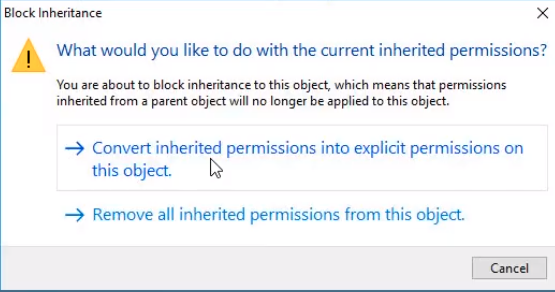
Now we need to choose Convert inherited permissions into explicit permissions on this object. This option takes the inherited permissions and it sets up a new set of permissions for just this profile share. That allows us to change the permissions settings.
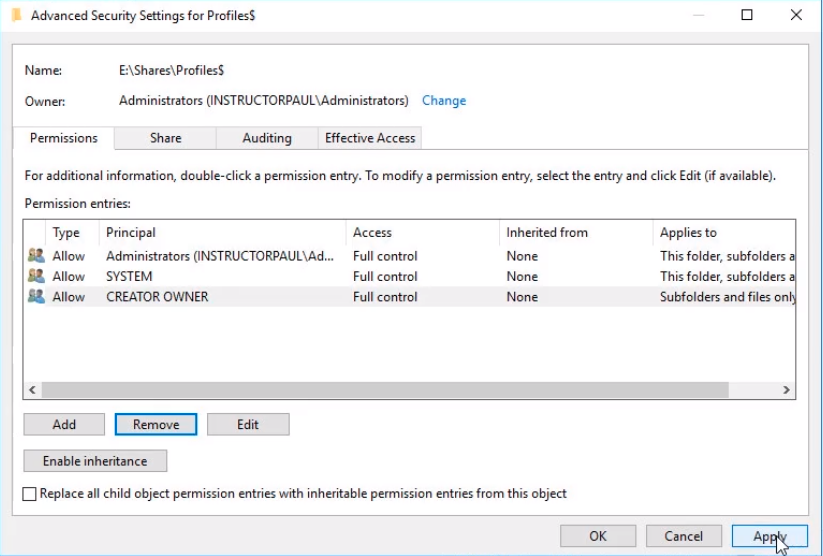
We remove the last two groups of users from the list and click on the Apply button.
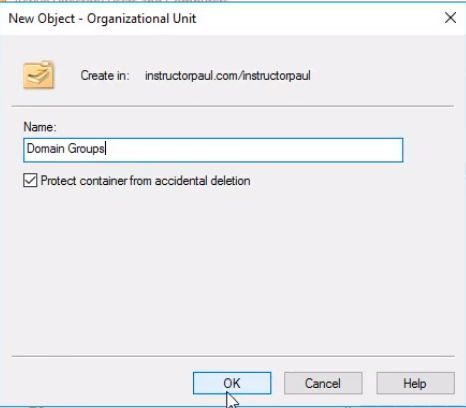
Now, let’s go to Active Directory by clicking on Server Manager > Active Directory Users and Computers and create a user group. This new user group will be called Roaming Profiles and we are going to give permissions to this group to the Profiles folder. Expand instructorpaul.com and the OU instructorpaul. Right-click it and select New > Organizational Unit.
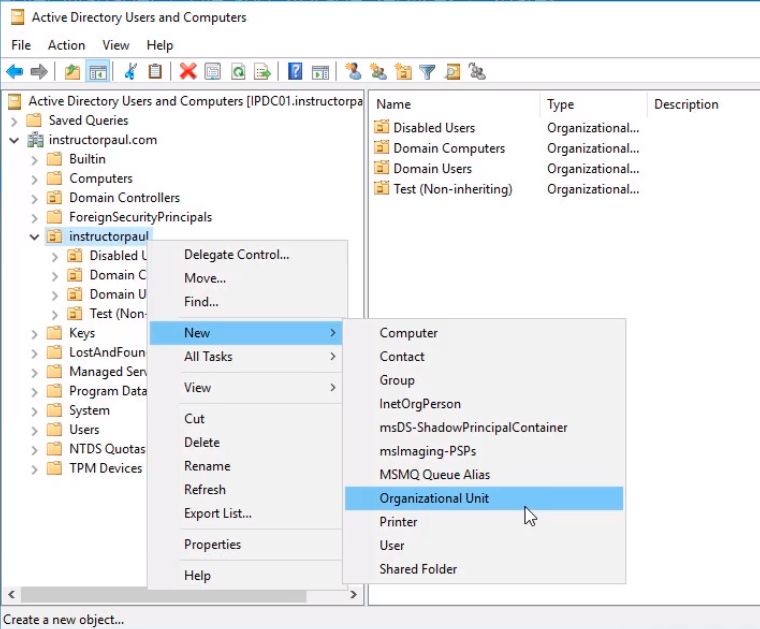
Let’s call this OU Domain Groups and click on OK.
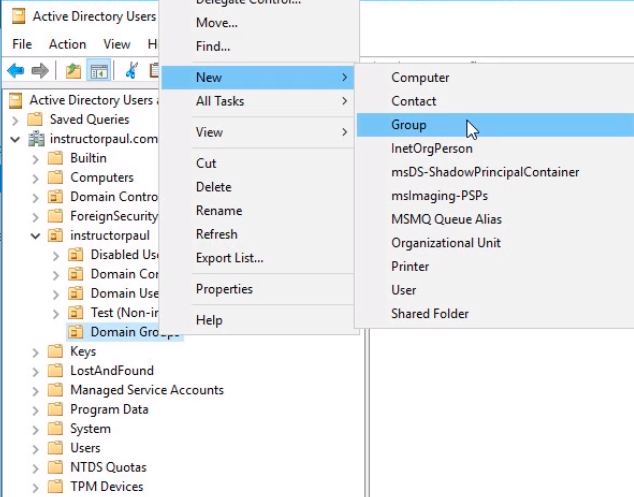
Now within this new OU, we will right-click it and select New > Group.
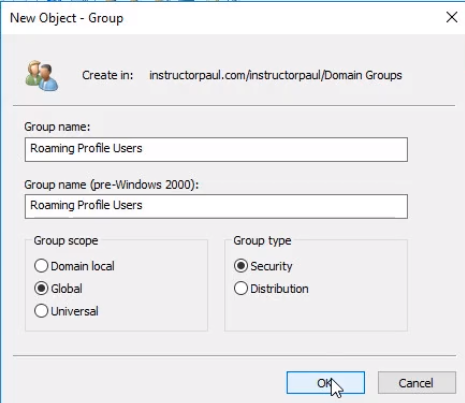
We are going to call the new Global Security group Roaming Profile Users. We choose Global to make it accessible to our domain and all trusted domains and Security because we are going to be dealing with permissions. Click OK.
Now let’s add a user account to the new group. Double click the group and select the Members tab and click on Add...
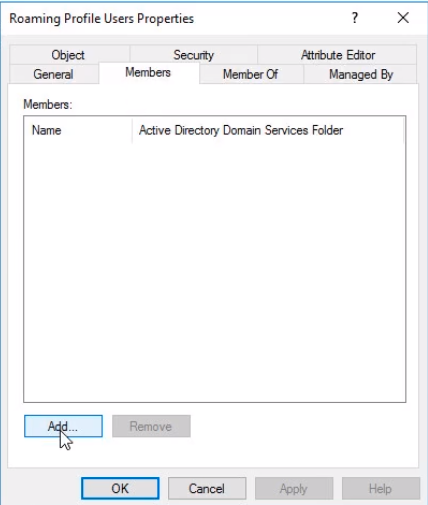
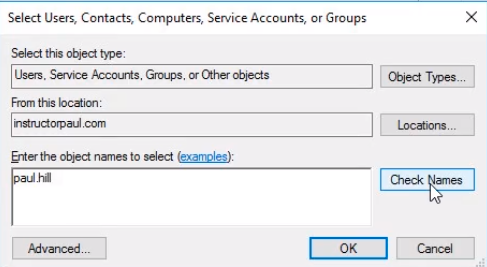
Search for all the user accounts you want to add. In this case we will add paul.hill and click on the Check Names button and click OK. You will add all the user names or groups that you want to be able to use Roaming Profiles within your Active Directory Domain.
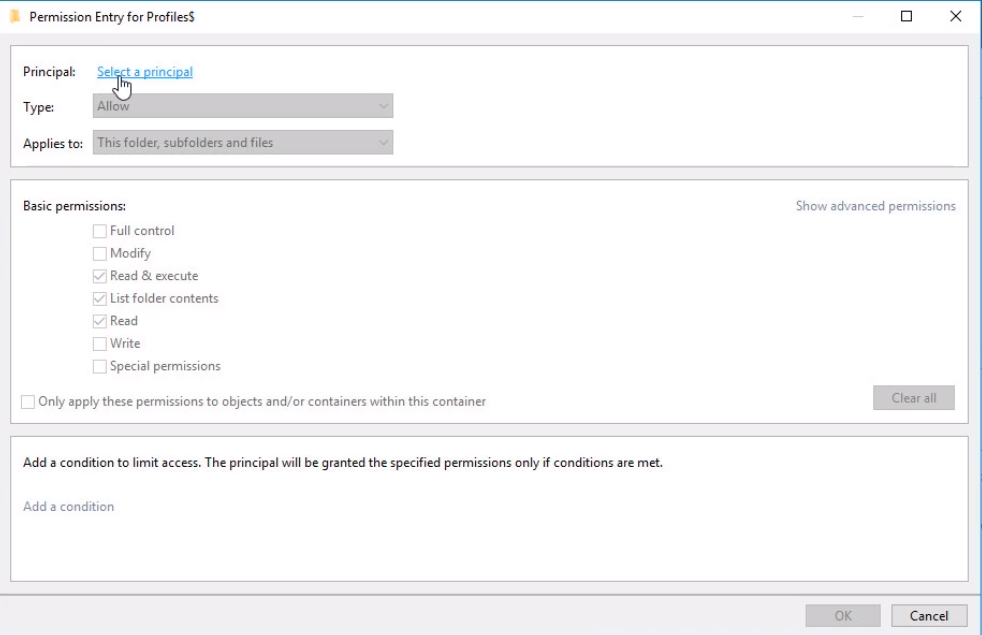
Now, go back to the New Share Wizard. We need to add that security group to these permissions entries. Click Add at the bottom and under Principal we need to click on Select a principal link.
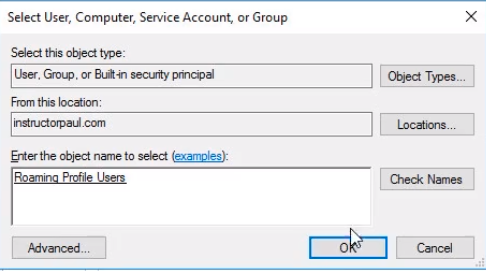
Search for Roaming Profile Users group and click on Check Names button and OK.
We are going to uncheck all these Basic permissions (1) and click on Show advanced permissions (2).
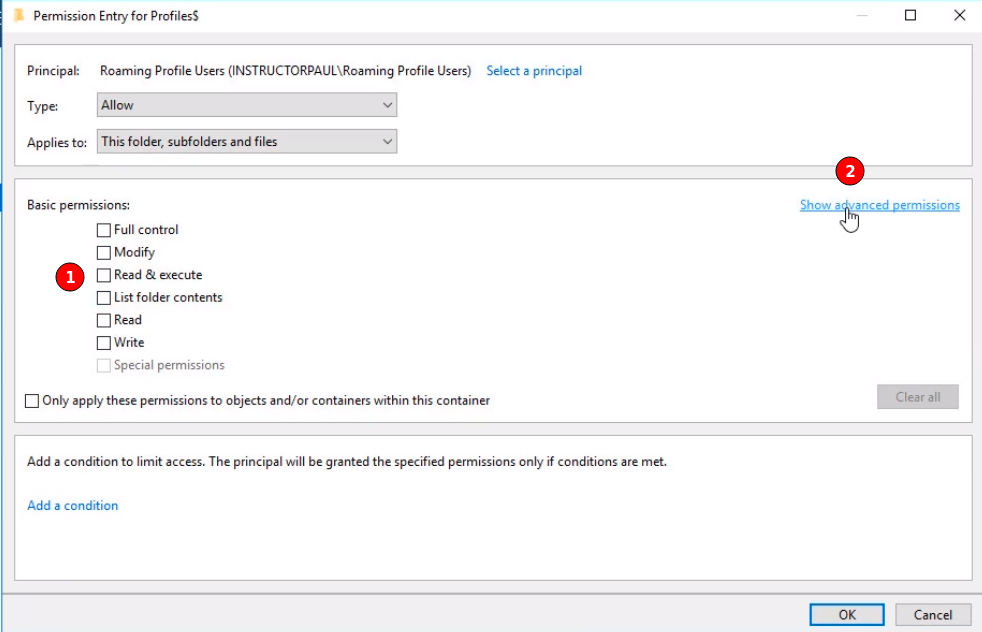
From the Advanced Permissions list we are selecting:
- List folder/read data
- Create folders/append data
Server Academy Members Only
Sorry, this lesson is only available to Server Academy Full Access members. Become a Full-Access Member now and you’ll get instant access to all of our courses.


What else is synced under the roaming profiles besides the files? The Windows Explorer and Chrome settings as well?
Please advise,
Ram
Hi Ramiro Del Rio
For Chrome, you might need to configure some settings manually. Check the following:
https://support.google.com/chrome/a/answer/7349337
Ricardo
When, why do we need that man? Why we need to check out some permissions and keep others??? Give us a realistic example give us a real scenario. Get rid from this Paul hill example please!
This course is too strange some lectures are very well explained and easy to follow.
But unfortunately the most are not. And is the same lecturer I don’t know how!!!
Hi Zein Saker
You would use roaming profiles when users use different workstations and want to keep the same desktop experience and settings. It can be easy to replace a broken computer if roaming profiles are enabled. It can get complicated to manage and maintain due to the size of the profile folders, loading speed, and other factors depending on the organization. These are rarely used nowadays since you have more laptops than desktops and OneDrive storage to save their files. It’s one of the things you can configure, but depending on the business requirement you can use other options if available.
We give the permissions to the Roaming users group so they can create and update their profiles when initiating and terminating their sessions. The administrator has permission on the main folder.
As you progress, some lessons and courses will be more difficult to complete than others.
Ricardo
I think you raise a good point. Sometimes we take for granted that students will know why you want to do something but not know how to do it technically. I will spend some time thinking about how we can add context to our courses for newer students.
I ran into an issue where my non-admin account got the “The sign-in method isn’t allowed”. It turns out that the Default Domain Controllers Policy didn’t have that non-admin account to the group. Once I added it, it worked. I think this should be mentioned because I thought it had to do with my ‘Route’ server being offline.
Hi Eric Gonzales
You are right. Local sign-in is not allowed for regular users on a Domain Controller.
Thank you,
Ricardo