
Installing Windows 10 in our IT Lab
Instructions
Q&A (0)
Notes (0)
Resources (0)
Saving Progress...
Resources
There are no resources for this lesson.
Notes can be saved and accessed anywhere in the course. They also double as bookmarks so you can quickly review important lesson material.
In this lecture, I am going to show you how you can install Windows 10 in our IT Lab.
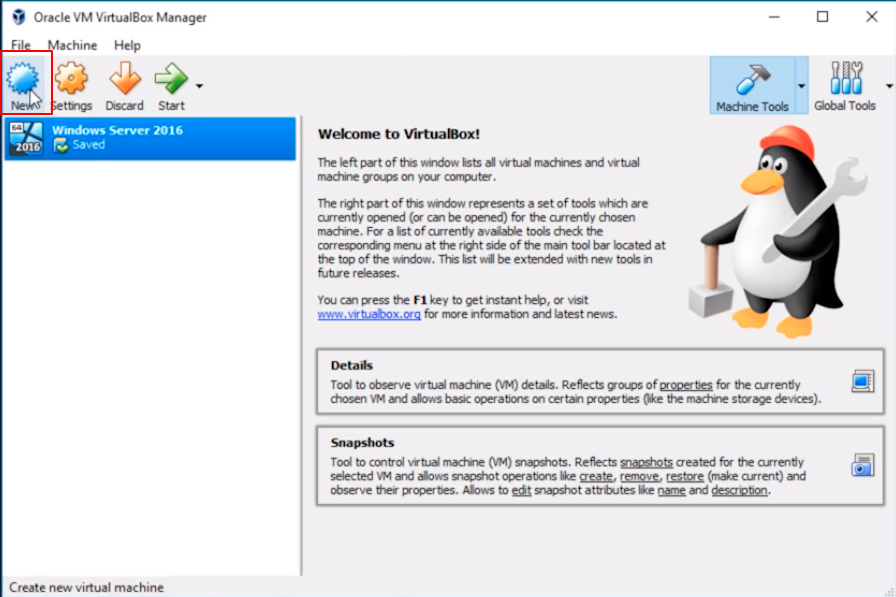
I have VirtualBox open and what I am going to do is to create a new VM by clicking on New.
In the Create Virtual Machine window, I am going to call this VM Windows 10. We can see that the Version was automatically populated to Windows 10 (64-bit). Here I am just going to click Create.

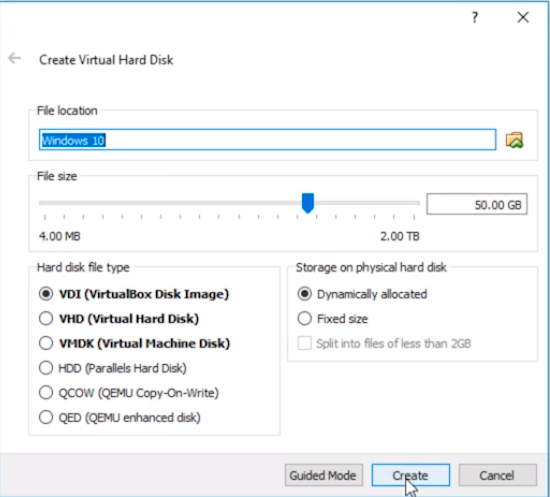
Now, we have already gone over the details of all the options in the Create Virtual Hard Disk window so I am just going to click on the Create button to create it with the default options.
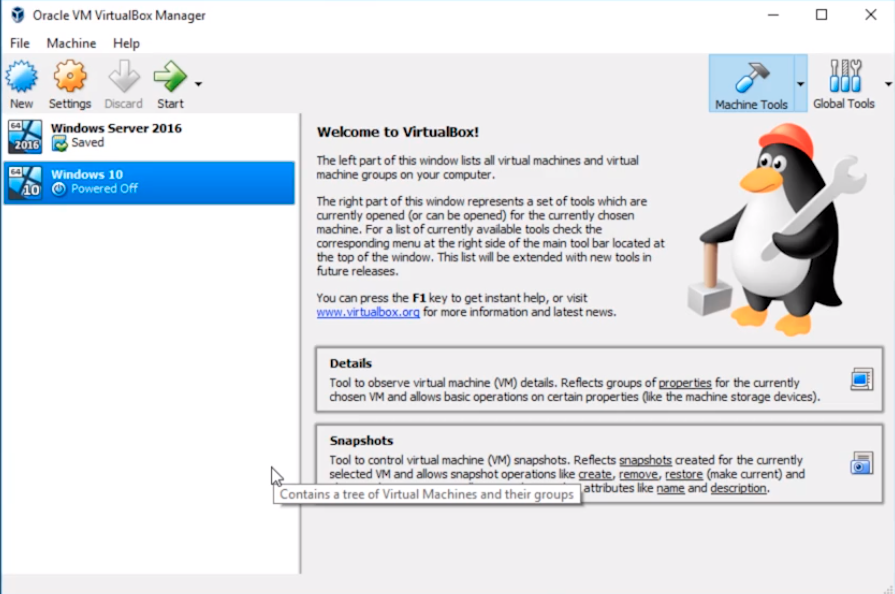
The Virtual Machine has been created.
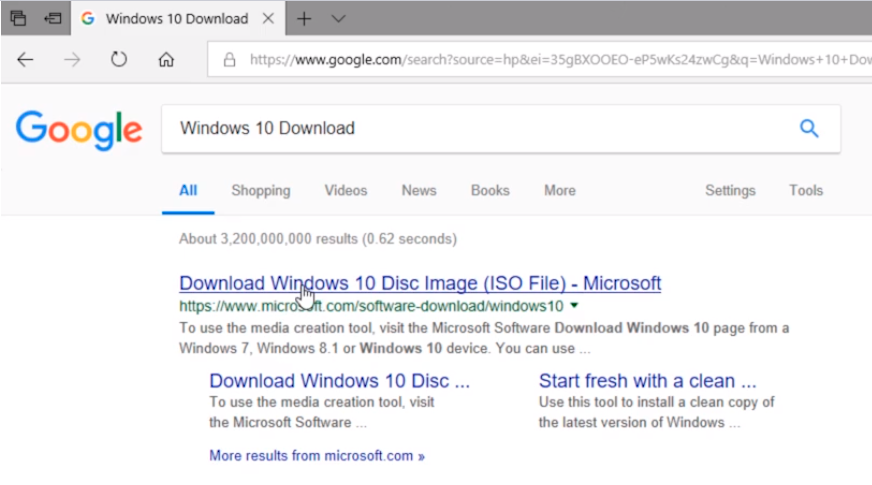
What I need now is an ISO file of Windows 10. I can get that by opening my Web Browser and doing a Google search for Windows 10 Download.

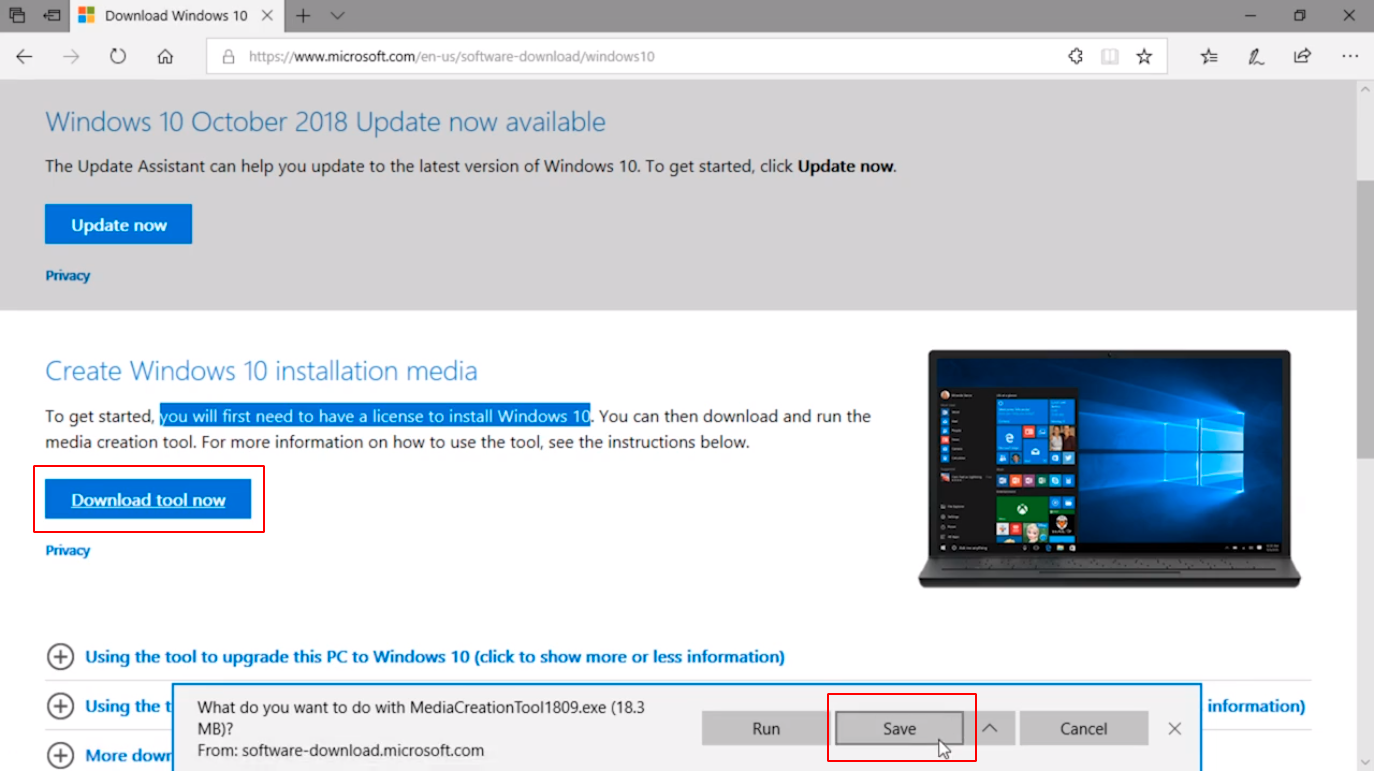
From the search results, we have the first option from Microsoft.com to download Windows 10. I will Click on the link.
And, we are taken to the page where we can download the Windows 10 Installation Media with the Microsoft media creation tool. I am running Windows 10 so I will be able to download and run this tool.
Note that in order to use Windows 10 we need to have a license to install Windows 10.
Click the Download tool now button and click on the Save button.
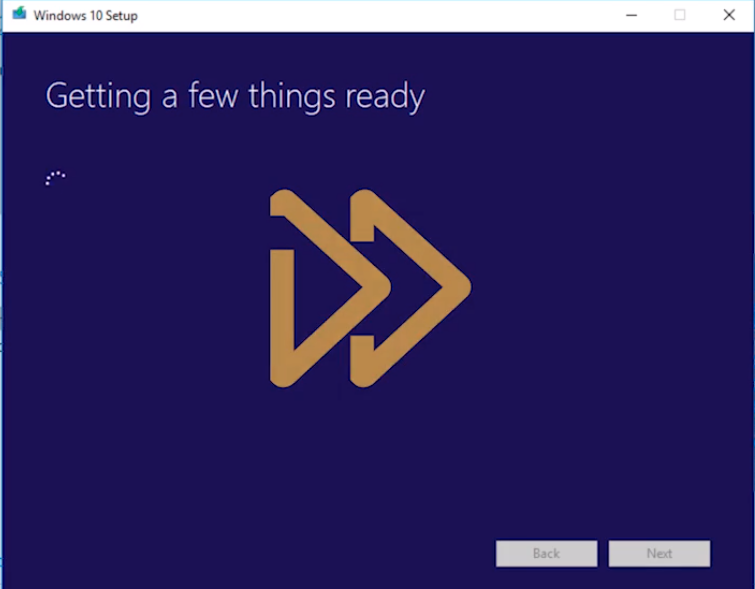
So what I am going to do now when it finishes downloading is click on the Run button.

The Media creation tool starts and we just wait for it to finish initializing.
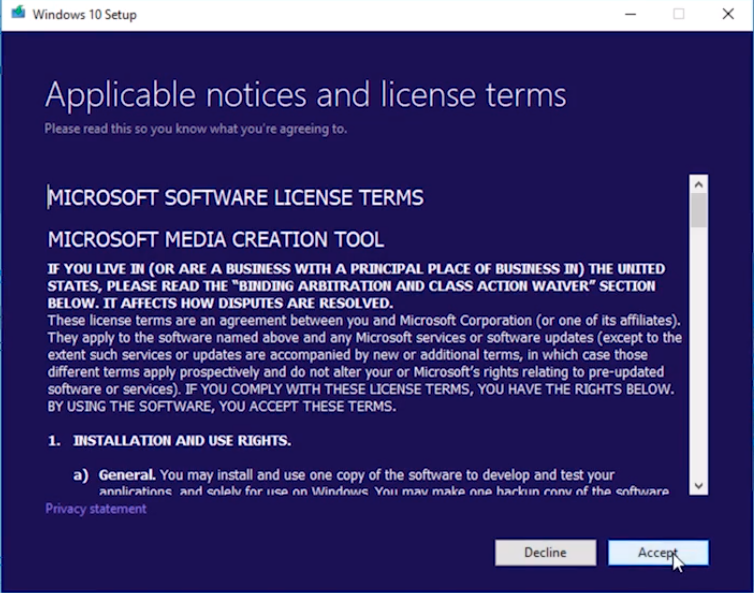
Here we are now at the license terms. Click on the Accept button.
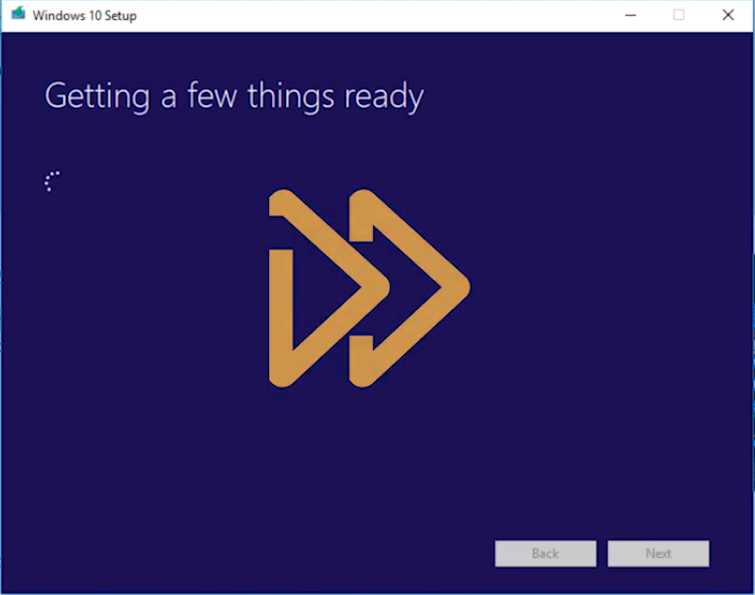
Wait for a couple of seconds again to proceed with the next steps.
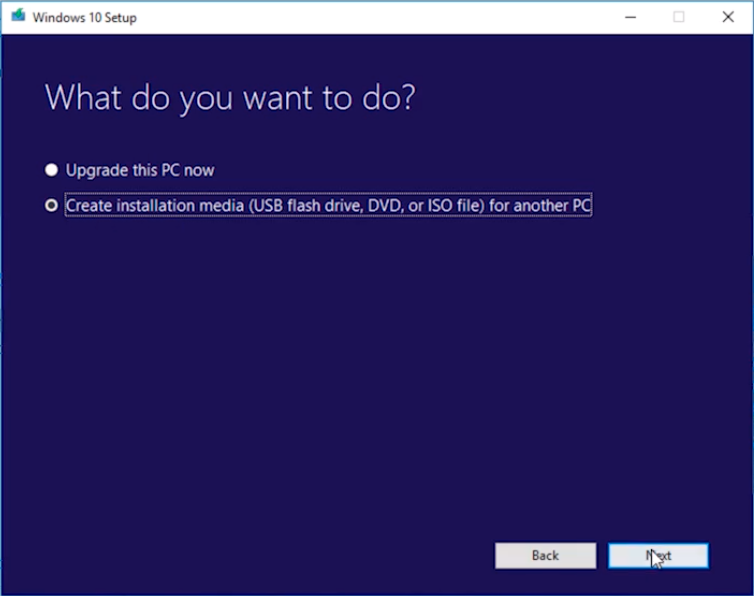
At this point, it is important that you choose to Create installation media (USB flash drive, DVD, or ISO file) for another PC option and click on Next.
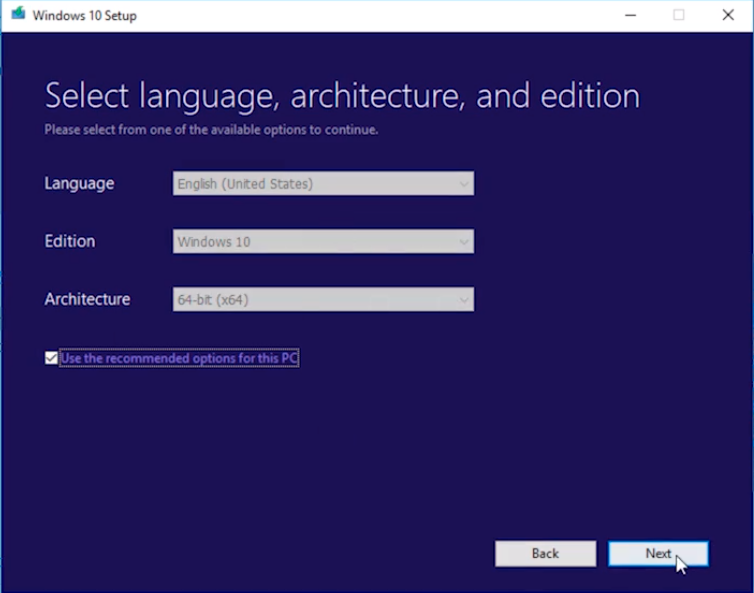
Here we are going to leave all these settings at the default and click the Next button.
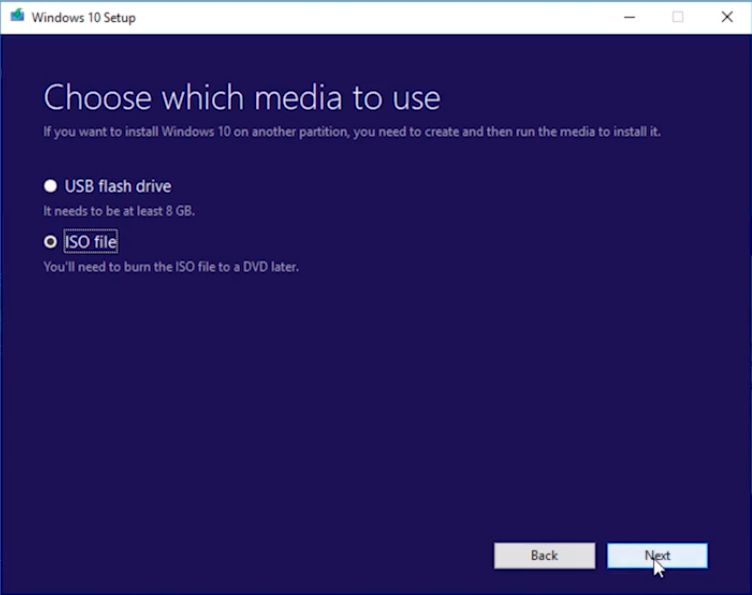
Here we are going to choose the radio button for the ISO file since we are going to use it for installing Windows 10 on our Virtual Machine. Click Next to continue.
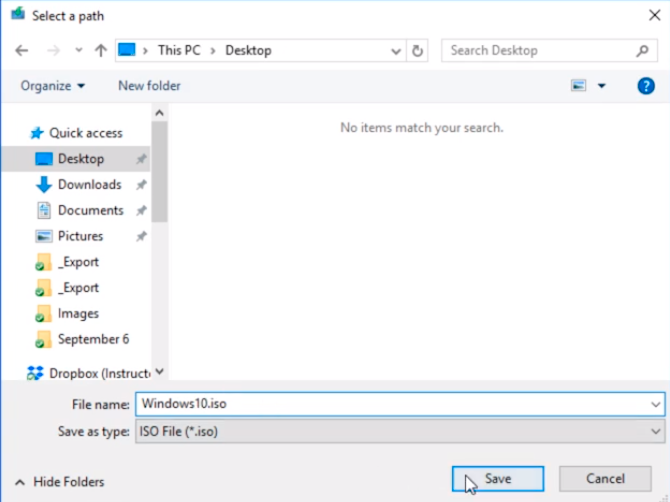
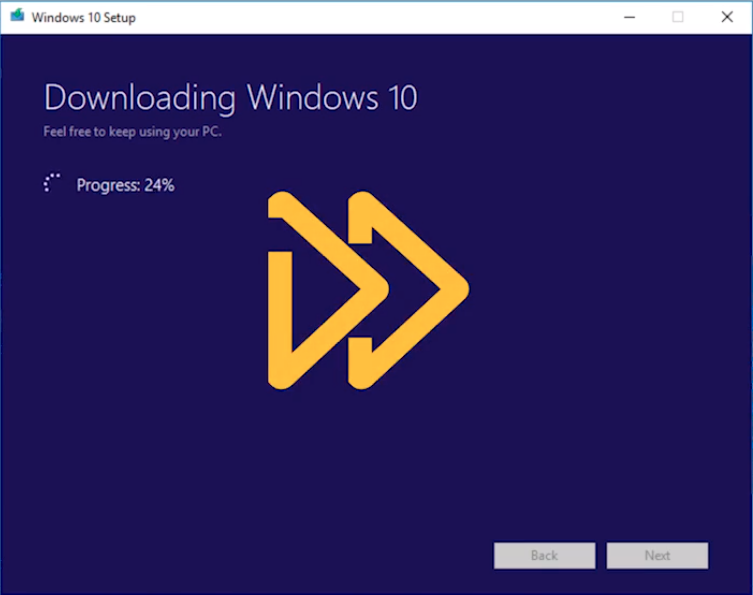
Now we need to choose where we want to download this ISO file. I am going to choose to download to the Desktop and I’ll rename it to Windows10.iso and click on the Save button.
At this point, we just need to wait for the ISO download to complete.
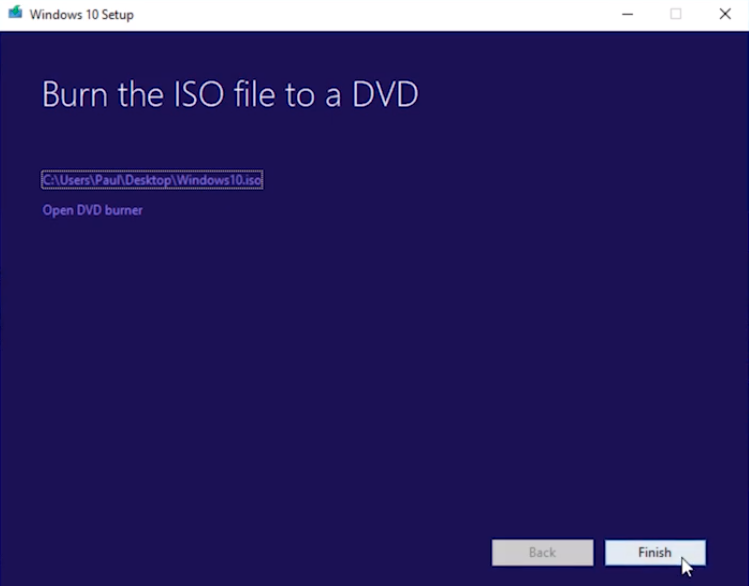
At this point the download is complete and the wizard is telling me to burn this ISO file to a DVD. I am not going to do that since I am installing it on a Virtual Machine so we just click on the Finish button.
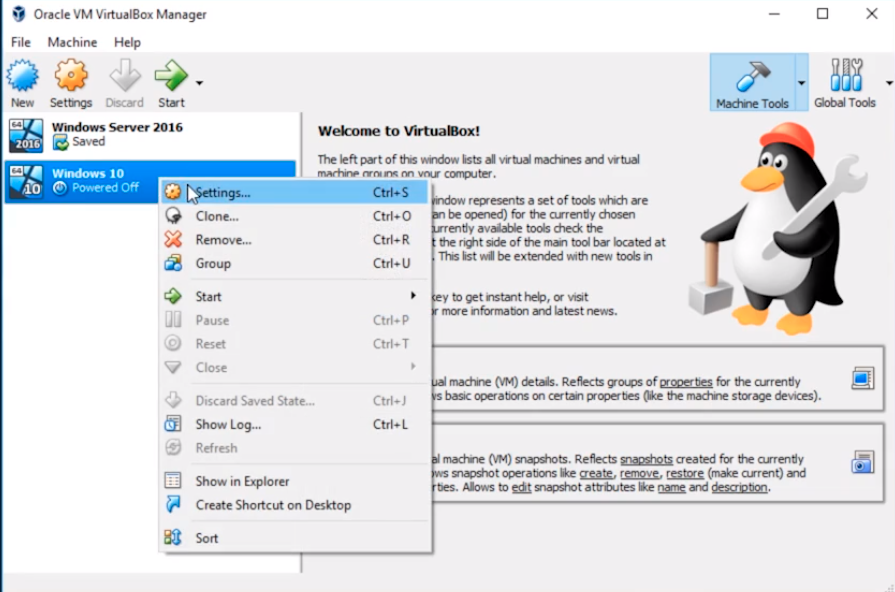
Now, back to our VirtualBox, I am going to select my Windows 10 Virtual Machine and right-click and select Settings.
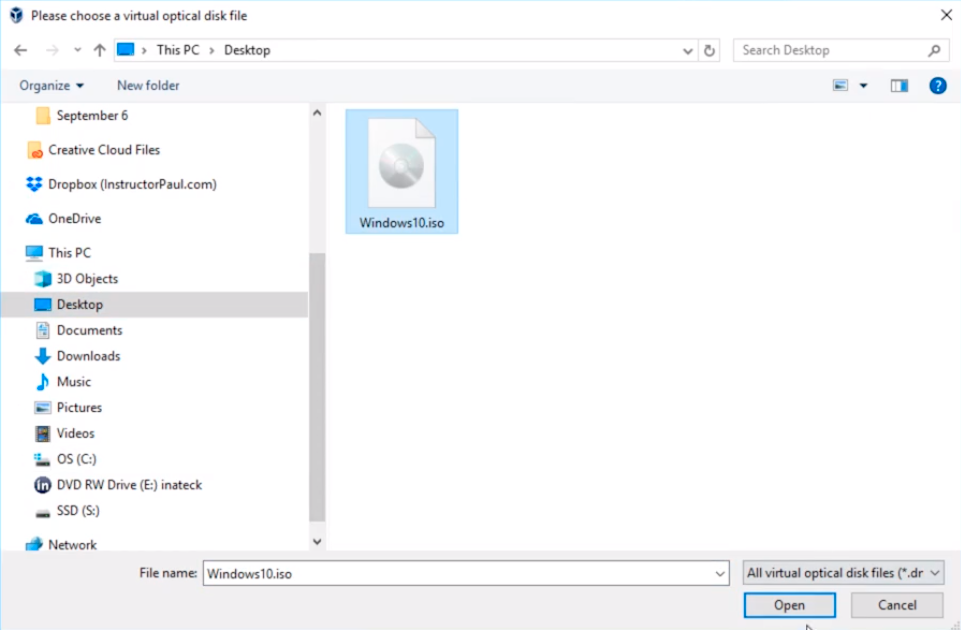
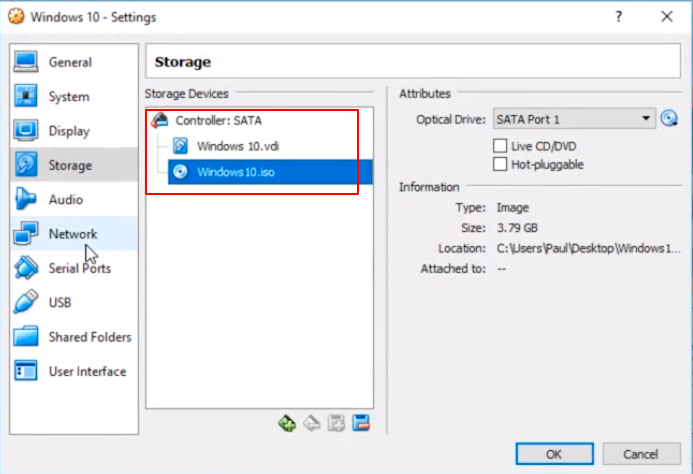
From the Settings windows we select Storage from the left options and from the Storage Devices in the middle pane select the Empty disc option and to the right then click on the Disc icon button and select Choose Virtual Optical Disk File...
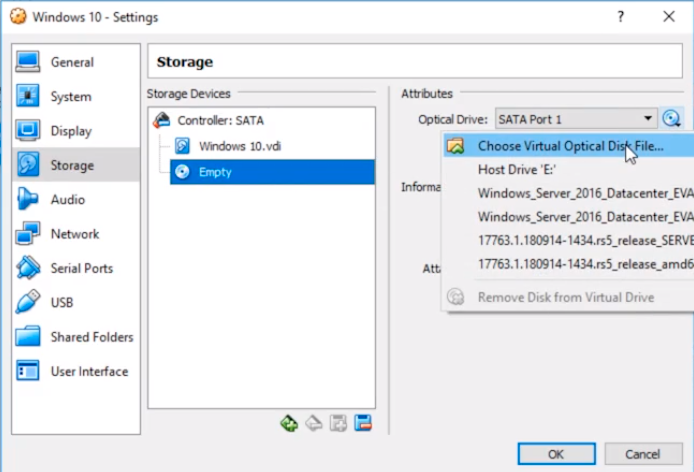
Navigate to the Desktop and select your Windows10.iso and click on Open.
And the ISO will be mounted on the Virtual Machine.
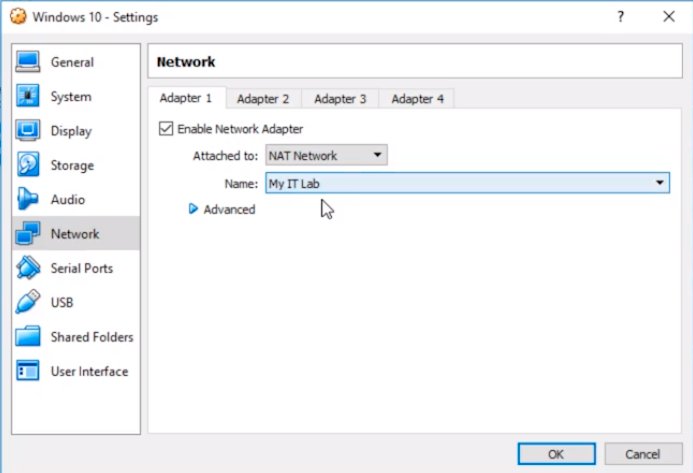
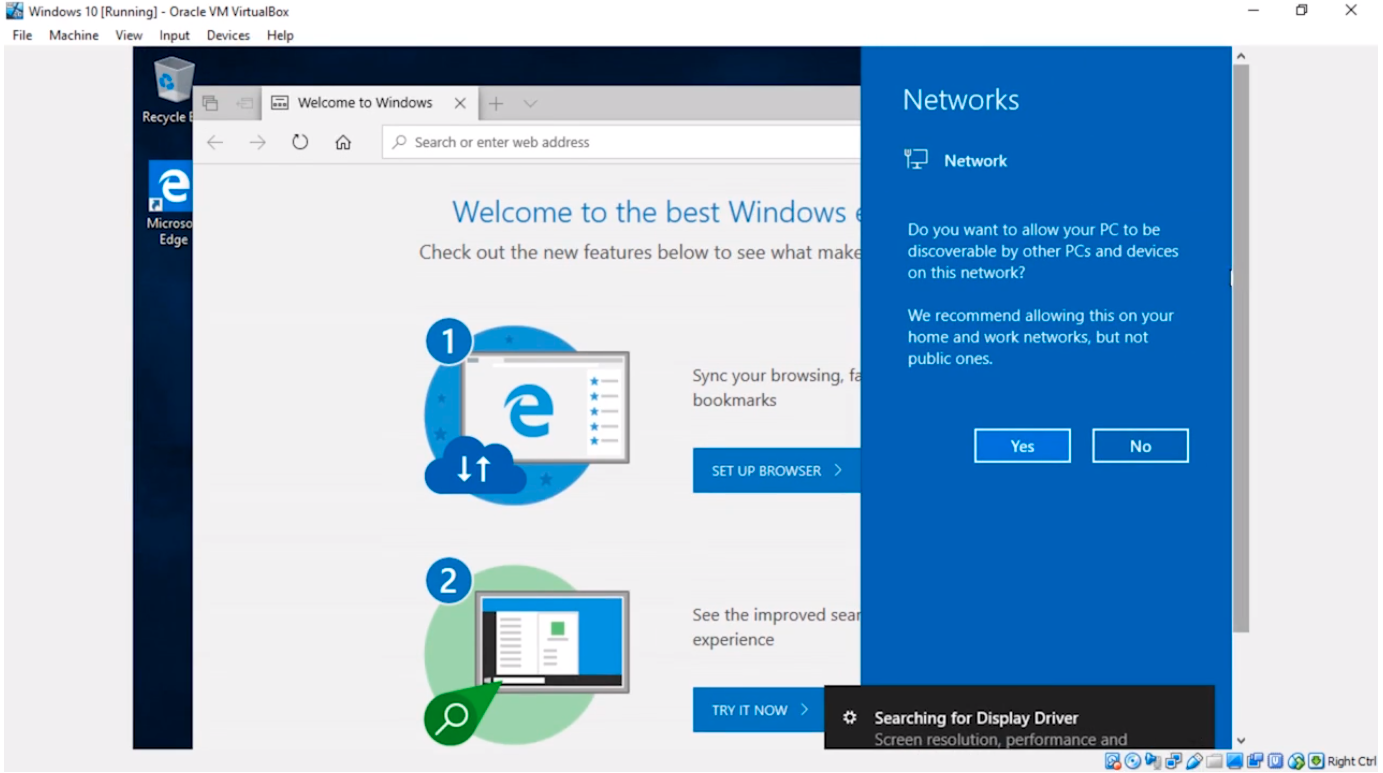
The next thing I need to do is to change the network adapter properties. Click Network on the left and change it to Nat Network and make sure it is set to My IT Lab. Click OK.
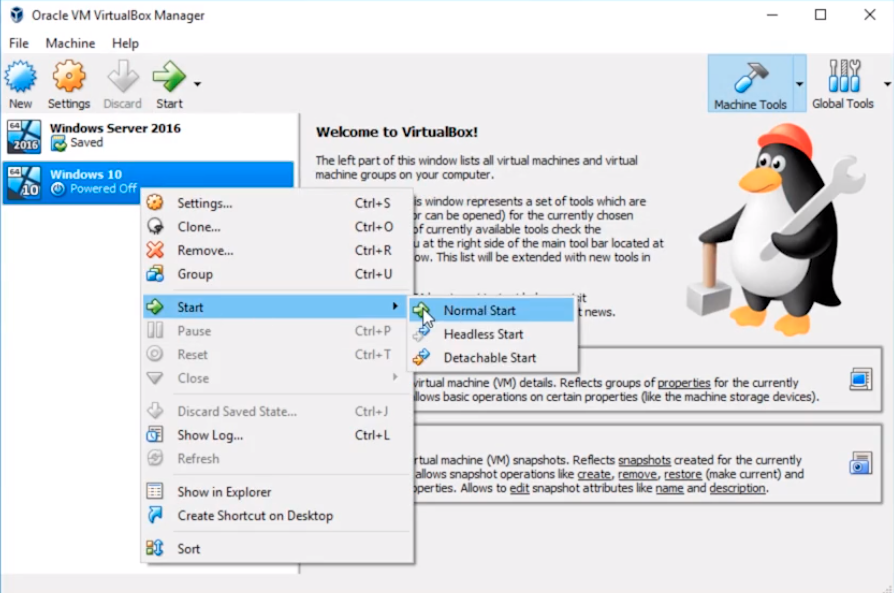
Now we are ready to power On our Virtual Machine.
Right-click on the Virtual Machine and Choose Start > Normal Start.
And the Windows Setup has begun. We are going to go through this process of installing Windows 10 very similar to Windows Server.
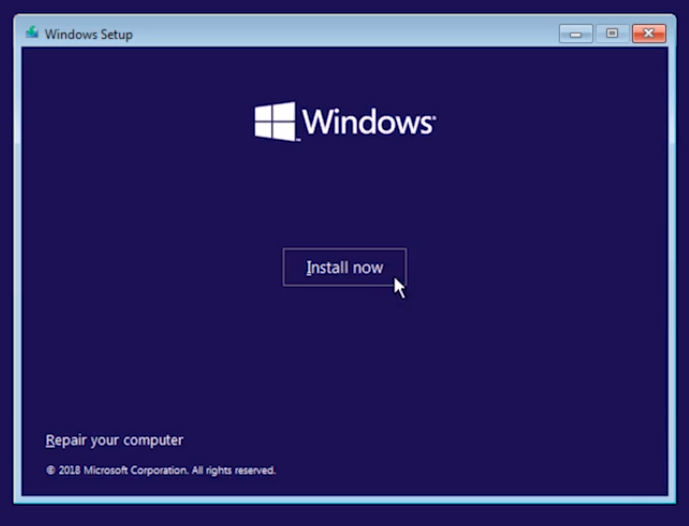
Click Next to start the wizard.

Click the Install now button. We will click on all default settings just by clicking next to get through the installation as fast as possible.
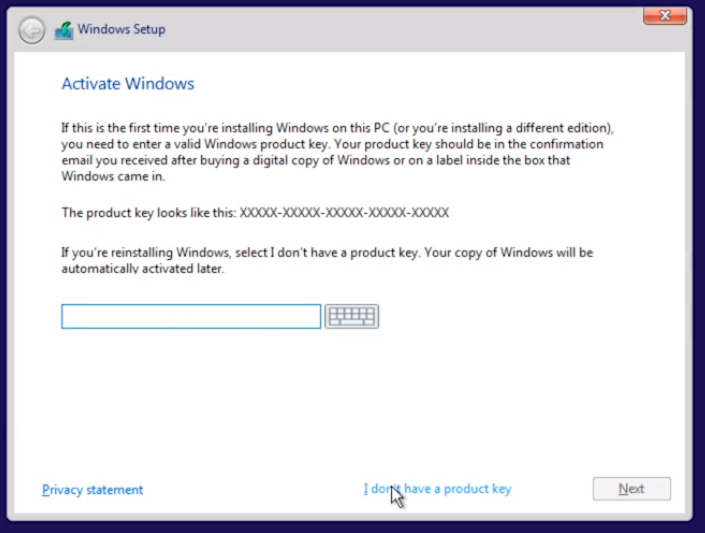
Here I am going to select I don’t have a product key and this will allow us to use the trial period.
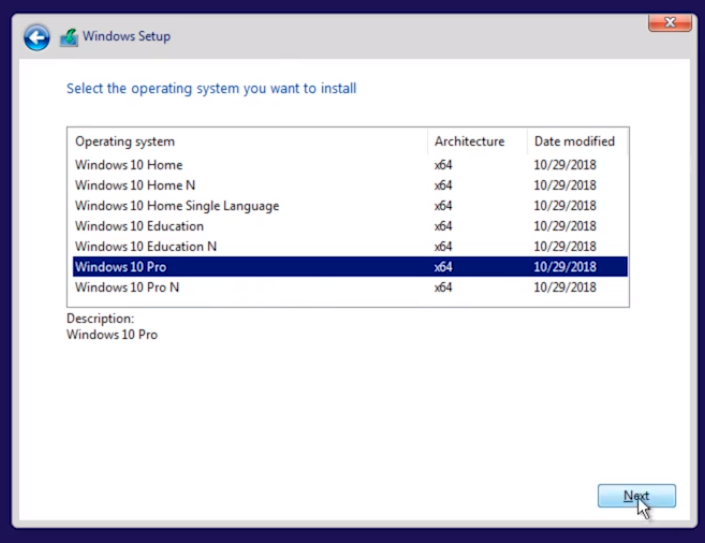
You want to make sure you select Windows 10 Pro and click Next.
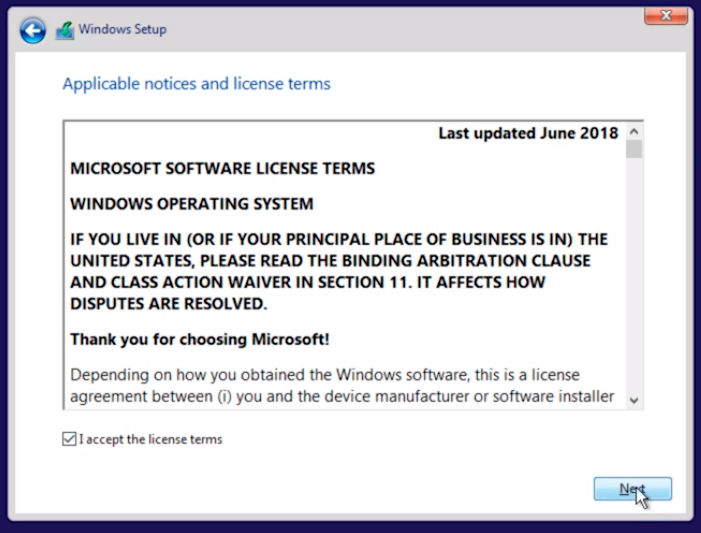
Click on I accept the license terms and click on Next.
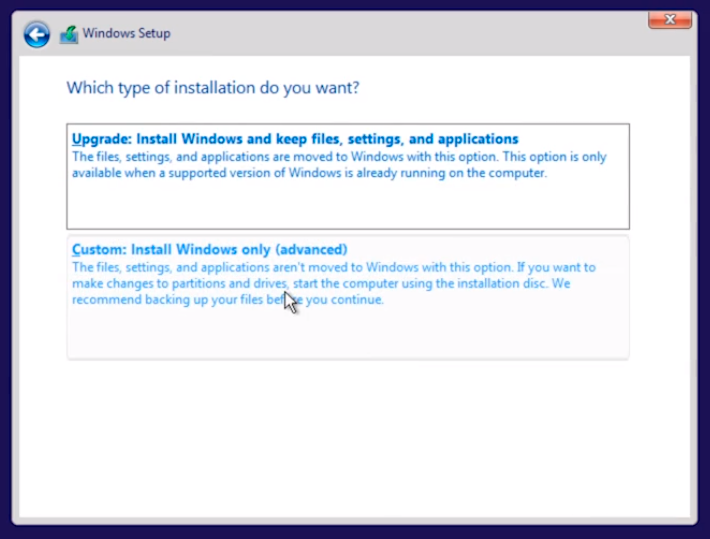
Select Custom: Install Windows only (advanced) since this is the first installation and we are not upgrading from an older Operating System.
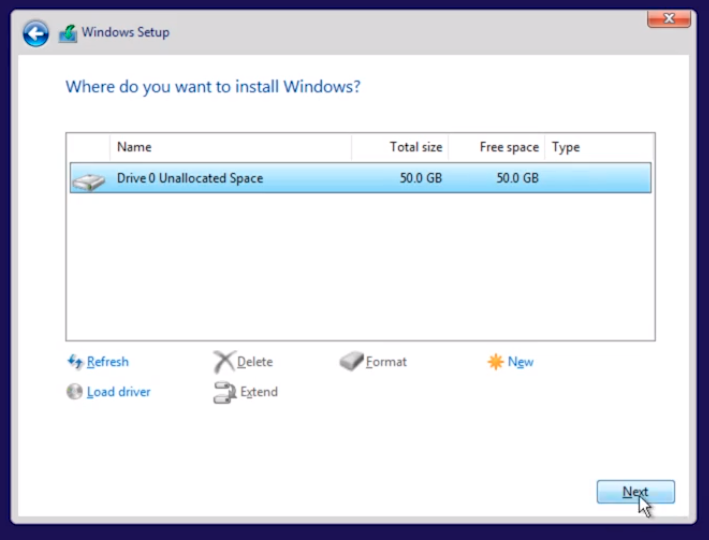
Click Drive 0 and click Next.
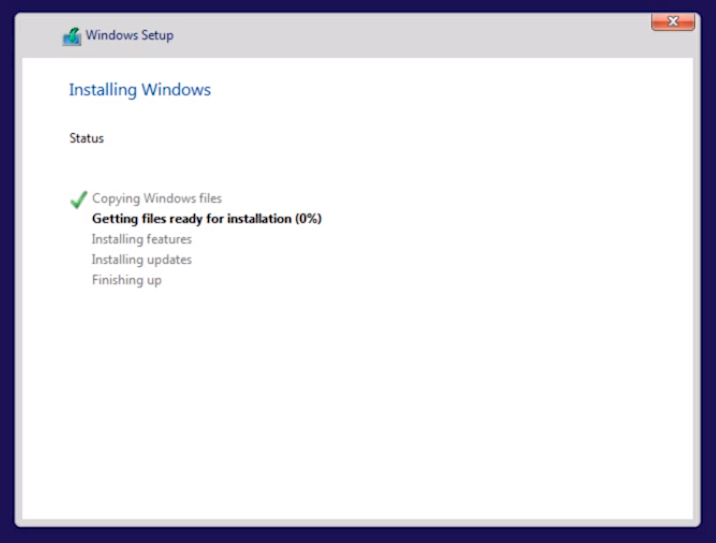
And the installation will begin. At this point, we just need to wait for the installation to complete.
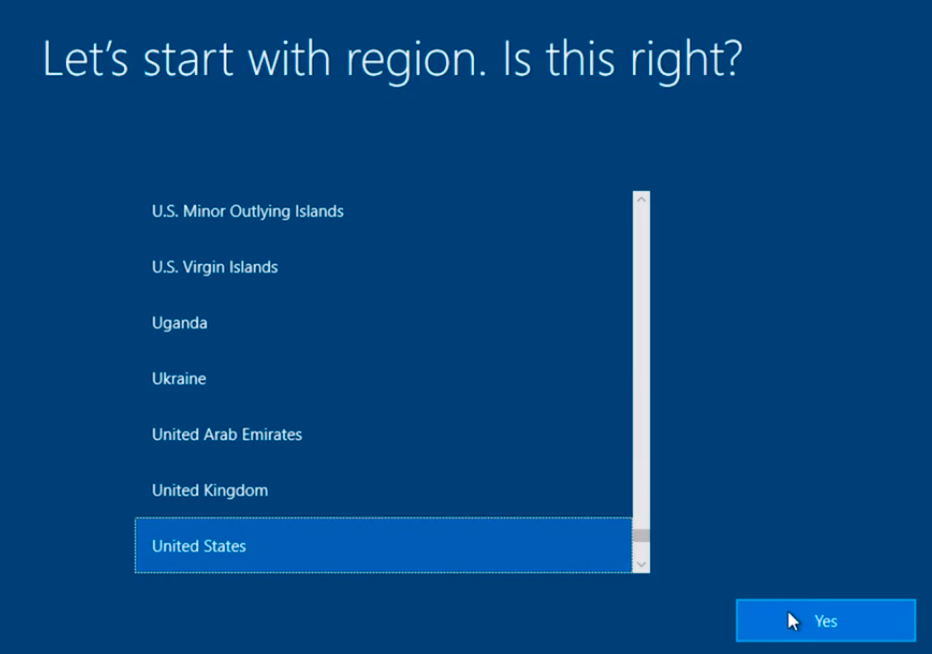
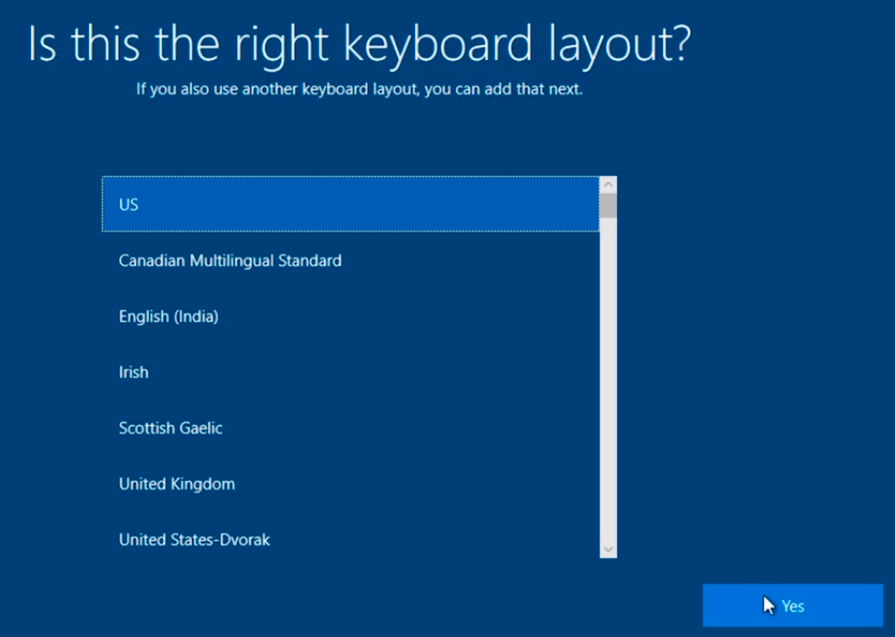
At this point in the installation, we need to select some options. I am going to leave the default settings and click on Yes.
Click on Yes.
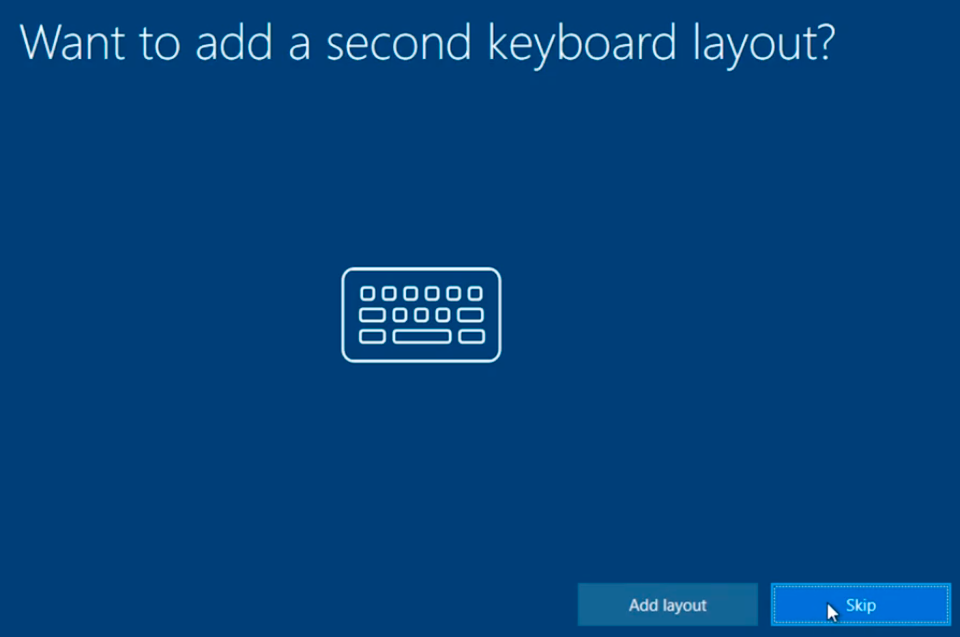
Click on Skip as I don’t want to add a second keyboard layout.
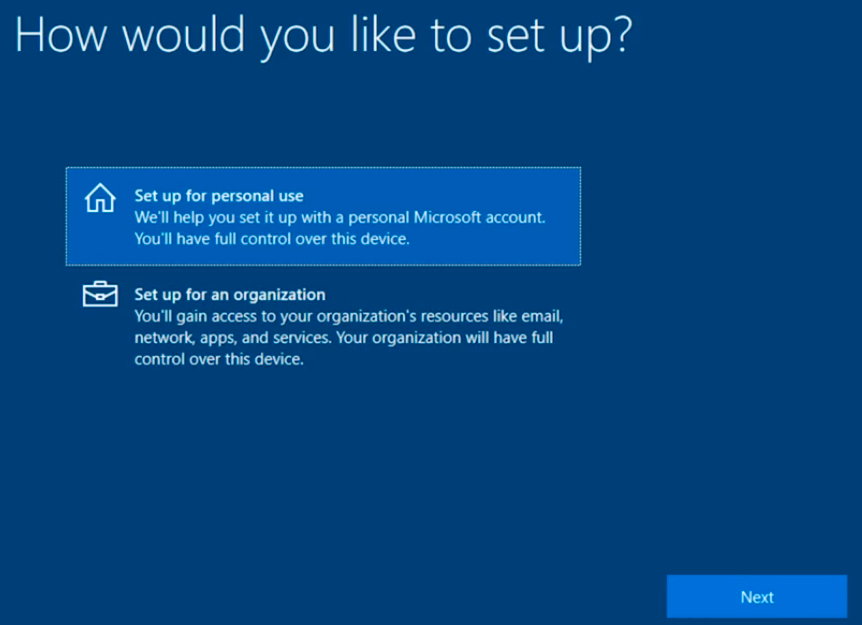
Select Set up for personal use and click Next.
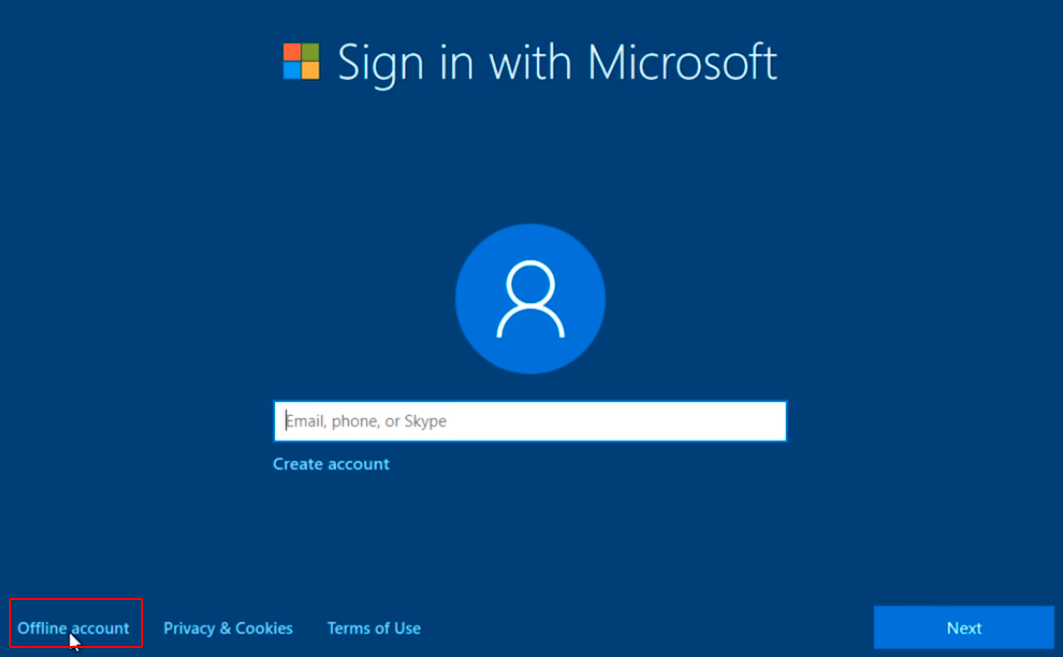
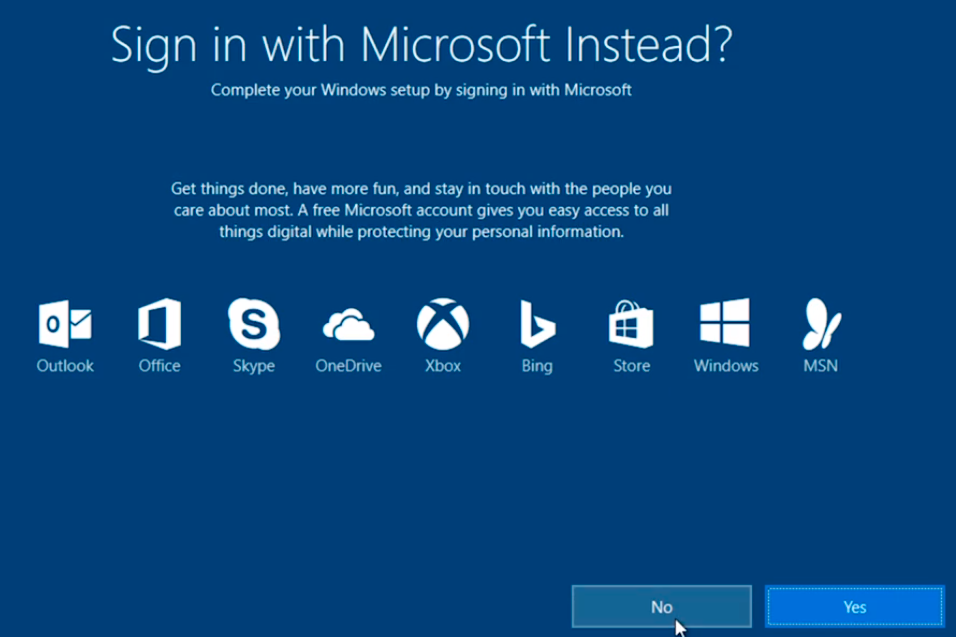
On this screen when it asks us to Sign in with Microsoft I am going to choose an Offline account to the bottom left.
Here I am going to select No when we are asked to Sign in with Microsoft Instead.
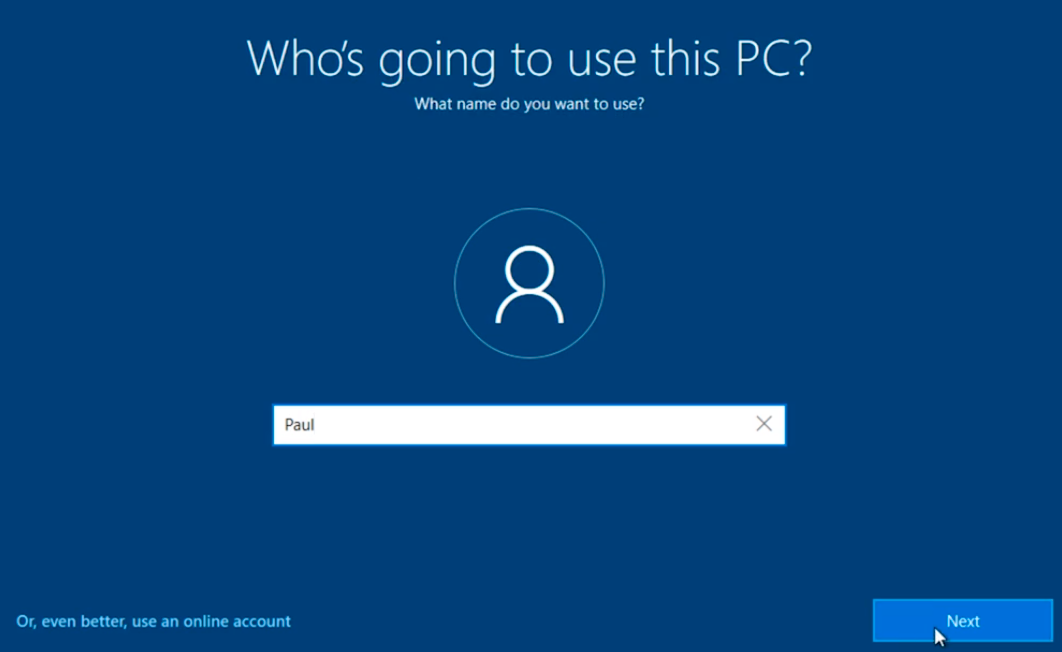
On this screen, we need to choose Who’s going to use this PC so I am going to type Paul and click Next.
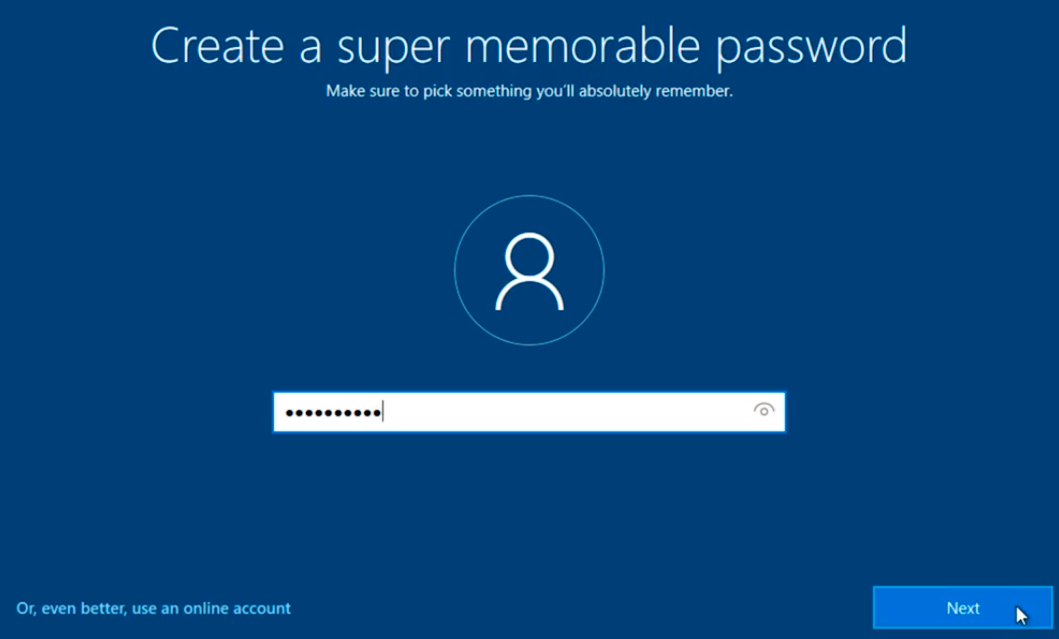
Type in a password for the account and click Next.
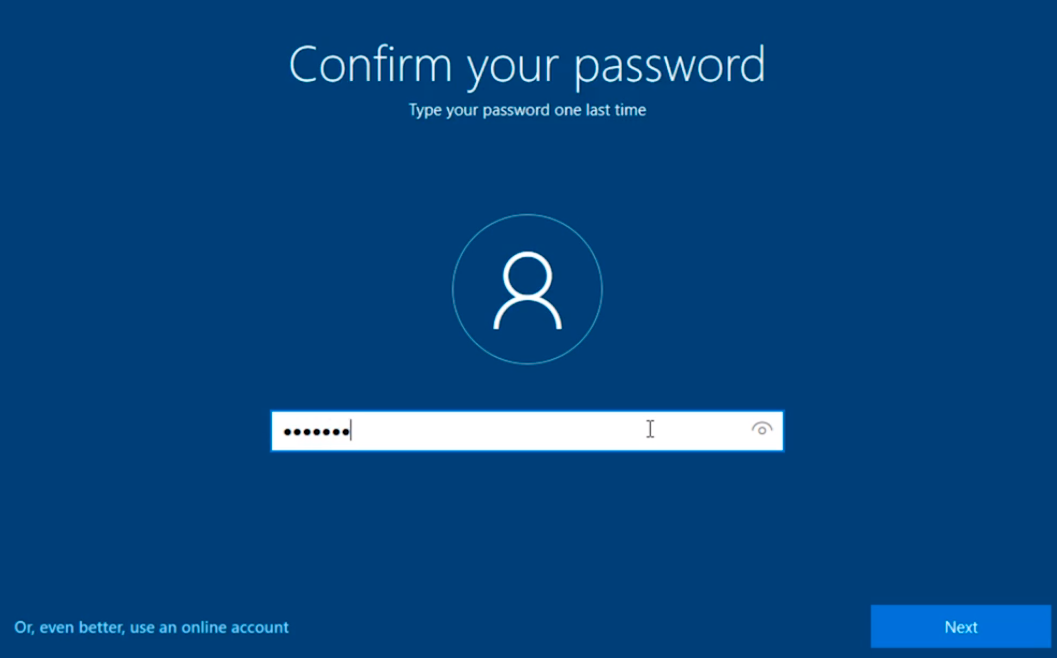
Confirm the password you just created and click on the Next button.
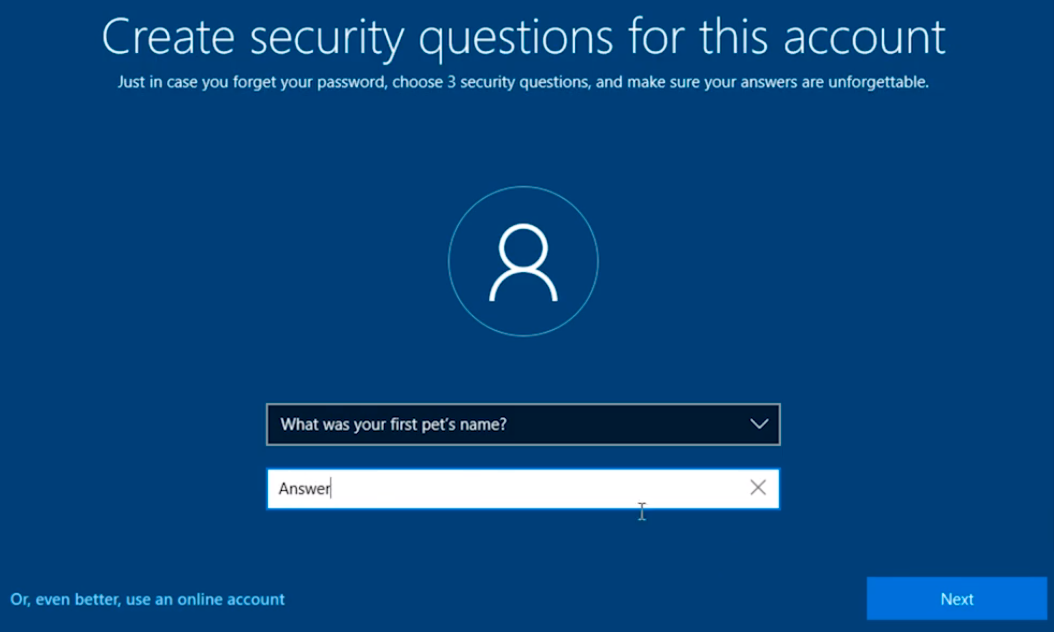
Here we need to choose some questions so I’ll type some random text as the answer and click on Next and I’ll repeat the same for the next two questions just to get through these options.
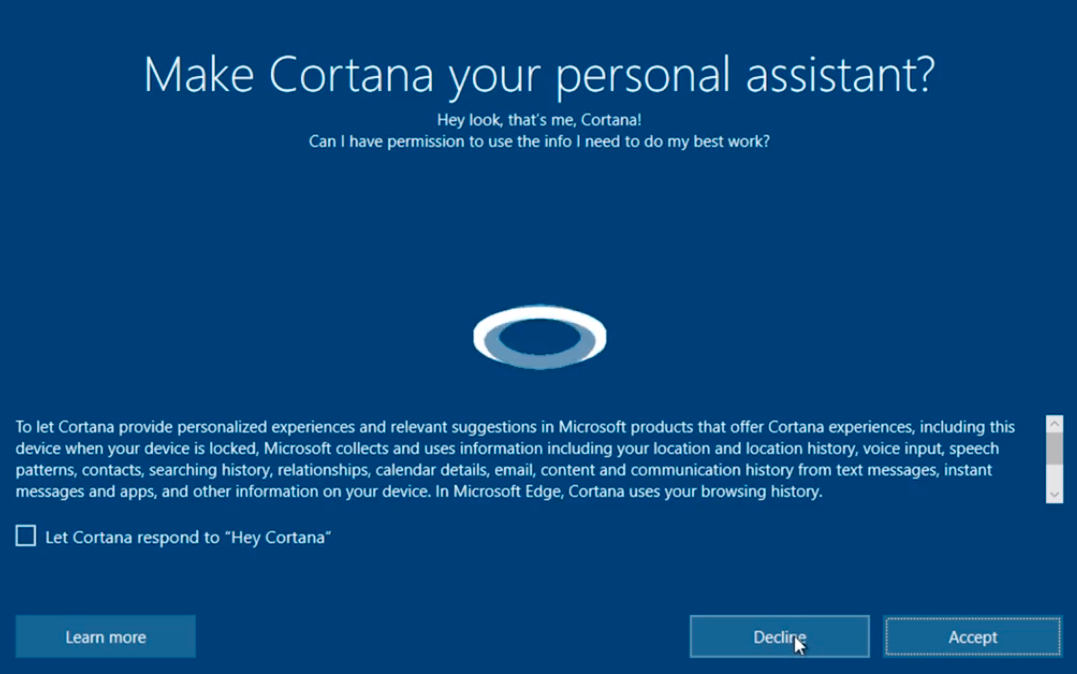
On the next screen, I choose Decline to continue because this generally takes more processing power than you generally want to use.
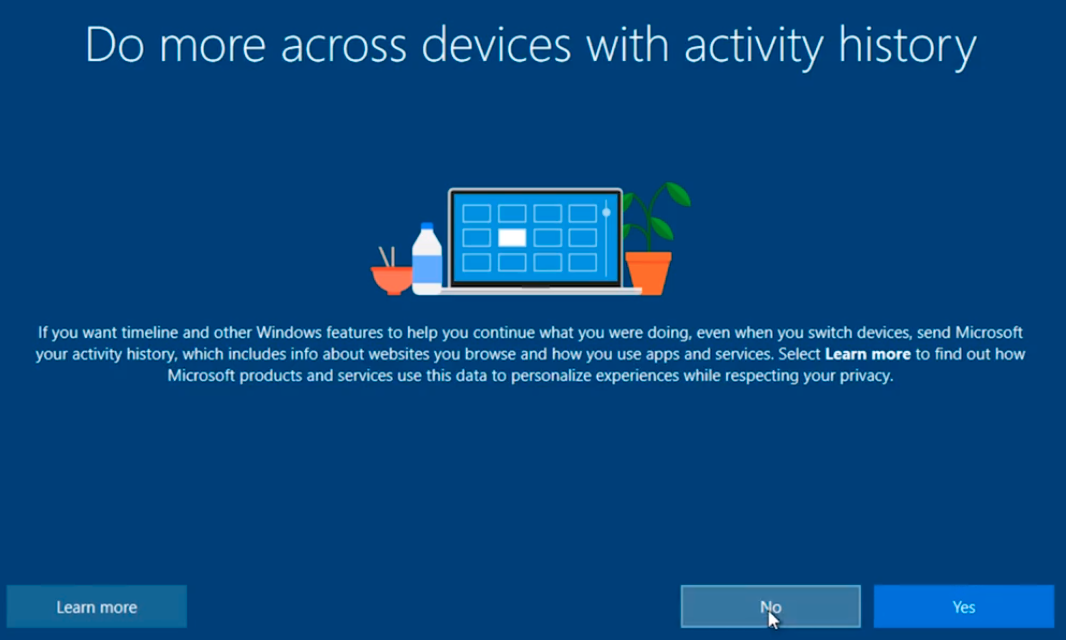
And I am going to select No on the next screen.
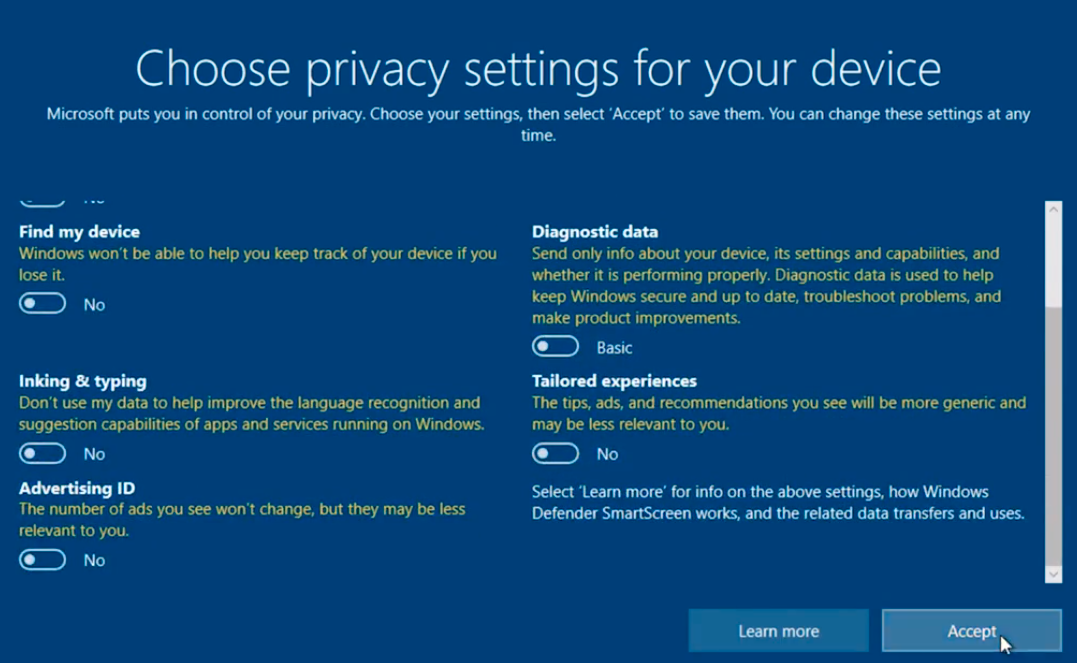
Here I am going to Turn Off all of these options because these are features that we don’t need for our lab and generally will slow down our Virtual Machine. Click Accept when done.
Now we are brought to the Desktop of our computer. I’ll close all the windows.
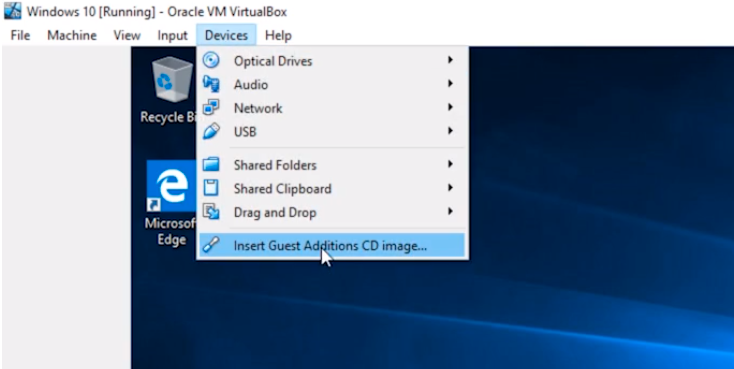
Now, what we want to do for most Virtual Machines that we install is the VirtualBox Guest Additions, especially for Windows VMs.
From the Virtual Machine menu, click on Devices > Insert Guest Additions CD image...
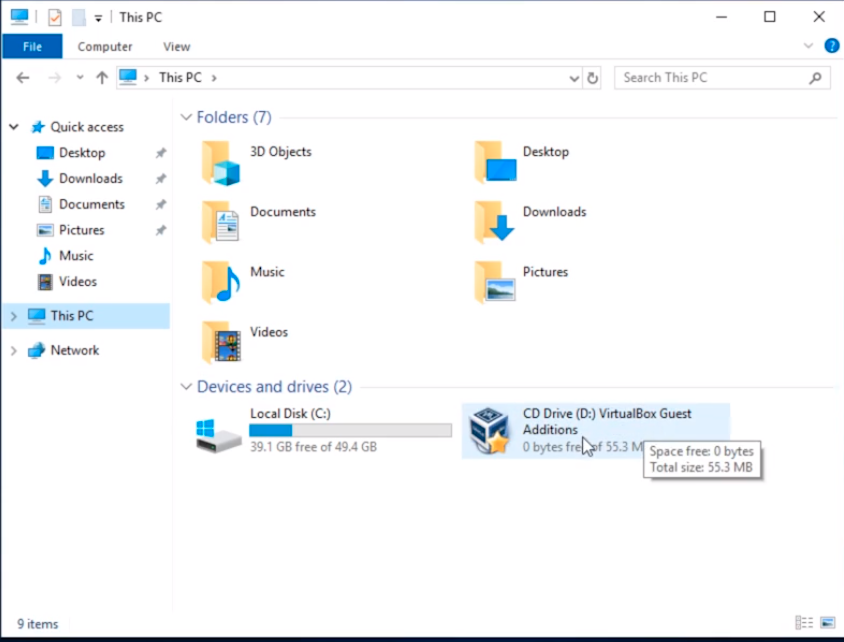
Click the Windows Explorer button and go to This PC and then from the CD Drive. Double-click on the VirtualBox Guest Additions icon to browse to it.
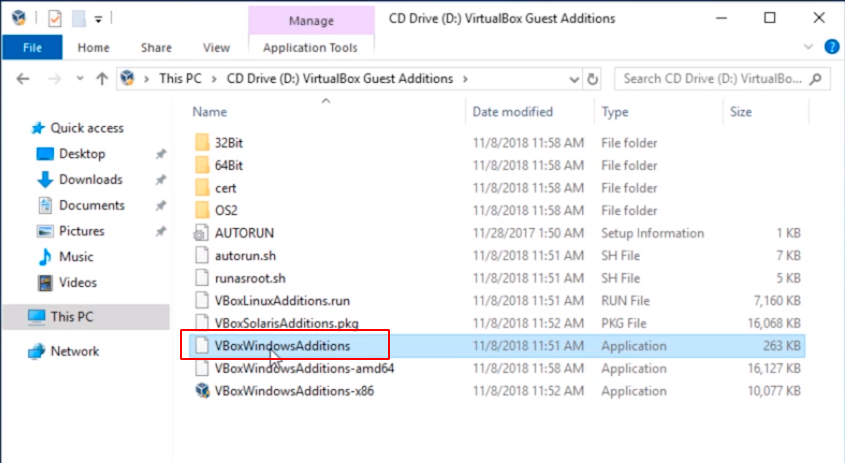
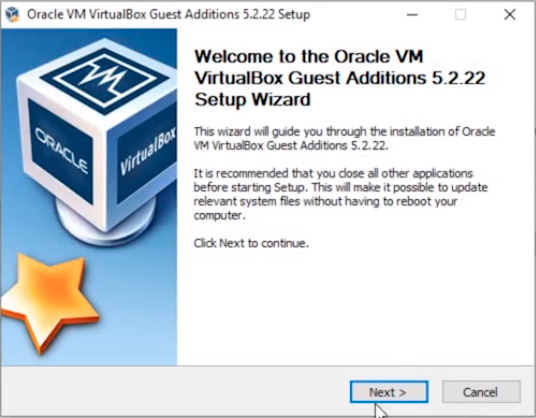
Double-click on VBoxWindowsAdditions to execute the installation.
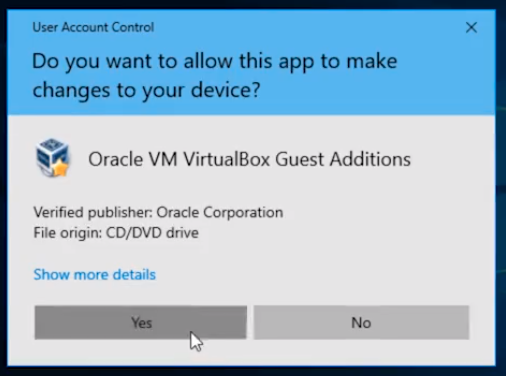
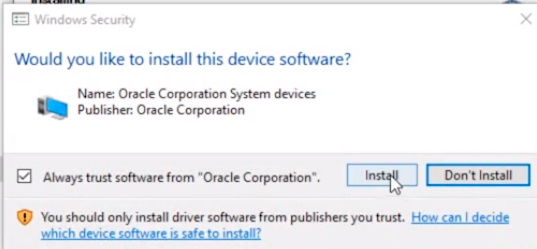
Click on Yes on the UAC prompt.
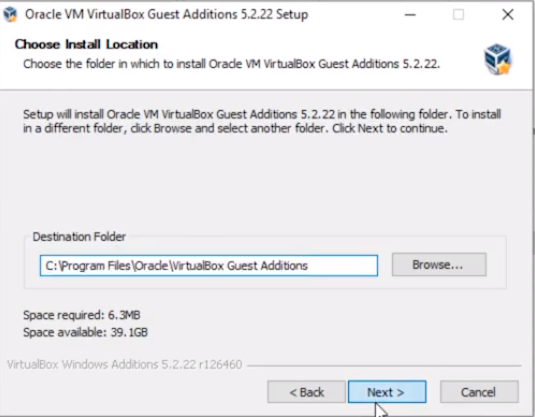
And I am just going to click Next to these prompts using the default selections.
Click Next.
Click Install.
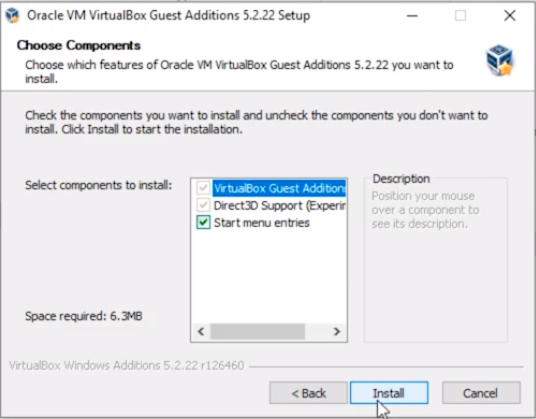
Installation begins.
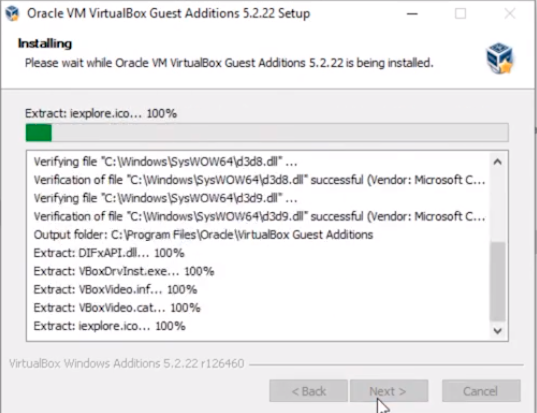
Click Install on the prompt.
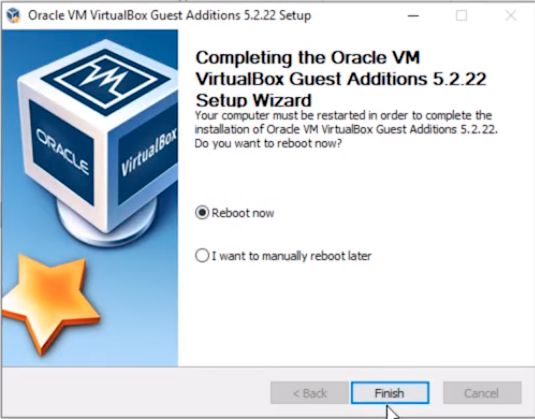
Click on the Finish option with the Reboot now option selected to reboot the Virtual Machine.
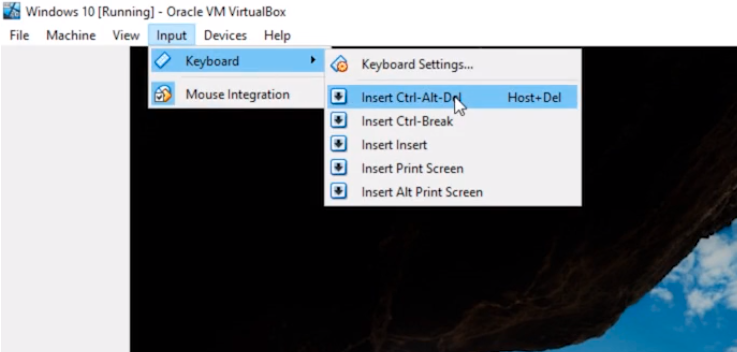
Now, when the Virtual Machine reboots, click on the Virtual Machine menu and select Input > Keyboard > Insert Ctrl-Alt-Del to send that combination of keys to the Virtual Machine.
Now log in using that Administrator password entered previously.
With the VirtualBox Guest Additions installed the screen resolution will be resized and we will not need to be scrolling up and down to see the screen.
Now that we are on the Desktop we see the resolution has been automatically resized and we are connected to our IT LAb Network with Internet access and our Windows 10 Virtual Machine is ready to be used.
That’s all we need to do to Install Windows 10 in our IT Lab.


Hello, I am having trouble with trying to install my it lab. 1st when I try to look for the file I downloaded on the host machine through my guest machine, I can never find it! However, I can always find it on my host machine but when I go back on the guest machine its like its never there. 2nd I am having trouble trying to download VM ware tools? Can you show please me how to download it so that I will not ever have to go through this annoying process again. Hope to hear from you soon Thank you. P.s My email is (removing email for privacy). Happy holidays
Hi Hector MARTINEZ
The file you download on your host machine will not be visible on your guest machine because both are different operating systems and are not sharing the same filesystem. What type of file are you downloading? You might need to look on your host machine for the file and copy/paste it into the desktop of your guest VM.
VMware tools are already on your system if you have a VMware workstation. Check the following video on how to install it: https://youtu.be/X7KZcA1U9Xo
Ricardo
Hello how are you? Thankyou for the reply! I didn’t know that VMware tools comes installed automatically on VMware workstation, how ever to answer your question I am trying to download an ISO file and mount it to my VMware machine. I know that the iso file that I am down loading is good because its straight off the website not from a 3rd party. The ISO file is from a Linux distribution. Before I follow those steps that you sent me on the you tube video, I have to first learn how to install the ISO file in my virtual machine 1st. That’s where I am having the most trouble because when I try to copy and paste it never appears on the guest machine.
I see what you mean. You need to create a “new” virtual machine for that Linux ISO file you downloaded.
Check out this video on how to do it:
https://youtu.be/2KrzgeB6qEI
Ricardo