
Creating a Virtual Network with VirtualBox
Instructions
Q&A (0)
Notes (0)
Resources (0)
Saving Progress...
Resources
There are no resources for this lesson.
Notes can be saved and accessed anywhere in the course. They also double as bookmarks so you can quickly review important lesson material.
In this lecture, we are going to set up a NAT network with VirtualBox Manager.
A NAT network allows you to connect multiple Virtual Machines together and it still provides them with Internet access using NAT or Network Address Translation. I am not going to explain what a NAT is, but just keep in mind it allows you to connect your VMs together and you can connect to the Internet.
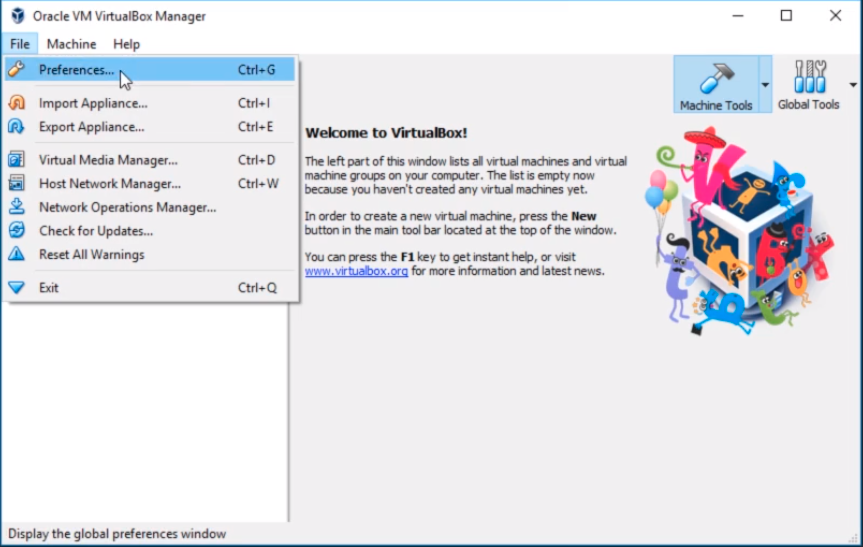
From the Oracle VM VirtualBox Manager click on File and select Preferences...
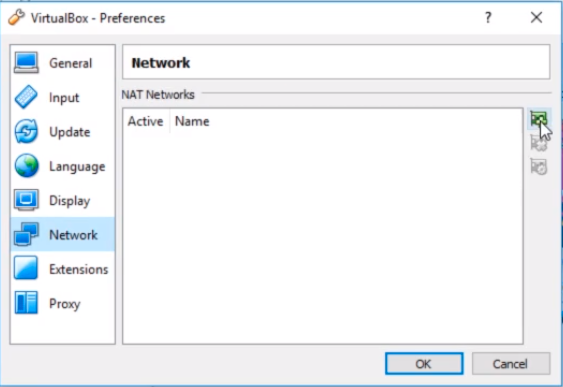
Now, on the VirtualBox Preferences window select Network from the left options and click on the green Plus button to the right side of the window. This allows us to add a new NAT Network.
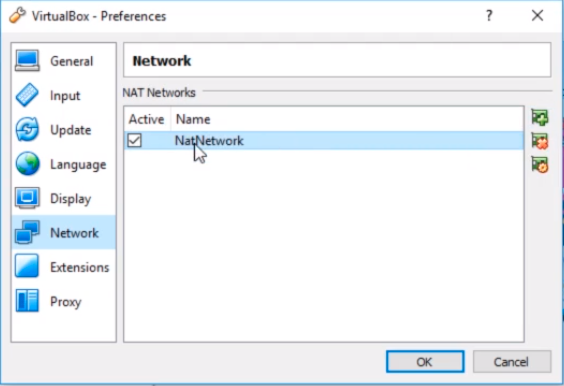
Now, I can double-click on the NatNetwork entry to customize it.
I can customize it and add a new name, change the CIDR, turn On or Off DHCP, etc.
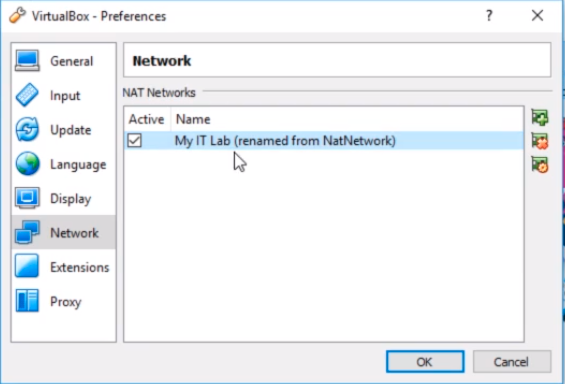
What I am going to do is change the Network Name field to My IT Lab.
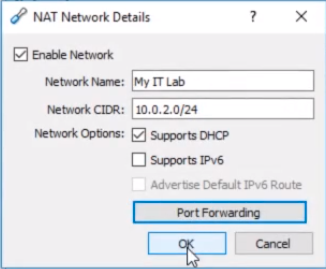
Now, I am not going to change the CIDR because I have seen instances where VirtualBox would give you issues when you do this. You can do it and get it to work, but just keep in mind that if you do change this you can run into issues.
The CIDR is basically the subnet that you are going to use for this NAT Network.
I am going to leave Support DHCP checked for now, but if I want to set up a DHCP Server in my lab I would want to turn this feature Off.
For those of you who don’t know, DHCP is a service that basically assigns IP Addresses to your Virtual Machines automatically versus you having to go and configure them manually. Nine out of ten if you are setting up a Server Operating System you are going to configure the IP Addresses manually anyways, and you want to set up your own DHCP server.
We don’t want to support IPv6 because we don’t use that.
We could choose Port Forwarding if we are going to set up something like a Web Server or any kind of service that we want to forward ports to from the Internet but we have no need to do this.
Click OK to close the window.
Now we can see it says My IT Lab (renamed from NatNetwork).
Now, if we click OK to close the Window we have created our NAT Network.
That’s all we have to do for Creating a Virtual Network with VirtualBox.


Click on the Tools icon bar above the virtual machine list. That will switch the view on the right of the screen to show the network configurations.
Ricardo
Hello, if I use VMware, what settings should I change regarding NAT? Or I don’t need to do anything about NAT?
Hi Cheolsoon Im
If you use VMWare then NAT is like the NATnetwork, no need to configure a new NAT network on VMware.
Ricardo
I would like to create a VM but the my physical computer network shouldn’t be affected. As this is a organization laptop. i want to create a separate network for the VM.
can anyone help me out. ?
Hi BOPPARAJU Shiva Keshav
This NAT configuration should work and not affect the physical computer network. This can give you access to the Internet without affecting the network to which you are connected.
Ricardo
Hello, great job i must say. I tried creating virtual network on my virtual box, some areas got greyed out. i could not increase the memory size and a lot more. Please what do i do?
Hi Francisca Okocha
Which areas were greyed out when creating a virtual network? To change the memory once the VM is created, open the VM’s settings by selecting the VM to modify and open the System tab. Change the “Base memory” value to the new amount of RAM depending on how much your host has available.
Let us know what other issues you encountered to help you create your Virtual Network with VirtualBox.
Ricardo
Hello. I’m using VirtualBox 7.0.10 for this. When I went to preferences, the “Network” tab isn’t there. After doing some research, the “Network” tab is now under “File>Tools>Network Manager”
Excellent class so far.