
How to Create Virtual Machines with VirtualBox
Instructions
Q&A (0)
Notes (0)
Resources (0)
Saving Progress...
Resources
There are no resources for this lesson.
Notes can be saved and accessed anywhere in the course. They also double as bookmarks so you can quickly review important lesson material.
In this lecture, I am going to show you how you can create Virtual Machines with VirtualBox.
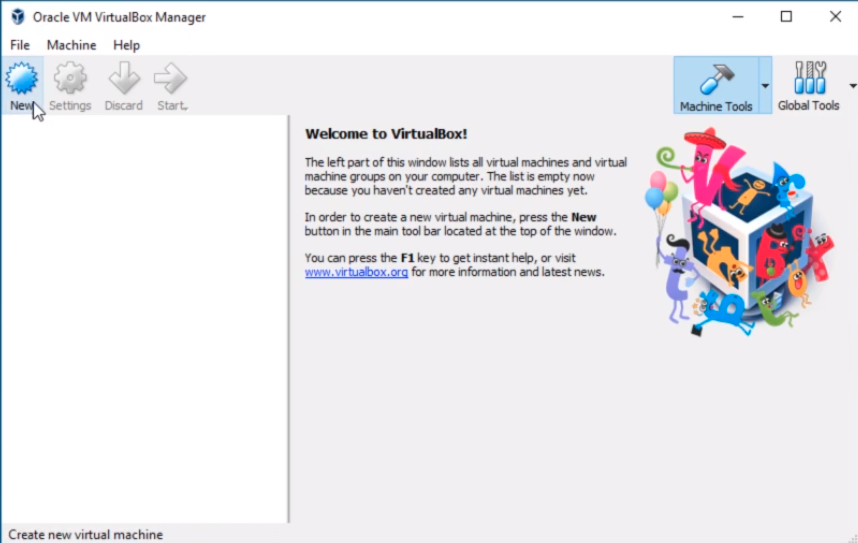
I have the Oracle VM VirtualBox Manager application open and what I am going to do is just click on New on the top left-hand corner.
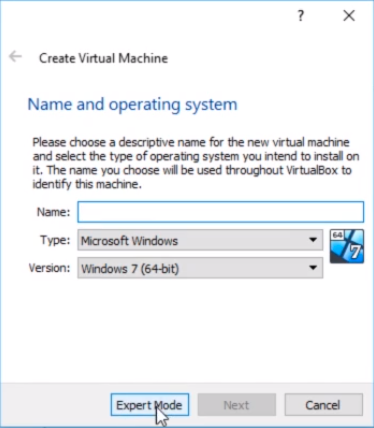
Once we click that we are going to get a new window named Create Virtual Machine. I like to use the Expert Mode so I am going to click that button.
What this does is you get the same options but it reduces the number of pages that we have to select.
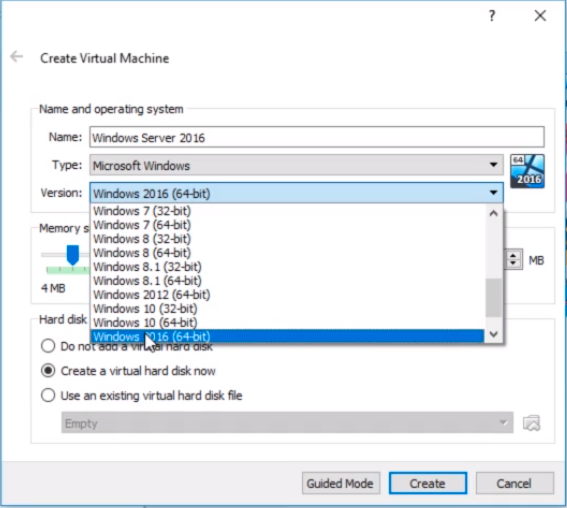
First, we are going to select a name for the Virtual Machine and we will call this one Windows Server 2016.
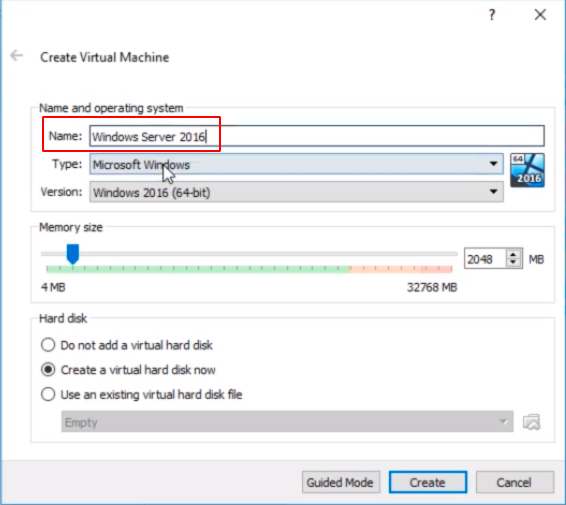
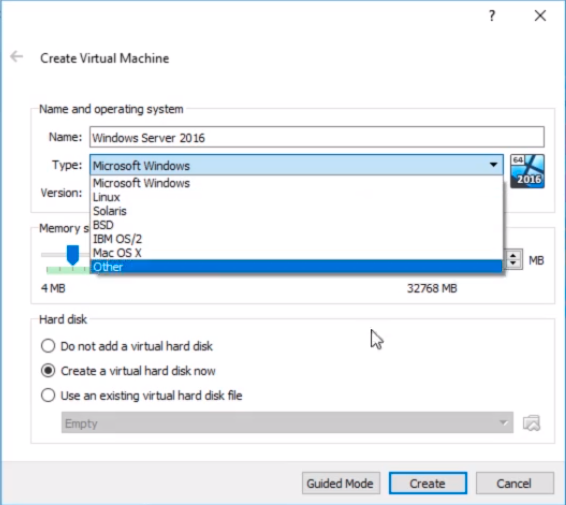
Next, we need to choose the Type. This will depend on the type of Virtual Machine that you are going to create. I am going to create a Windows Virtual Machine, but if you want to do Linux you can do that or choose any other of the available types.
Now, we need to select the version. I can see that automatically selected Windows 2016 (64-bit).
This is a 64-bit option so if you have only 32-bit versions available it could mean that you don’t have virtualization enabled in your BIOS or it could mean that you don’t have a 64-bit Operating System or a 64-bit processor which would be required to install Windows Server 2016.
Now, you can install Windows Server 2019 which was just released by selecting Windows 2016 (64-bit). So if you find something that’s pretty close to what you are trying to install usually you will be fine selecting that version.
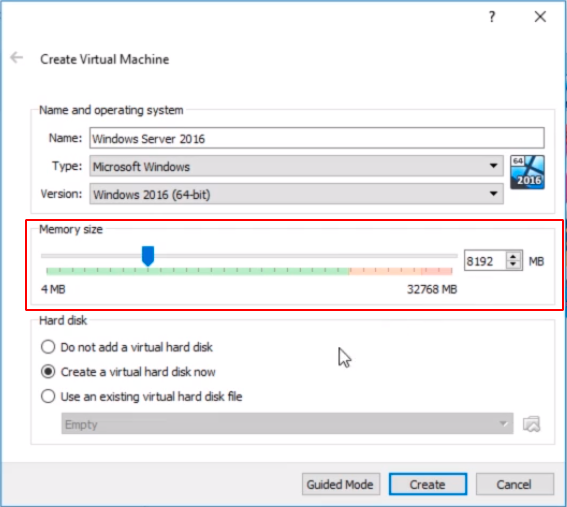
Next, we have to choose the Memory size.
The easiest way to figure out how much memory you should use would be by opening Task Manager clicking the Performance tab and selecting Memory. You will see how much memory you are using right now.
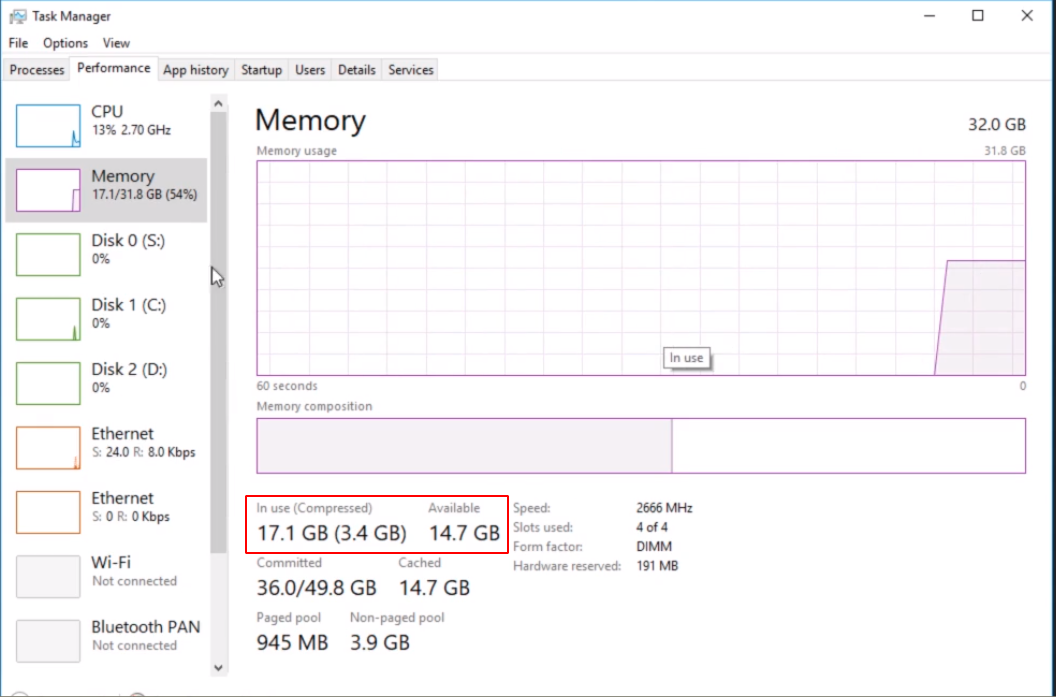
I am using 17 GB out of 32 GB of available memory so I would like to pick an amount that will fit the available memory. I will pick 8 GB, which will put me around 25 GB of memory in use out of 32 GB.
I’ll move the slider to 8 GB of RAM for the Memory Size and you can see that’s 8192 MB.
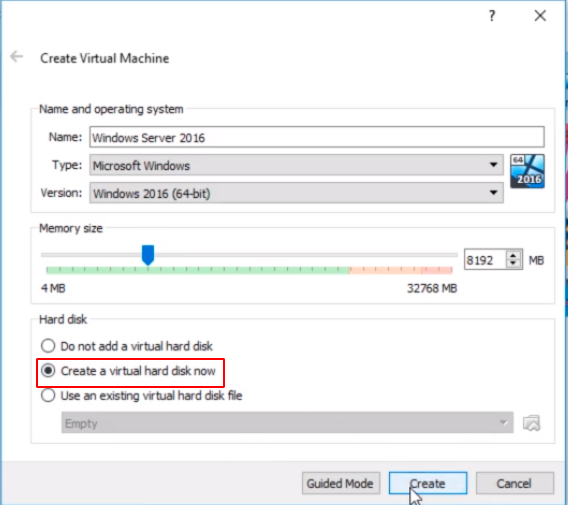
Now what I am going to do is choose under the Hard Disk.
If we had a Hard Disk created we would choose not to add a virtual hard disk option or we could choose to Use an existing virtual hard disk file option and select one if available.
I am going to select Create a virtual hard disk now option and click Create.
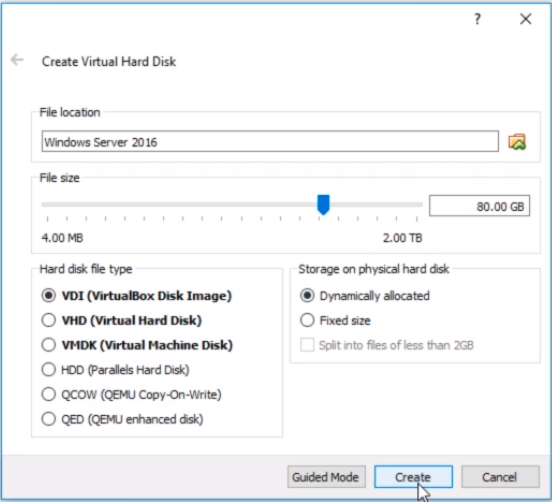
Now, we are going to create a Virtual Hard Disk in a new window. I am going to leave the File Location at the default and this will create it under the same folder as the Virtual Machine.
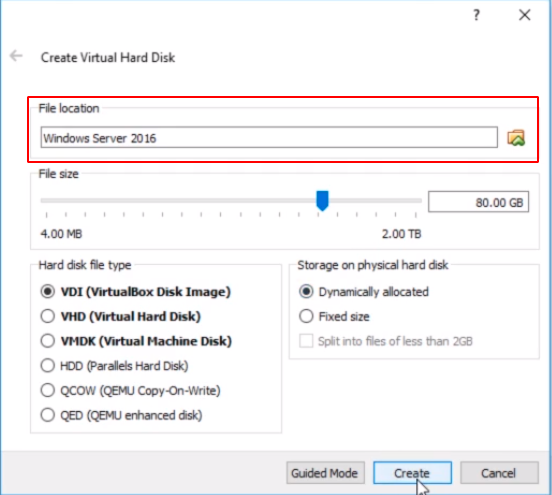
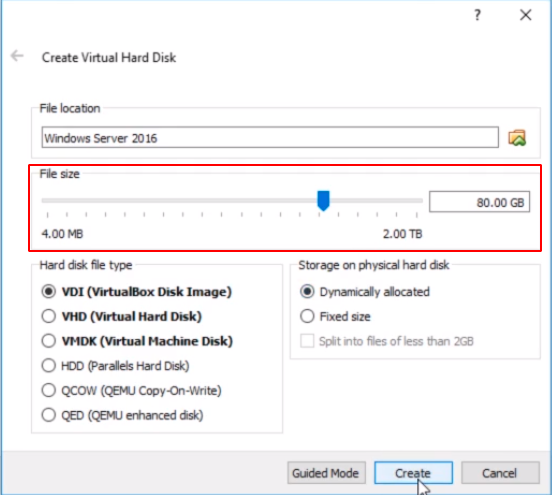
Next, we have to choose a File size. I am going to select 80 GB.
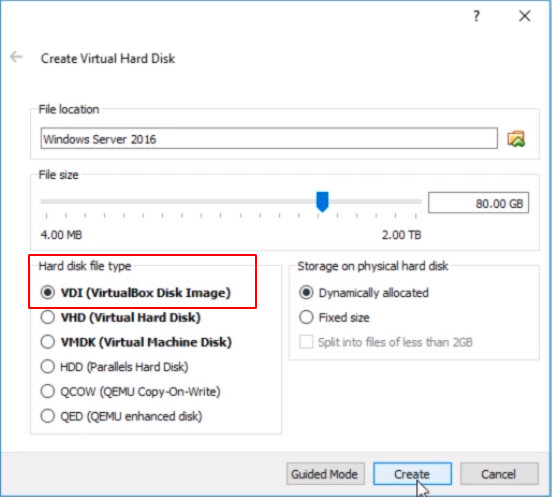
For the virtual Hard disk file type, we can leave it at the default of VDI (VirtualBox Disk Image). This is only important to choose or change if you plan on importing this Virtual Machine to another virtualization technology like VMWare or Hyper-V or any other.
Now, for Storage on a physical hard disk, I strongly recommend that you use Dynamically allocated. What this does is that the Hard Disk file of 80 GB will only be as big as the files that are on the Hard Disk. So, if we install Windows Server 2016 the Operating System, and let’s say that takes 10 GB of storage the Hard Disk file will only be 10 GB in size with a maximum of 80 GB.
Basically, the Hard Disk drive will expand and contract based on how much data is on the Virtual Machine. This is generally the most efficient way to create Virtual Machine Hard Disk drives.
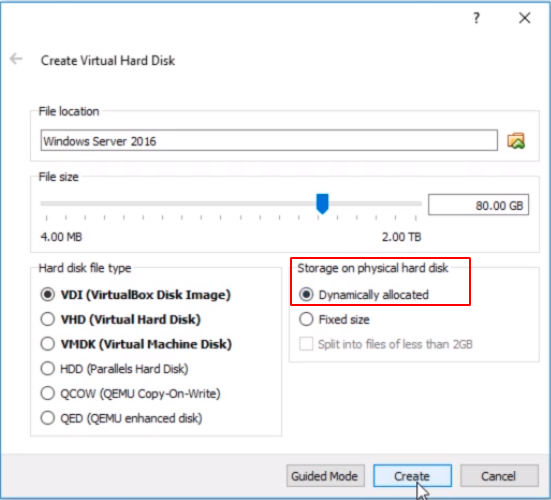
Now, Fixed Size means that if we create an 80 GB fixed Hard Disk drive that Hard Disk drive would be 80 GB in size no matter how much data is stored on the virtual Hard Disk drive.
Now, this could be good if you are trying to budget out storage space let’s say if you have a 100 GB Hard Disk space and you create 4 x 25 GB Hard Disk drives and you never have to worry about running out of space whereas if you have a 100 GB Hard Disk and you dynamically allocated a 100 GB disk to all 4 Virtual Machines what would happen if you get more than 25 GB of data stored on each 4 of those hard disk drives, you are going to exceed 100 GB total and you are going to have issues.
So, choose Dynamically allocated and click Create.
Now, we have created our Virtual Machine.
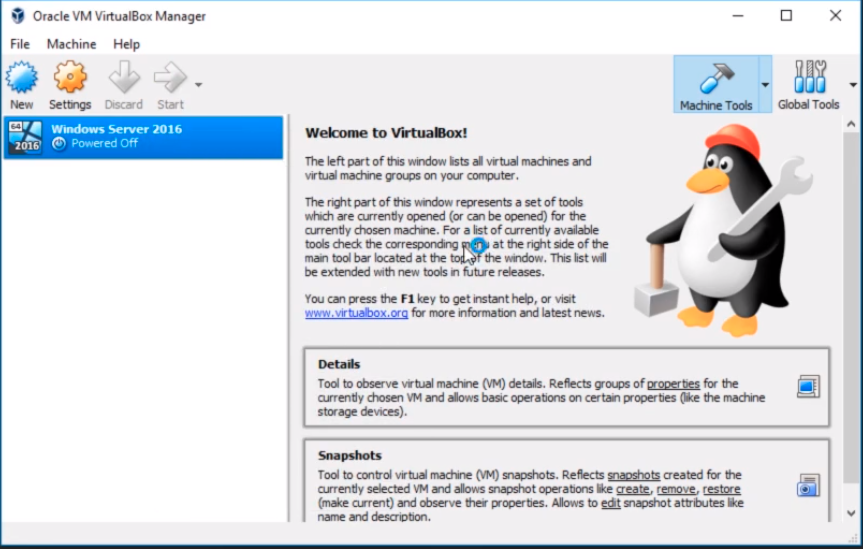
Now, we can right-click on the Virtual Machine and choose Settings.
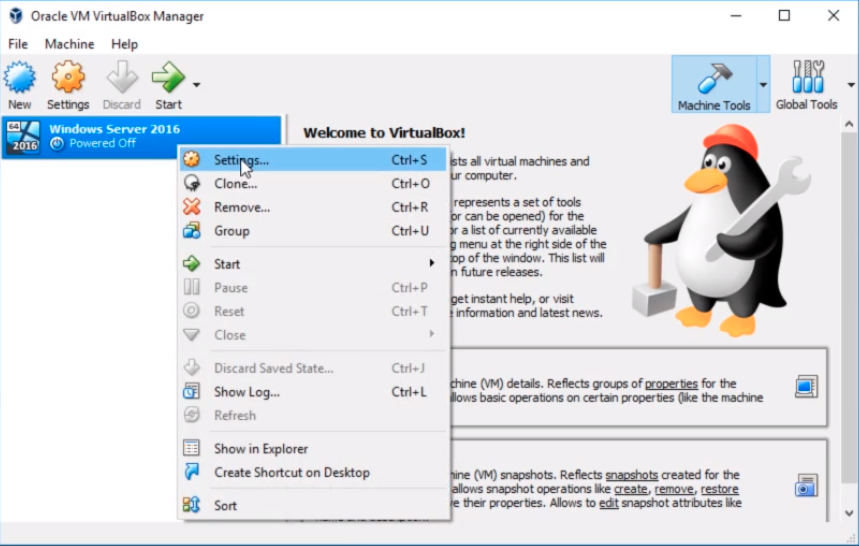
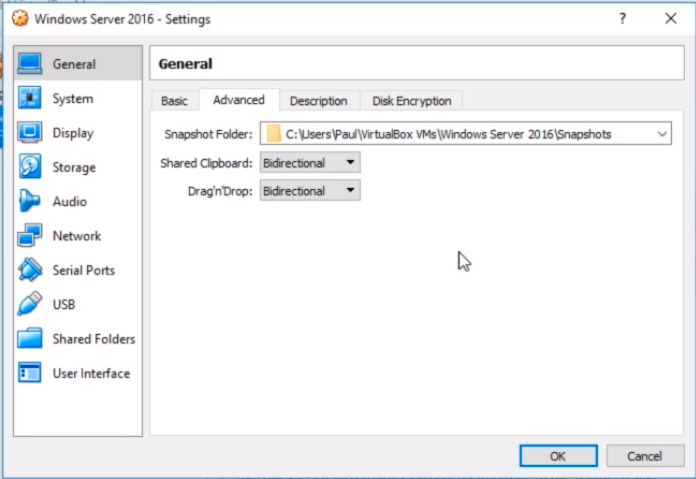
From Settings, we can do a lot of things to modify the Virtual Machine. We can go through all the settings but it is not something we need to do. One thing we can do is set Shared Clipboard to Bidirectional and Drag and Drop to Bidirectional under General > Advanced tab. This allows us to Copy and Paste and Drag and Drop from your Host Computer to your Virtual Machine and vice versa.
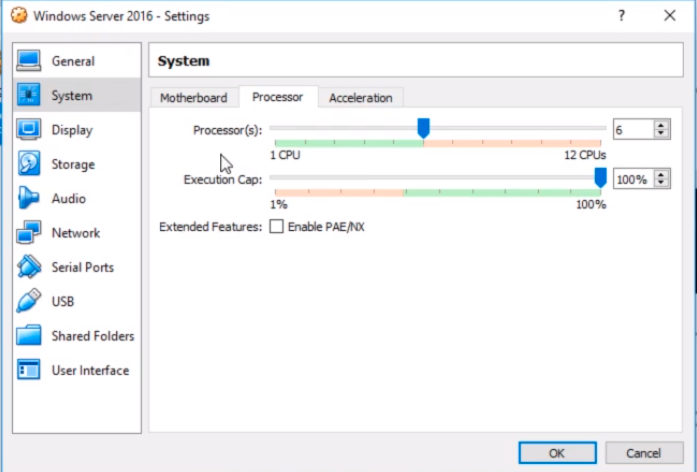
Now, if you go to System from the left menu. One thing that I like to do and this really affects the performance of the Virtual Machine is pump up the CPUs from 1 to 2. That really enhances the performance of your Virtual Machine.
What I am going to do is set it to 6 because I can afford that since I have a lot of CPUs on this Host computer but if you can just bump it up to 2 that is really nice.
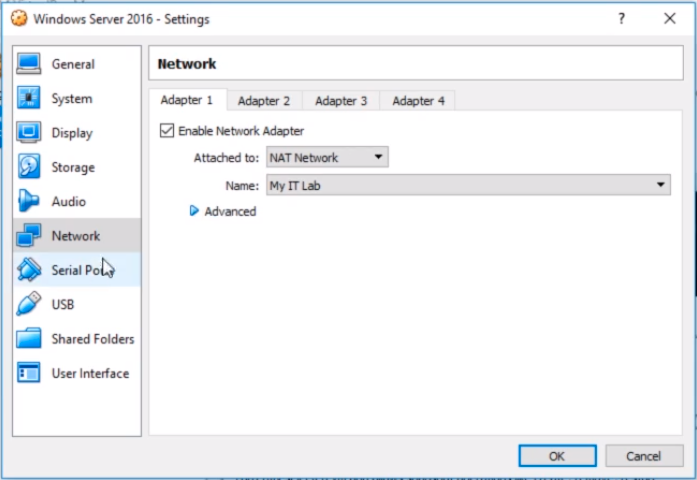
Now, if we click on Network on the left options. We can change from NAT to Nat Network and we want to make sure we select the Nat Network we created called My IT Lab.
For the rest of the options, there’s no need to modify them unless needed.
Click OK to close the Windows Server 2016 Settings window.
That’s all we have to do to Create and Configure a Virtual Machine with VirtualBox.


Hello, Thankyou for your videos they are very informative, however I have been struggling for a while already trying to install a iso image on a virtual box. I made sure the bidirectional option was on so that I can copy n paste and when I copy the iso image from my regular desktop it just disappears! I dont think its the Iso, hopefully not SMH… Nevertheless, I really need some of you help, hope to hear from you soon thankyou P.S my email is <–Edited email for privacy–>
Hi Hector MARTINEZ
Besides enabling the bidirectional option you might also need to install the VirtualBox Guest Addition tools.
Check this article https://pureinfotech.com/install-guest-additions-windows-10-virtualbox/
Also, is not necessary to drag and drop the ISO inside the virtual machine, you just add it to the Optical drive media in VirtualBox.
Check the following link: https://pureinfotech.com/mount-iso-virtual-machine-virtualbox/
Ricardo