
Install the DHCP Server Role

Full-Access Members Only
Sorry, this lesson is only available to Server Academy Full-Access members. Become a Full-Access member now and get instant access to this and many more premium courses. Click the button below and get instant access now.
Instructions
Q&A (0)
Notes (0)
Resources (0)
Saving Progress...
Resources
There are no resources for this lesson.
Notes can be saved and accessed anywhere in the course. They also double as bookmarks so you can quickly review important lesson material.
In this lecture, we are going to create a DHCP server by installing the DHCP server role on our ITFDC01 server.
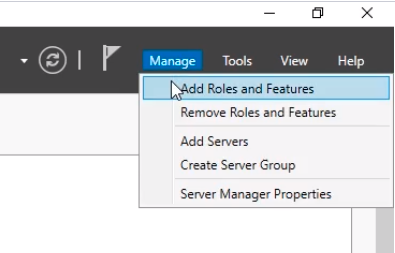
To install DHCP on a server, open Server Manager and select Manage > Add Roles and Features.
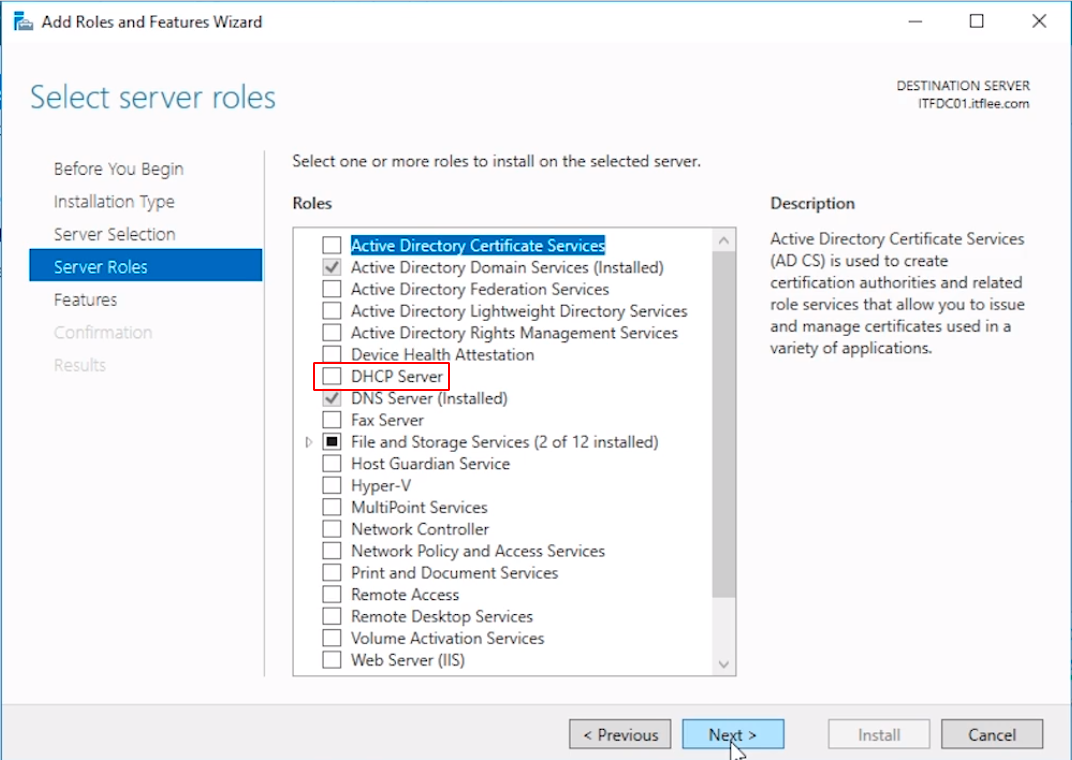
Continue through the prompts until you get to the Server Roles tab. Check the DHCP Server checkbox.
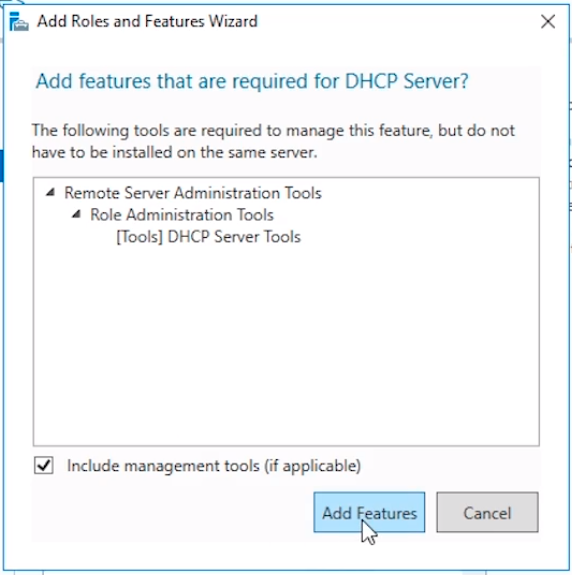
You’ll be prompted to add the Features that are required by the DHCP Server Role. Click the Add Features button to continue.
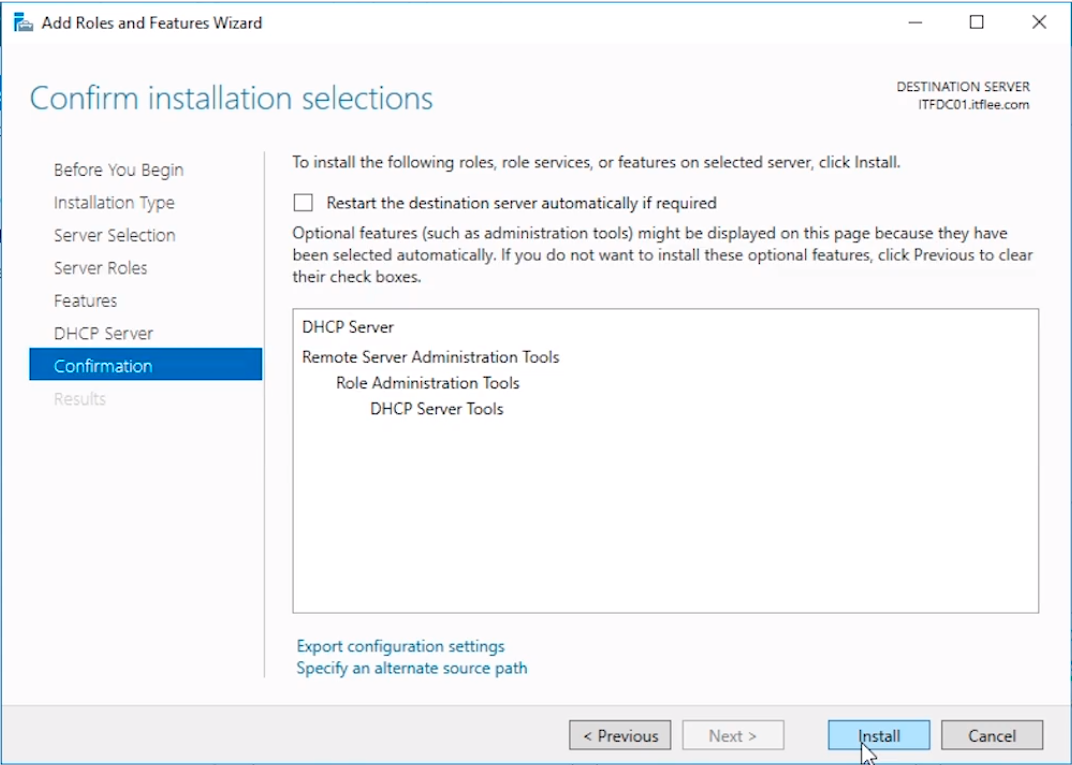
Click Next until you get to the confirmation window and click Install.
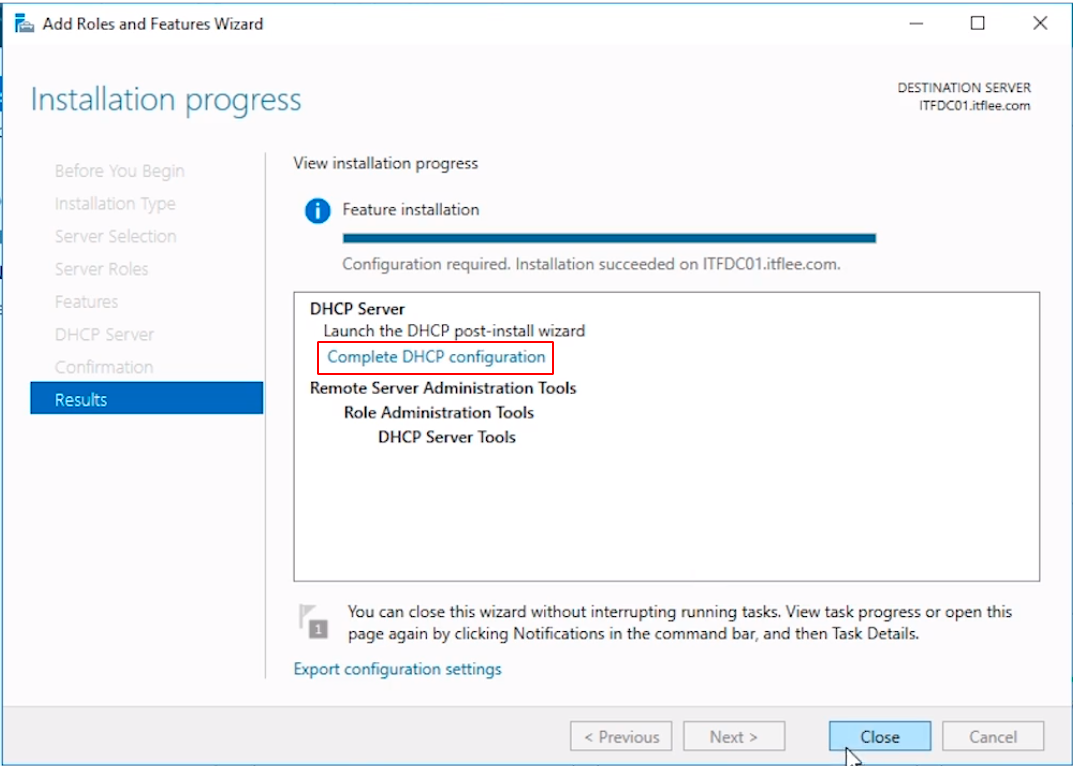
The installation will begin and we just need to wait for it to finish.
Once the installation completes, click the Complete DHCP configuration blue hyperlink.
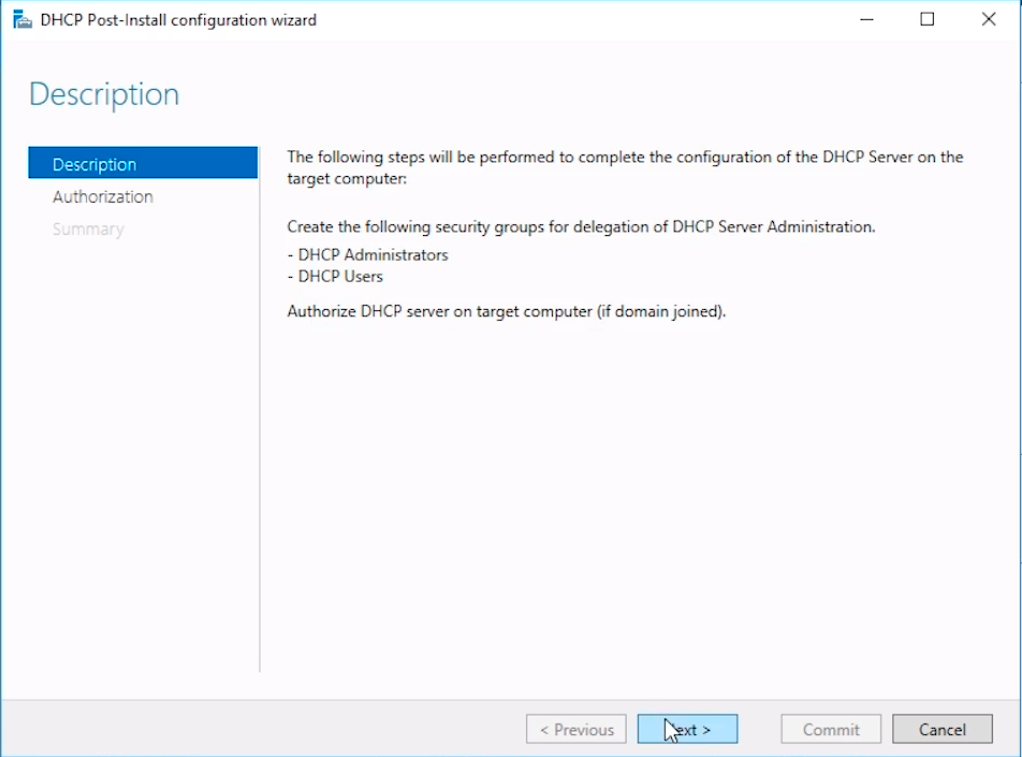
The DHCP Post-install configuration wizard window will appear. The first configuration window tells us that we will need to create the DHCP Administrators and DHCP Users security groups and authorize the DHCP server.
Click Next to continue.
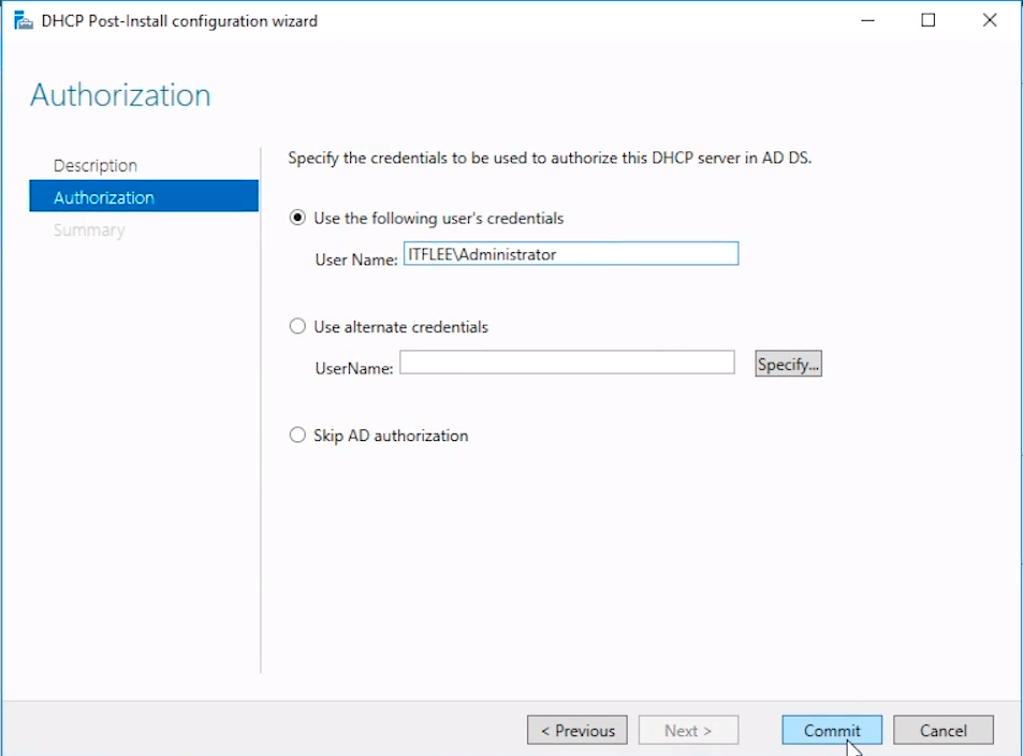
The next screen we will be presented with is the Authorization screen. We need to specify a domain user account that has Domain Administrator permissions.
By default, it specifies the account ITFLEE\Administrator. We know that this Administrator account is a Domain Account because it is prefixed by our domain NetBIOS name ITFLEE and a backslash. This account is suitable for the tasks required so click on Commit to continue.
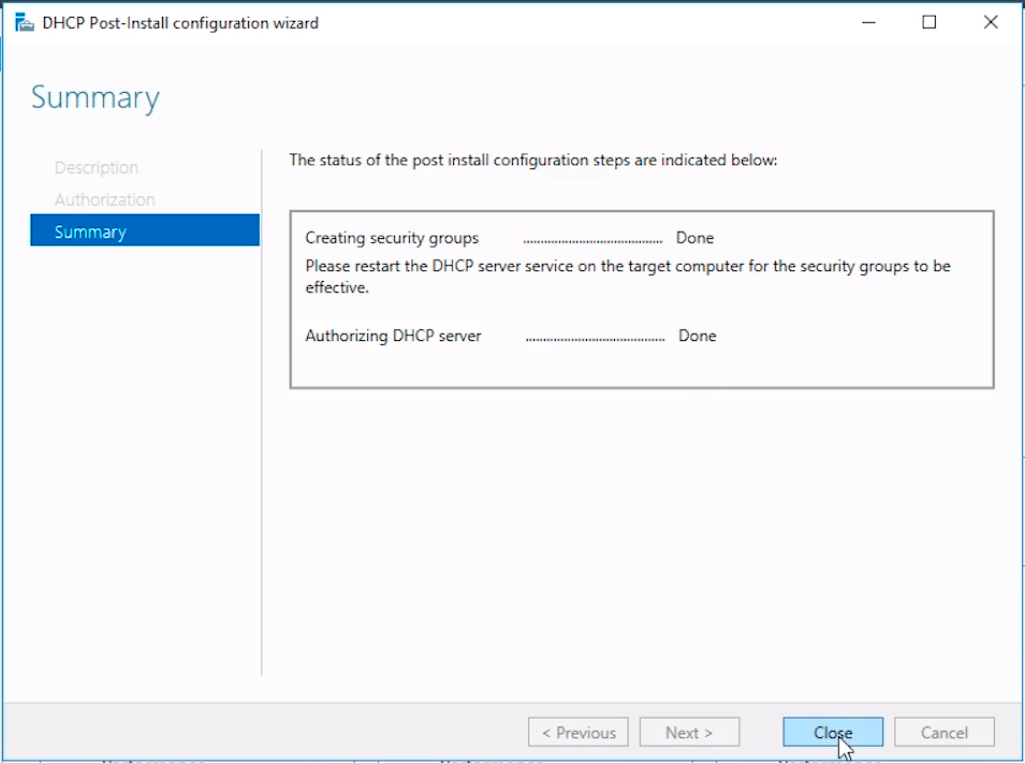
Next, you will be brought to the Summary page where you can see the two tasks that are being completed. The tasks are now completed, so we can click Close to exit the DHCP window.
Now you will notice on the left side of the Server Manager window we have a DHCP Tab.
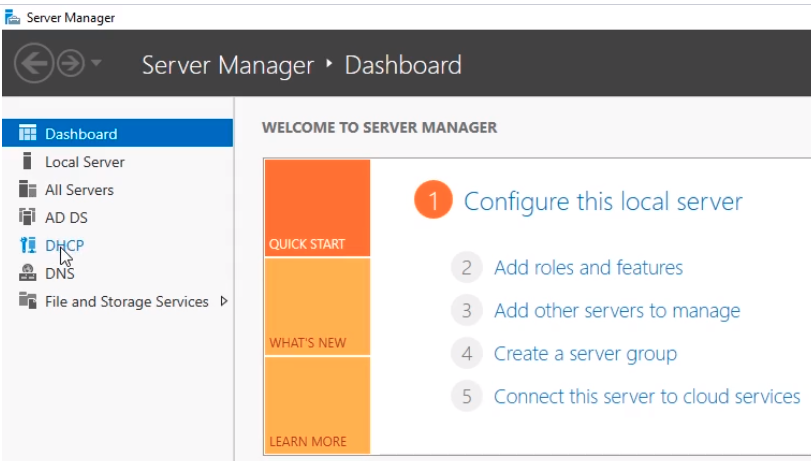
Click on the DHCP tab to view information related to DHCP such as Events, Services, and more.
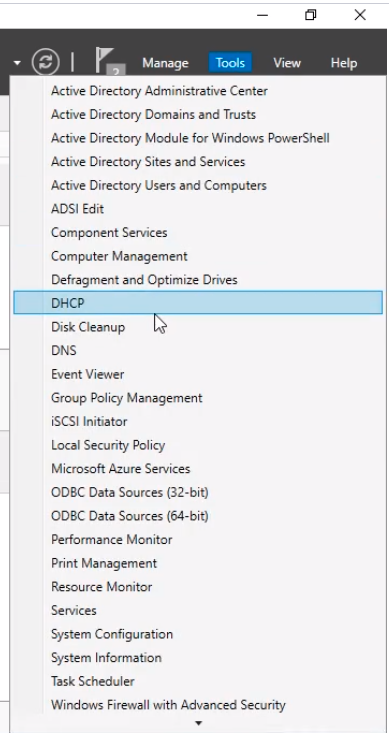
To open the DHCP management console click on Tools > DHCP on Server Manager.
The DHCP management console will appear and we can see our servers listed along with the IPv4 and IPv6 settings. In this course, we will be using IPv4 because it is by far the most commonly used protocol.
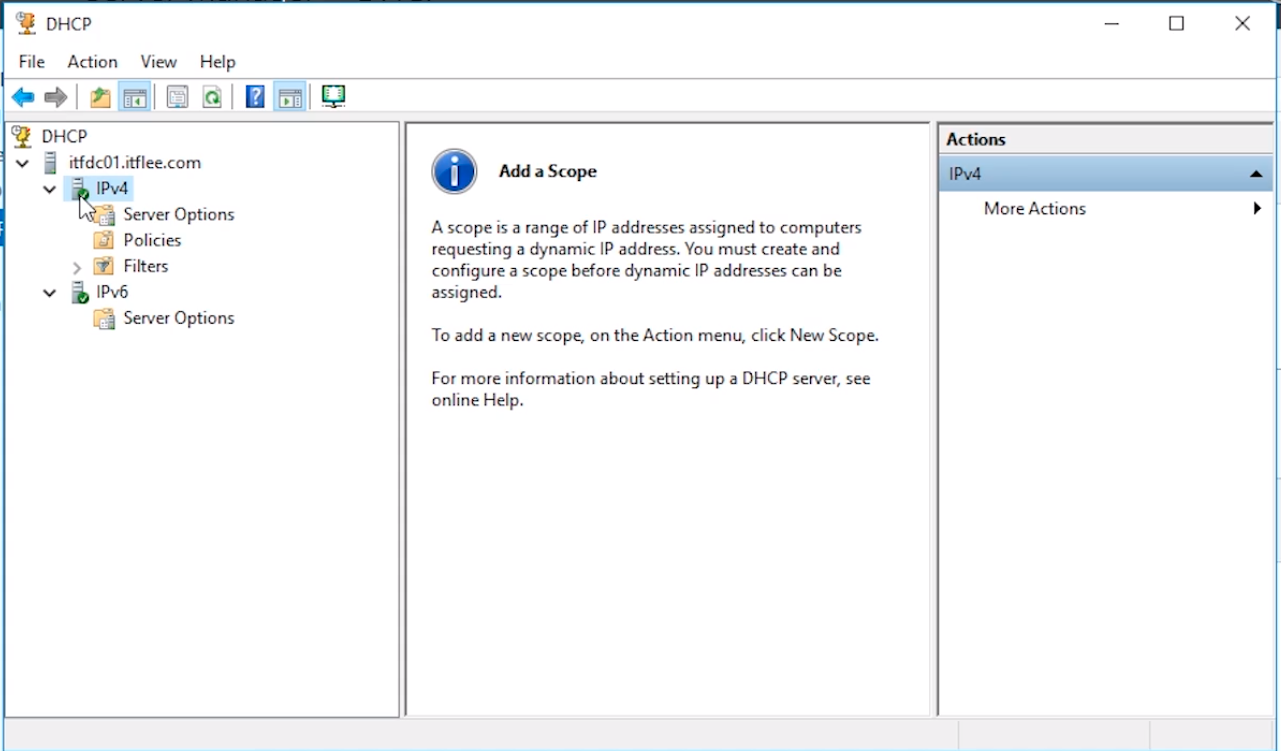
Right now our DHCP server is not fully functioning because we need to define a scope for it to use.
We will do that in the following lectures.
Server Academy Members Only
Sorry, this lesson is only available to Server Academy Full Access members. Become a Full-Access Member now and you’ll get instant access to all of our courses.


