How to enable Intel VT or AMD-V virtualization in your BIOS
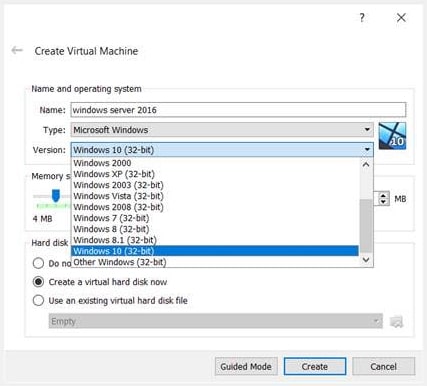
This post describes how to resolve the issue of VirtualBox only showing 32-bit Operating Systems when creating a new Virtual Machine (image below).

Fix #1 - You have the Hyper-V feature enabled on your host computer.
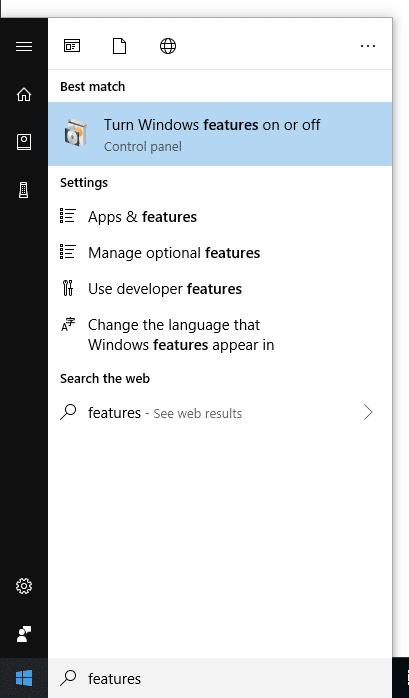
To turn off the Hyper-V feature on Windows 10, click the Start button and type "features". This should return "Turn Windows features on or off".
From here scroll to the Hyper-V feature and make sure the checkbox is unchecked (see image below). Once you turn off the feature make sure you reboot your computer.


Fix #2 - You need to enable Virtualization in your BIOS.
Follow these steps to enable Intel VT (Virtualization Technology) and AMD-V virtualization. Keep in mind that different motherboards will have different versions of the BIOS or UEFI and there are too many variations for us to show screenshots of all possible options. We will do our best to describe the basic process you need to go through:
Reboot your computer and open the BIOS menu. When the computer is booting up you should see instructions regarding how to open your BIOS. It's usually a done with one of the keys below:
- Delete key
- F1
- F9
Once you are inside of the BIOS, you want to look for your processor settings. This could be hidden within the Processor Settings or Advanced CPU Configuration.
From here you can enable Intel Virtualization Technology sometimes referred to by the names below:
- Intel VT
- AMD-V
- Virtualization Extensions
- Vanderpool
- AMD IOMMU
Select Save & Exit to restart your computer.


