Configuring and Mounting a New Volume
In this lesson, you will learn the practical aspects of managing storage in a Linux environment, specifically focusing on how to add a new drive to a virtual machine (VM) in VirtualBox and then configure and mount this new volume on our "Ubuntu Server" VM. This is a crucial skill for anyone managing Linux servers, as it involves understanding how to expand storage capabilities and manage filesystems effectively.
Adding a New Drive to the VM in VirtualBox
To increase the storage capacity of your "Ubuntu Server" virtual machine (VM) in VirtualBox, you need to add a new virtual hard drive. Here's how to do it:
__
Ensure that your VM is powered off before attempting to complete the steps below. You can shutdown your VM with the shutdown now command
1\. Start VirtualBox : Open VirtualBox and select the "Ubuntu Server" VM from your list of VMs.
2\. Access VM Settings : Click on the "Settings" button while your VM is highlighted. This will open a new window where you can modify various settings of the VM.
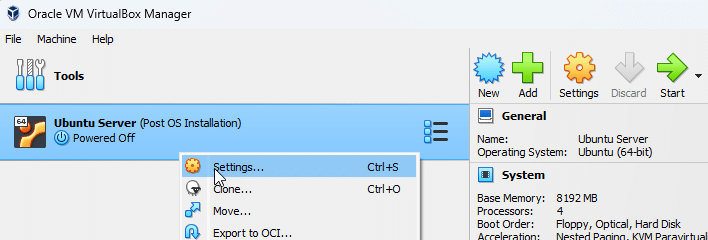 Open VM Settings
3\. Navigate to Storage Settings : In the settings window, click on the "Storage" tab. Here, you'll see your current storage setup, including any hard drives or optical drives attached to the VM.
4\. Add a New Hard Drive : Look for the "Controller: SATA" or "Controller: IDE" section in the storage tree. Right-click on it and choose "Add Hard Disk ".
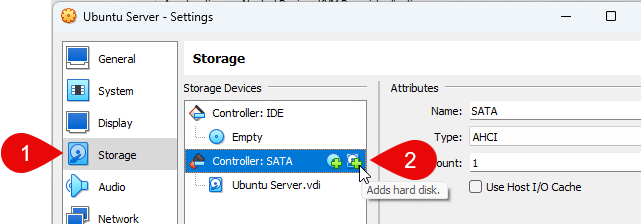 image 3
In the new window, select "Create new disk". This will launch a wizard to guide you through the process of creating a new virtual hard disk.
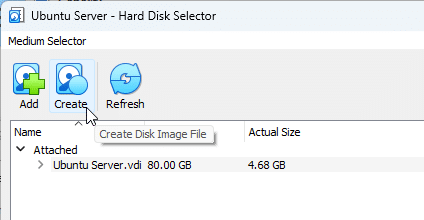 Create a new Disk Image File
**5\. Configure the New Hard Disk…
No comments yet. Add the first comment to start the discussion.