Install the DHCP Server Role
In this lecture, we are going to create a DHCP server by installing the DHCP server role on our ITFDC01 server.
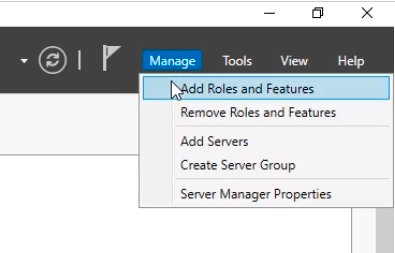
To install DHCP on a server, open Server Manager and select Manage > Add Roles and Features.
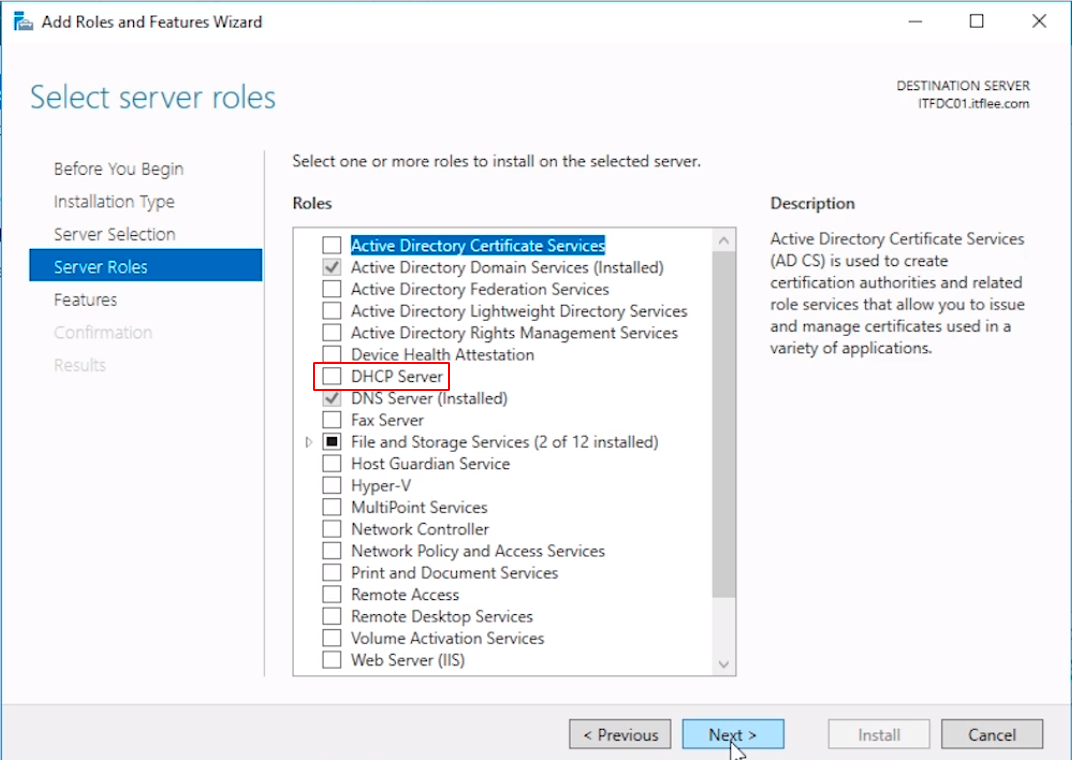
Continue through the prompts until you get to the Server Roles tab. Check the DHCP Server checkbox.
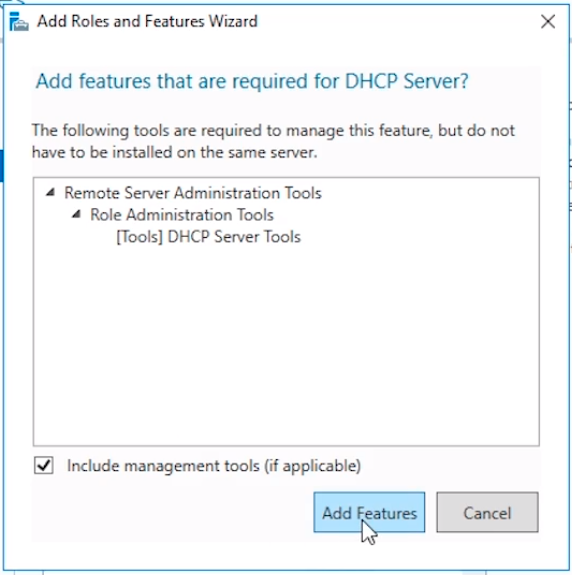
You’ll be prompted to add the Features that are required by the DHCP Server Role. Click the Add Features button to continue.
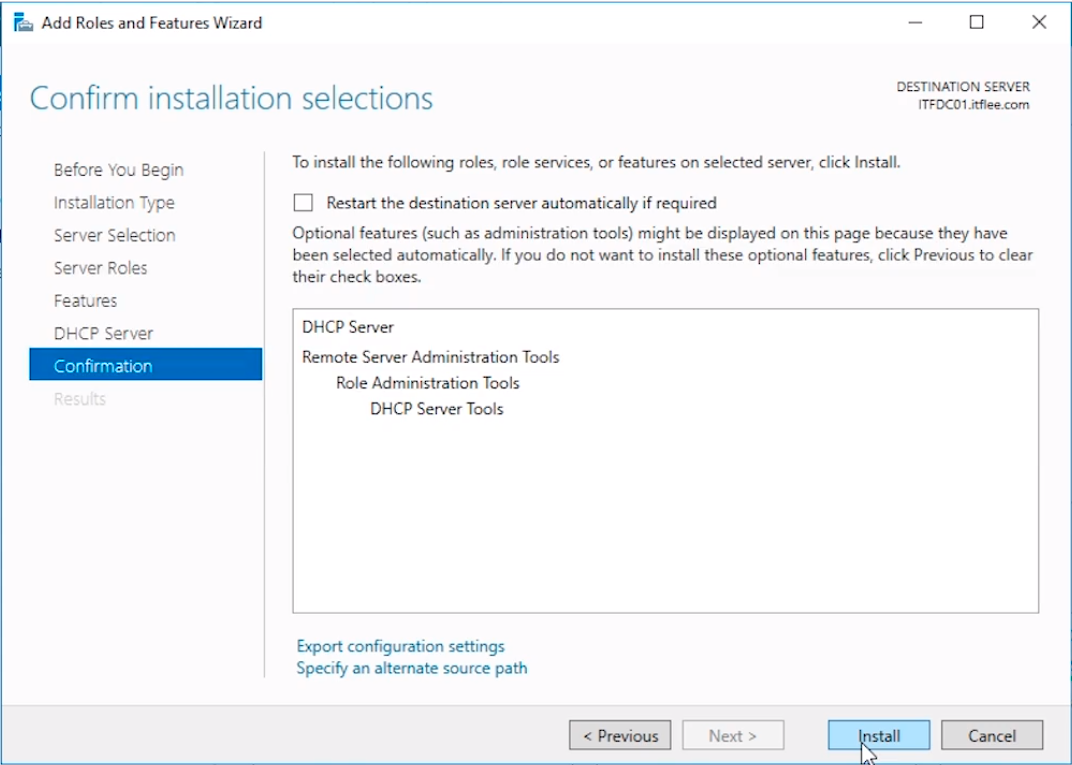
Click Next until you get to the confirmation window and click Install.
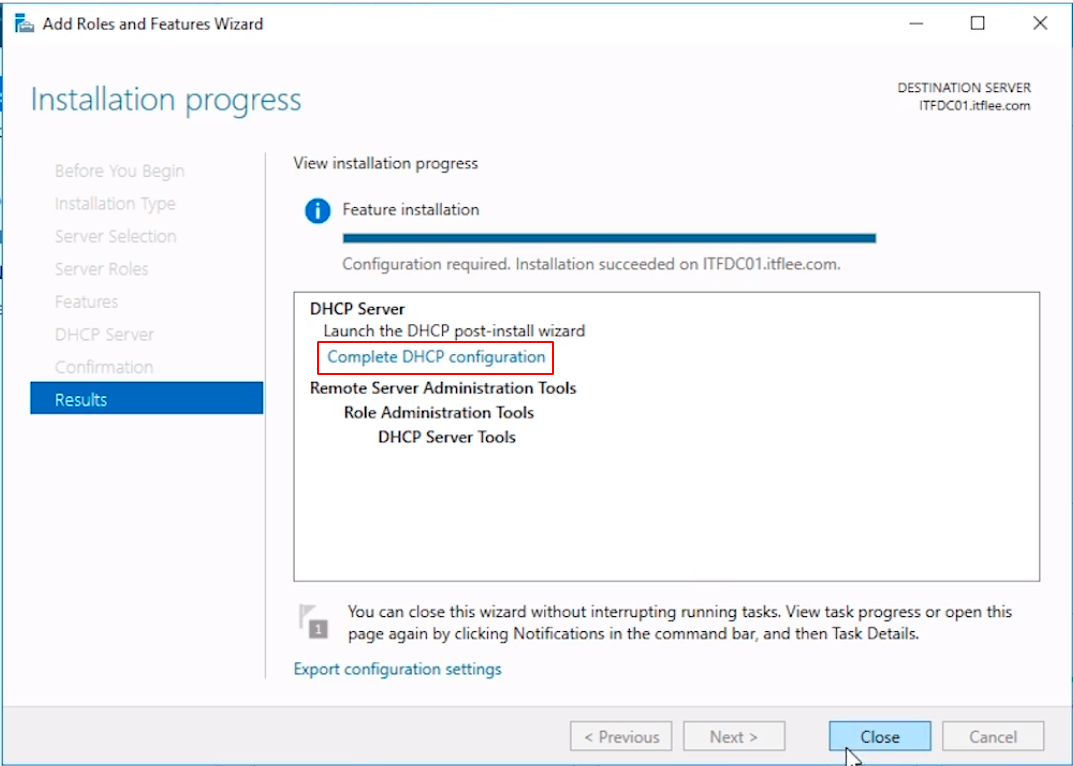
The installation will begin and we just need to wait for it to finish.
Once the installation completes, click the Complete DHCP configuration blue hyperlink.
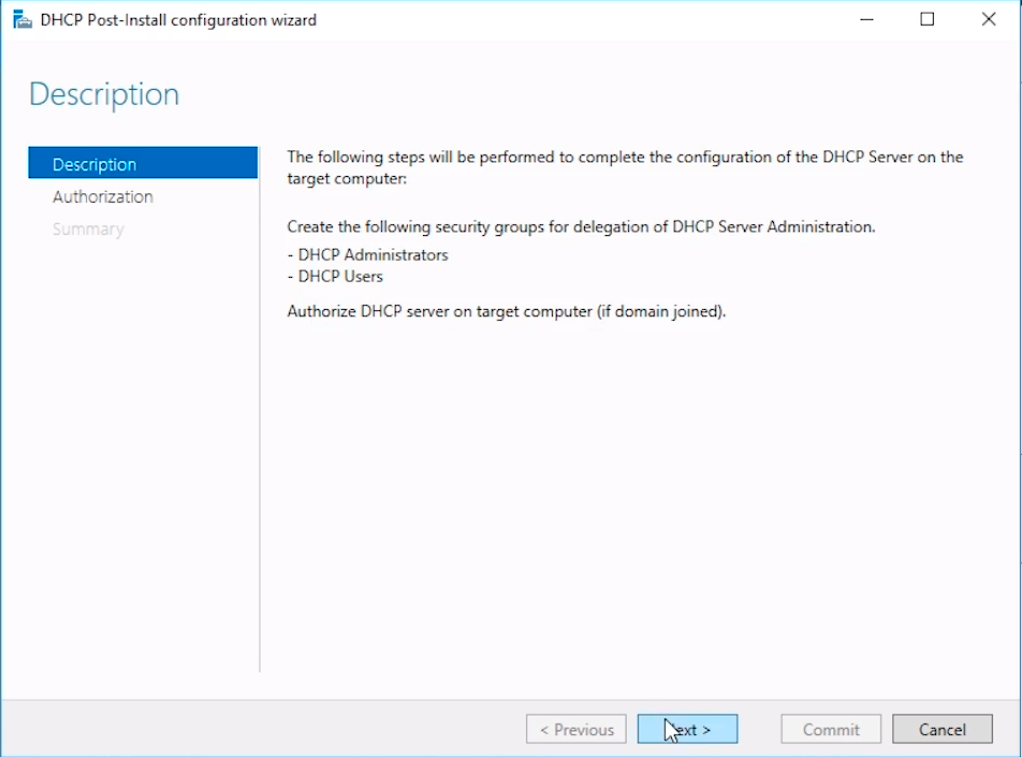
The DHCP Post-install configuration wizard window will appear. The first configuration window tells us that we will need to create the DHCP Administrators and DHCP Users security groups and authorize the DHCP server.
Click Next to continue.
The next screen we will be presented with is the Authorization screen. We need to specify a domain user account that has Domain Administrator permissions.
By default, it specifies the account ITFLEE\Administrator. We know that this Administrator account is a Domain Account because it is prefixed by our domain NetBIOS name ITFLEE and a backslash. This account is suitable for the tasks required so click on Commit…
No comments yet. Add the first comment to start the discussion.