In this lesson, you will learn how to implement DFS to your Windows Server 2016 for your branch office locations.
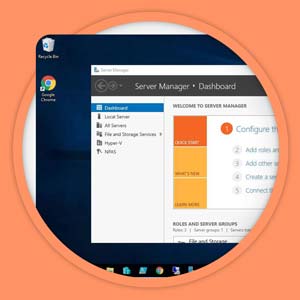
Step 1. Open Server Manager
Open the Server Manager by clicking the Windows button and clicking the Server Manager or by searching it on the list of programs.
Step 2. Add the DFS role
- Click on Manage from the top right-hand corner, and then click Add Roles and Features.

2. In the Add Roles and Features Wizard, click Next

3. Choose Role-based or feature-based installation on the Select installation type, then click Next.
4. On the Select destination server page, you will see the name of the server you have previously configured selected, click Next.
5. On the Select server roles page, expand the File and Storage Services (installed), do the same thing for File and iSCSI Services, and then select the DFS Namespaces checkbox.

6. From the Add Roles and Features pop-up window, click Add Features.
7. On the Select features page, click Next.
8. On the Confirm installation selections page, click Install. Once the installation is complete, hit the Close button.

Step 3. Configuring your DFS Namespace.
- Go back to the Server Manager, click Tools, and then go to DFS Management.

2. On the DFS Management window, from the navigation pane, click Namespaces.

3. Right-click Namespaces, and then click the New Namespace.
4. From New Namespace Wizard, on the Namespace Server page, under Server, type the name of your server (on this example, it is SA-JF-WSRV-01), and then click Next.

5. On the Namespace Name and Settings page, under Name, type the name of the namespace you want to set it to (for our example, mine is DevOps) and then click Edit Settings.

6. Type C:\<namespace> (for this example, C:\DevOps) under Local path of shared folder and choose All users have read and write permissions and click OK. (The Drive C here is the example of where actually your target folder is located on your server. This will only be visible to you as the server administrator. Using the namespace will hide this local path to your users.)

7. On Namespace Name and Settings window, click Next.
8. On the Namespace Type page, make sure that Domain-based namespace is selected. Please also note that the namespace will be accessed by \\<yourcreateddomain>\DevOps (For this example it will be \\jfrdc-lab.com\DevOps)

9. Ensure that the Enable Windows Server 2008 mode check box is selected, and then click Next.
10. On the Review Settings and Create Namespace page, click Create.
11. You will see the confirmation “You have successfully completed the New Namespace Wizard”, click the Close button.
Step 4. Verify DFS functionality for your server. Create sample file.
- Go to the File Explorer. (Press Windows logo + “E” or simply click the File Explorer icon on the taskbar)
- On the address bar of your file explorer, type the namespace you have created and hit enter. (For this example, it is \\jfrdc-lab.com\DevOps)

3. Verify that you can access the target folder of your namespace.

4. Create a sample text file by doing a right click inside the target folder.

5. Name your file as “Sample Text File“.
6. To verify that the file also exists on your local drive, navigate to where you saved your target folder. On this example it is C:\DevOps
7. You should be able to see the text file you have created.

Next process is to create target folder on your created namespace. To learn about adding target folder, click here.

Sign up free and start learning today!
Practice on REAL servers, learn from our video lessons, interact with the Server Academy community!


