
Active Directory Groups Tutorial

Paul Hill
February 2, 2021 • 5 min read
Active Directory groups and memberships are one of those things you MUST understand in order to administer Active Directory.
At a high level, Active Directory groups are collections of AD Objects. A group’s members can contain users, computers, other groups and more.
Let’s get started!
Create Active Directory Groups
To create a group in Active Directory right-click on your desired OU and select New > Group:
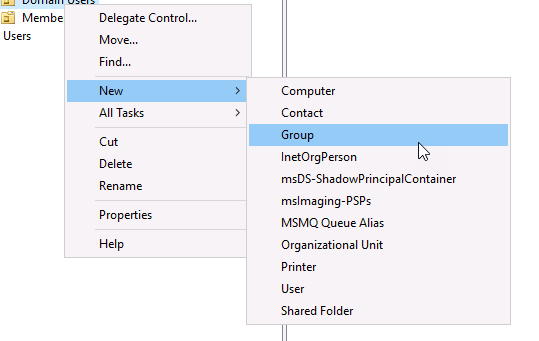
The New Object – Group window will appear.
Group Name
Now you need to specify the Active Directory Group Name. This is the name that will be displayed for the group in Active Directory.
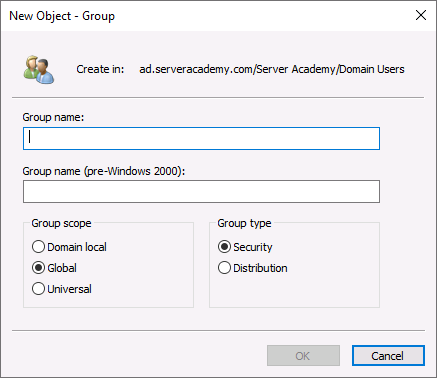
Group Name (pre-Windows 2000)
This will automatically populate the pre-windows 200 group name as well. As the name implies this name is compatible with older versions of Windows Server and is limited to 20 characters.
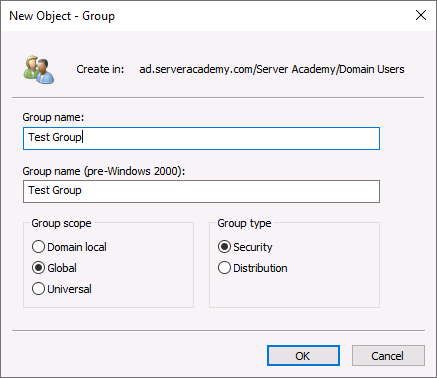
I am going to name my group “Test Group”
Group Type
There are two types of groups in Active Directory:
- Security
- Distribution
Security
A security group in Active Directory is used to assign permissions to resources with Group Policy.
Distribution
A distribution group in Active Directory is used to create email distribution lists.
We are going to use a Security group in this lesson.
Group Scope
For the group scope, we have three options:
- Domain Local
- Global
- Universal
The scope generally only comes into play when you dealing with multiple domains and trusts. If you are in a single domain environment, nine times out of ten you are going to be fine picking a Global scope. We will still cover the differences here however.
The difference between these comes down to the possible members, memberships of the group, scope conversion (for example, can you change from Global to Universal) and grantable permissions.
If you want to see Microsoft’s documentation on this subject then it can be found here. I’m going to the simplest breakdown for you that I can below:
| Scope | Possible Membership of | Grant Permissions | Scope Conversion | Possible Members |
| Domain Local | -Domain local groups | -Within the same domain | -To Universal (if no domain local members) | -AD Accounts-Local groups-Global groups-Universal groups ^^ from the same domain, trusted domain, other forests and external domains. |
| Global | -AD Accounts-Global groups | -Any domain in the same forest-Trusting domains and forests | -To Universal (if not a member of another global group) | -AD Accounts-Other global groups ^^ from the same domain |
| Universal | -Universal Groups ^^ Same Forest -Domain Local groups-Local Groups (computer local not domain) ^^ Same forest or trusting forests | -Any domain in the same forest-Trusting domains and forests | -To Domain Local (if not a member of other universal group)-To Global (if does not contain other Universal Group as a member) | -AD Accounts-Global Groups-Universal Groups ^^ From any domain in the same forest |
In our scenario, we are going to use Global because we are working in a single domain environment and we have no need to add users from other domains or forests.
Creating a group
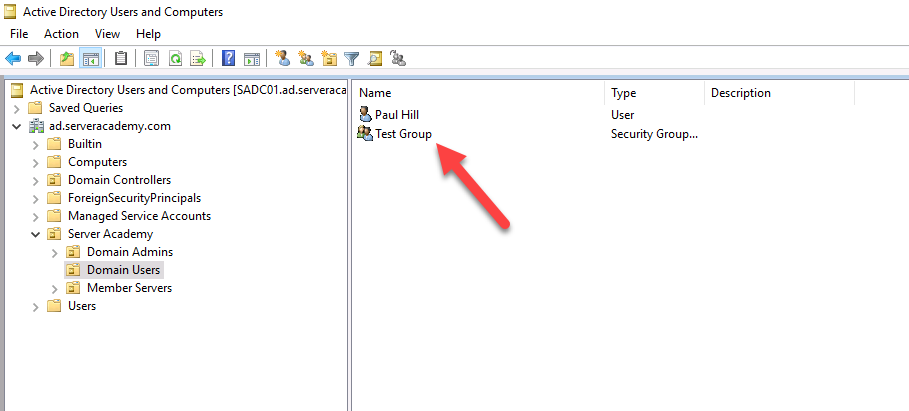
Once you configued the settings, go ahead and click OK to create the group:
Now you should see the AD Group listed in the Active Directory OU that you created it:
Group Properties
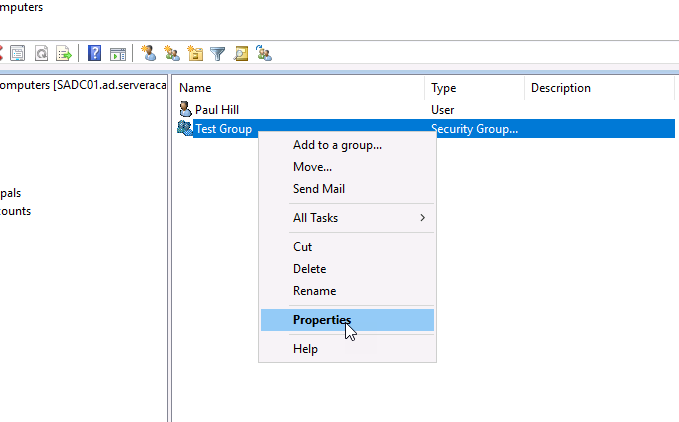
Right-click the group and select Properties:
General Properties
From the General tab, you can convert the group or modify its general information. Click the Members tab.

Delete or add Group Members
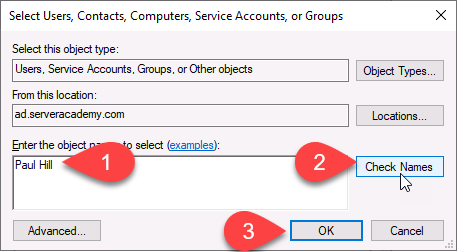
Click the Members tab. From here you can see all of the members (if any) of this Active Directory group. Right now there are no members, so let’s add a member by clicking the Add button:

Now you can search for and add your desired user. I am going to use my user account which is “paul.hill”:
Now this user will be listed under the Members tab.
Note: If I open the properties of my Paul Hill user account and navigate to the Member Of tab, I will see this group listed there:

Back at the group’s Members tab, you can remove the user from this group by clicking the user name and selecting Remove.
Primary Groups
The Active Directory primary group was created to support the UNIX POSIX integration for access control to resources.
POSIX (portable operating system interface for uni-X) is a set of standards designed to aid in the creation of cross platform software.
If you’re working in a Windows only environment, this won’t apply to you.
Member Of Tab
Going back to our AD Group, click the Member Of tab. This view lists all of the other groups that this group is a member of. That’s right, you can nest groups within groups.
You can click the Add button to add this current group as a member of another group if desired. Adding and removing memberships works exactly the same as adding or removing members.
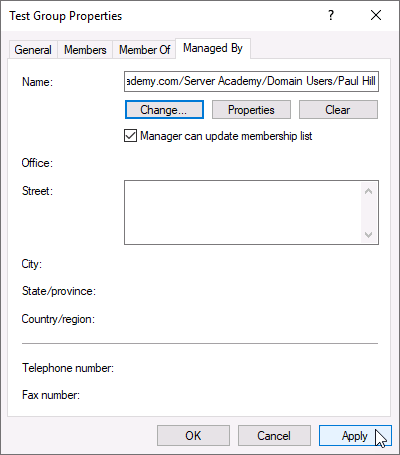
Managed By
The Managed By tab will allow you to grant control of the Group by a non-admin user. I can add my user Paul Hill and select Manager can update membership list:
Now if this user can use something like RSAT to connect to Active Directory remotely and manage the members of this group.
Deleting Groups
To delete an Active Directory group, simply right-click the group and select Delete:

This will automatically remove all the associated members and memberships of the group.
Active Directory Groups Tutorial Conclusion
And that’s it! If you found this tutorial interesting then you will love the Server Academy membership! Please consider our free trial to help you level up your Windows Server IT skills.
Also leave a comment and let me know what you thought about this tutorial!

Sign up free and start learning today!
Practice on REAL servers, learn from our video lessons, interact with the Server Academy community!